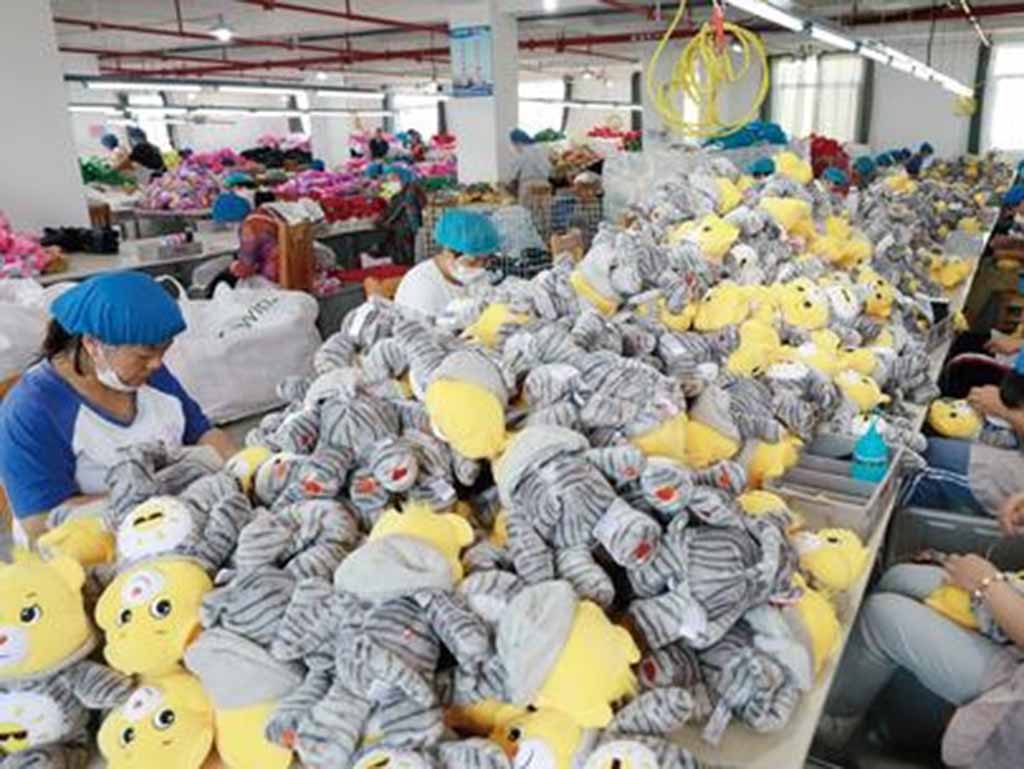
Making animal plushies is not only about sewing fabric together. It is a full process that turns sketches and ideas into soft, safe, and lovable products that can stand on shelves all over the world.
When you understand each step—from choosing materials and tools, to building patterns, sewing, stuffing, and quality checks—you can control both cost and quality. This is how you move from “cute idea” to a stable animal plush line that buyers trust and reorder. In this guide, I will walk you through how we think about animal plushies in our factory, so you can plan your own projects with more confidence.
What materials and tools are essential for making animal plushies?
The materials and tools you choose will decide how your animal plushies feel, how they look, and how long they last. Good choices here prevent many problems later, such as flat shapes, rough seams, or failed safety tests.
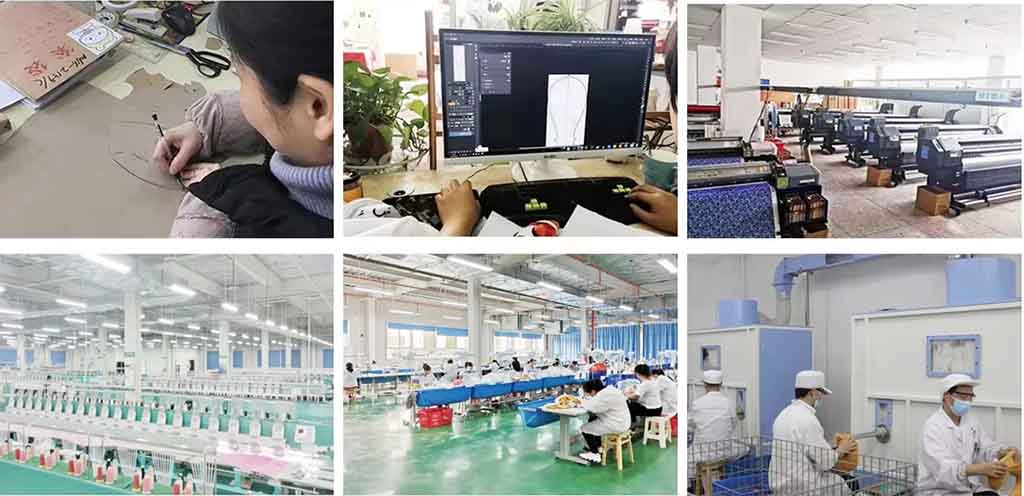
For most animal plushies, you need three main material groups: soft surface fabrics, safe and stable fillings, and strong sewing supplies. You also need a set of tools, from basic scissors and needles to industrial sewing machines and stuffing equipment in factory settings. When materials and tools match your target market, you get plushies that feel professional, not homemade.
Key materials and tools for animal plushies
In our daily production for brands and retailers, we usually organize materials and tools like this:
| Category | Examples | Why It Matters for Animal Plushies |
|---|---|---|
| Surface fabrics | Minky, velboa, faux fur, short plush | Defines softness, texture, and animal “fur” look |
| Inner fabrics | Lining, inner bags, reinforcement cloth | Supports shape, holds pellets, strengthens weak zones |
| Fillings | Polyester fiberfill, cluster fiber, plastic pellets | Controls softness, weight, and body volume |
| Sewing supplies | Polyester thread, embroidery thread, zippers, Velcro | Holds structure, adds details, allows access openings |
| Tools (basic) | Scissors, pins, hand needles, markers, rulers | Needed for pattern work, cutting, and small fixes |
| Tools (factory) | Sewing machines, embroidery machines, stuffing machines, needle detectors | Improve speed, accuracy, and safety |
As a buyer or brand owner, you do not need to operate every tool yourself, but you should know what your factory is using. This helps you understand why one quote is cheaper or more expensive and how it will affect the look and life of your animal plushies.
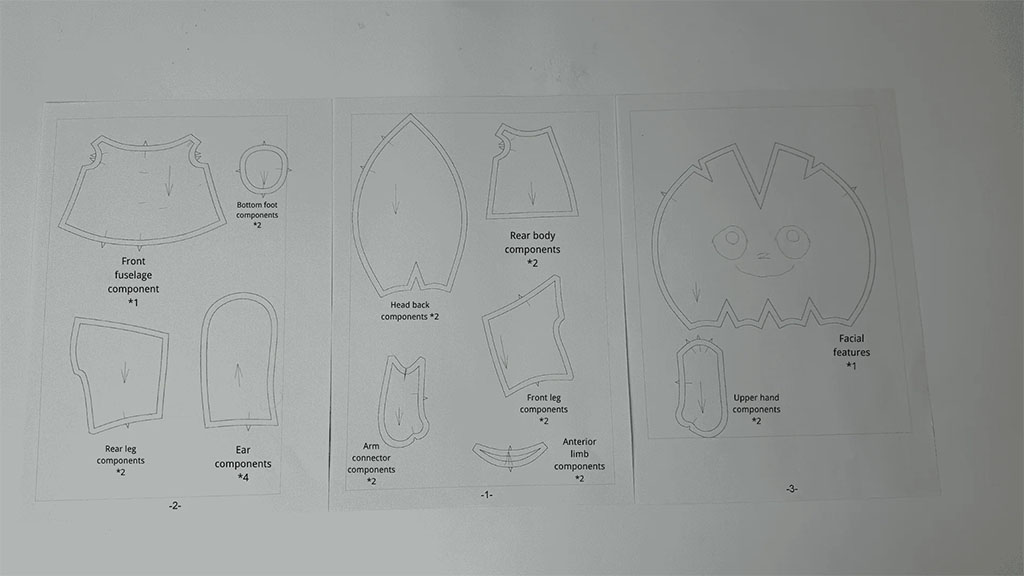
How do you design patterns that capture accurate animal shapes and proportions?
Pattern design is where your animal plush starts to feel alive. A good pattern can make a simple fox, bear, or penguin look charming and stable. A weak pattern leads to twisted legs, strange faces, or bodies that will not sit correctly.
To capture animal shapes, you need to work from clear references, define your style level (realistic, stylized, or chibi), and then build patterns that reflect this style with correct proportions. You also need to think about production: curves, seam lines, and panel counts that can be sewn at scale without losing shape.
Pattern planning for different animal styles
When we design patterns in our R&D team, we usually start with side, front, and top views of the animal. Then we decide how “real” or “cute” the proportions should be.
| Style Goal | Pattern Approach | Typical Use Cases |
|---|---|---|
| Realistic animal | More panels, complex curves, shaped muzzles | Museum shops, nature brands, premium gifts |
| Semi-realistic cute | Balanced body, slightly larger eyes and head | Family retail, gift shops, kids’ brands |
| Chibi / super-deformed | Large head, small body, simplified limbs | Character brands, fandom goods, collectibles |
| Minimalist silhouette | Very simple shapes, low detail | Modern decor, lifestyle brands |
Key pattern steps we follow:
- Collect references: Real animal photos and style inspirations from your market.
- Define main views: Side, front, and sometimes 3/4 view sketches.
- Set proportions: Decide head size, body length, leg thickness, tail placement.
- Break into panels: Turn the drawing into pattern pieces with logical seam lines.
- Add seam allowance: Usually 0.5–1 cm, depending on fabric and product size.
- Make the first sample: Sew, stuff, and then mark corrections on the plush.
For example, a standing fox plush needs strong leg geometry and a balanced tail so it does not fall over. A sitting bear needs a clear sitting angle in the pattern, not just extra stuffing. When patterns are correct, your animal plushies look “right” before you even think about marketing photos.
What sewing and assembly techniques build clean, durable plush structures?
Good patterns still need strong sewing and smart assembly. If your seams are weak or misaligned, your plushies will not pass internal tests or real-world handling by kids and collectors.
Clean, durable structures come from choosing the right seam type, sewing in a smart order, and reinforcing high-stress areas such as joints, tails, and ears. In factories, we control these steps with clear sewing instructions, operation guides, and training, so every worker builds the plush in the same way.
Core seams and assembly planning
Different parts of an animal plush need different seam solutions. For example, the body needs smooth curves, while the base may need extra strength.
| Seam / Technique | Typical Location | Purpose |
|---|---|---|
| Standard lockstitch | Body panels, head, limbs | Main structural seams |
| Overlock / serging | Fabric edges inside the plush | Prevents fraying and keeps inside neat |
| Topstitching | Around ears, muzzle, special lines | Adds shape lines and helps seams lay flat |
| Bar-tacks / reinforcements | Limb joins, tail base, hang loop | Strengthens high-stress points |
| Hand ladder stitch | Final closing point after stuffing | Closes opening with almost invisible seam |
Typical assembly order for many animal plushies:
- Prepare details: Embroider or print eyes, nose, and markings on flat fabric.
- Sew small parts: Ears, tail, small fins, or wings, then turn and lightly stuff if needed.
- Assemble head: Sew head panels together, join ears, and sometimes muzzle pieces.
- Assemble body: Sew body panels, leaving opening for stuffing. Add tail and other parts.
- Join head and body: Depending on design, sew head and body panels in sequence or close separately and attach.
- Attach limbs: Sew legs and arms into body seams or attach later, depending on style.
A clear sewing route saves time, reduces mistakes, and produces more consistent plushies across your whole order. When we work with new designs, we often make a “sewing map” so both sides understand how the animal comes together.
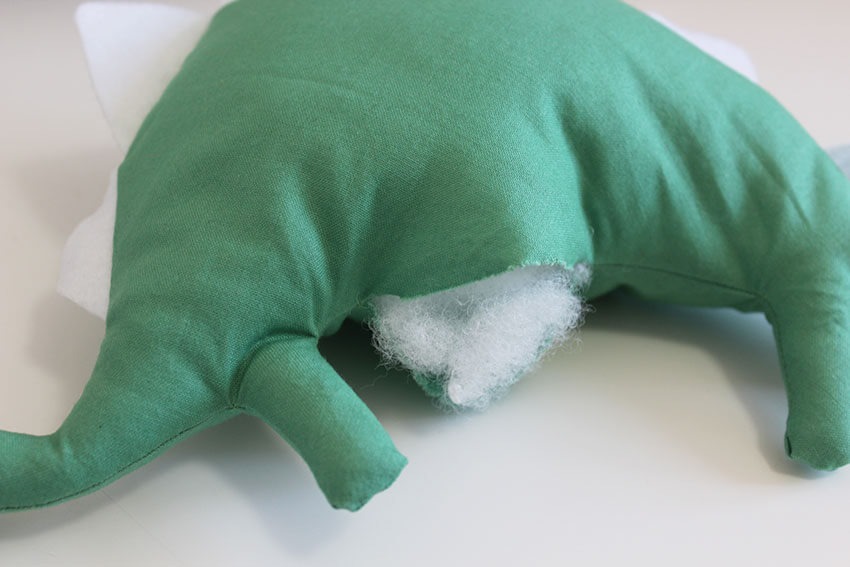
How is stuffing applied to achieve balanced softness and realistic form?
Stuffing is what gives your animal plush its body and life. The same pattern can look cheap or premium depending on how stuffing is placed and controlled. Overstuffing can make seams hard and faces distorted; understuffing can create flat, sad-looking animals.
To achieve balanced softness and realistic form, we treat stuffing as a planned step, not an afterthought. We look at each body area and decide on target firmness. We also consider whether the plush should sit, stand, or flop in a certain way, and we adjust stuffing density to support that posture.
Stuffing strategy by body area
When we train workers or guide clients, we often show stuffing plans in simple maps. Think of the animal body as zones with different goals.
| Body Area | Stuffing Goal | Practical Approach |
|---|---|---|
| Head | Full, smooth, expressive | Medium to high density, extra care at cheeks |
| Muzzle / snout | Clear shape, no hard lumps | Add small amounts at a time, pack evenly |
| Body / torso | Stable volume, comfortable softness | Medium density, check side view for sagging |
| Limbs | Enough structure, still squeezable | Higher density near joints for strength |
| Tail | Holds shape or supports balance | Control density; may add wire or pellets if allowed |
| Base / bottom | Stable sitting or standing | Sometimes add pellets + dense stuffing |
In factory production, we often use stuffing machines to control density more precisely. For special lines like weighted plush, we use inner bags with pellets placed at planned points (belly, base, or limbs).
For your own evaluation, simple tests help: squeeze the head, shake the body, and place the animal on a flat surface to see if it sits or stands as you expect. If not, we change stuffing distribution or adjust the pattern slightly. This back-and-forth between pattern and stuffing is normal and is how we move toward a professional final result.
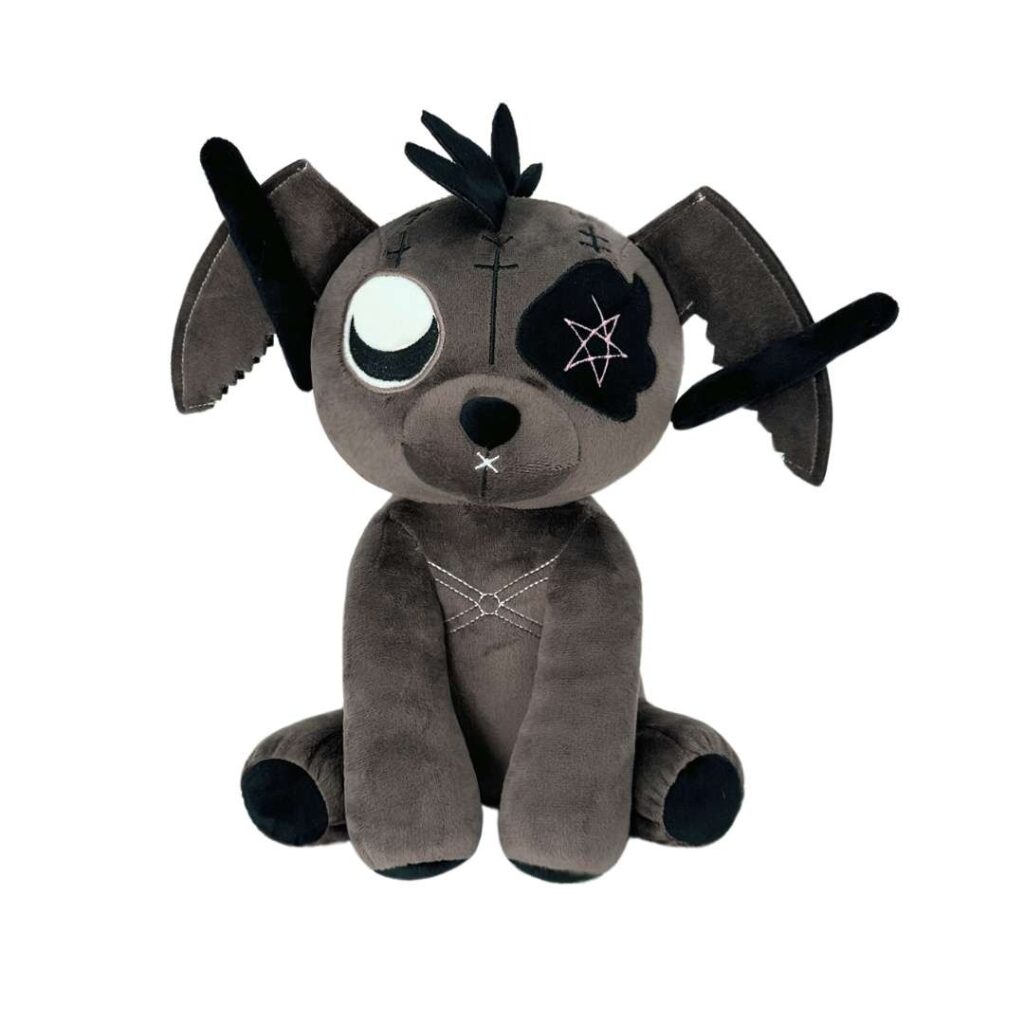
How do you add facial details, markings, and features for character accuracy?
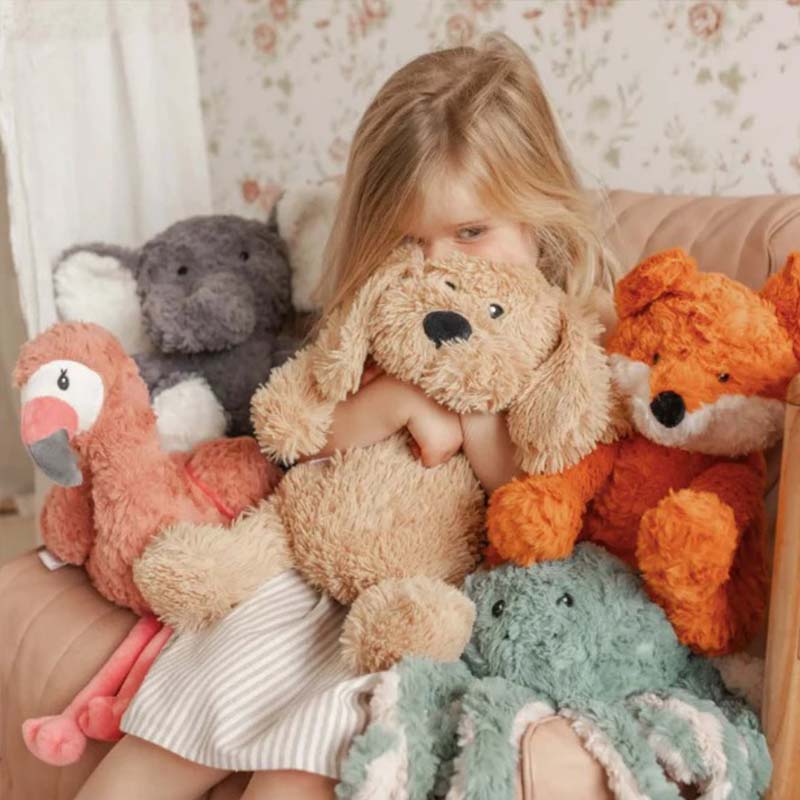
Facial details and markings are what turn a generic animal into a specific fox, panda, corgi, or brand mascot. Customers often decide in seconds based on the face: if it feels friendly and “correct,” they are more likely to buy and keep.
To get accuracy and personality, we focus on three main points: placement, technique, and color. Facial elements should match reference drawings; techniques (embroidery, printing, appliqué, safety eyes) must be chosen based on age group and brand style; color should be stable and aligned with your visual identity.
Options for faces and markings
Different methods give different looks and safety levels. For younger children, we usually avoid small plastic parts; for adult collectors, we may use more complex or reflective elements.
| Feature Type | Method | Best For | Notes |
|---|---|---|---|
| Eyes (safe for kids) | Embroidery, fabric appliqué | Baby and toddler plushies, all ages | Very safe, premium look |
| Eyes (decorative) | Safety eyes, plastic eyes | Older children, teens, collectors | Must be firmly attached for safety |
| Nose and mouth | Embroidery, small fabric pieces | Most plushies | Clean lines and soft feel |
| Markings / patterns | Embroidery, screen print, heat transfer print | Spots, stripes, logos | Good for brand mascots and detailed animals |
| Text / branding | Woven labels, printed tags, small embroidery | Brand names, slogans, event info | Supports marketing and collector value |
Before we lock a design, we always test face placement on physical samples. Small changes in eye spacing or nose height can change the emotion from calm to surprised, or from cute to strange. For licensed animal characters, we strictly follow the style guide and adjust until both sides feel the plush matches the IP.
For markings, we choose between embroidery and printing based on detail level and cost. Dense spots or stripes on an animal plush may be better printed when there are many small elements; iconic features like a panda’s eye patches often work best as panels plus embroidery.
What finishing and quality checks ensure professional, long-lasting animal plushies?

Even with good design and materials, poor finishing can ruin the final impression. Visible loose threads, twisted ears, or uneven faces can cause returns and bad reviews. Finishing and quality checks are the final filter between production and your customer.
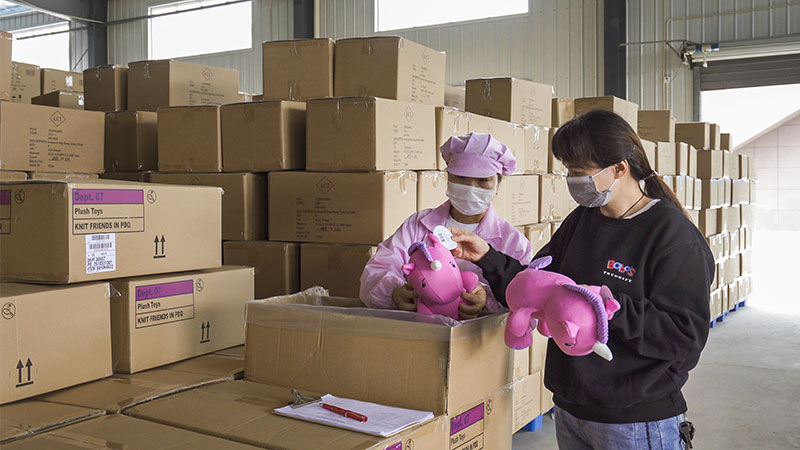
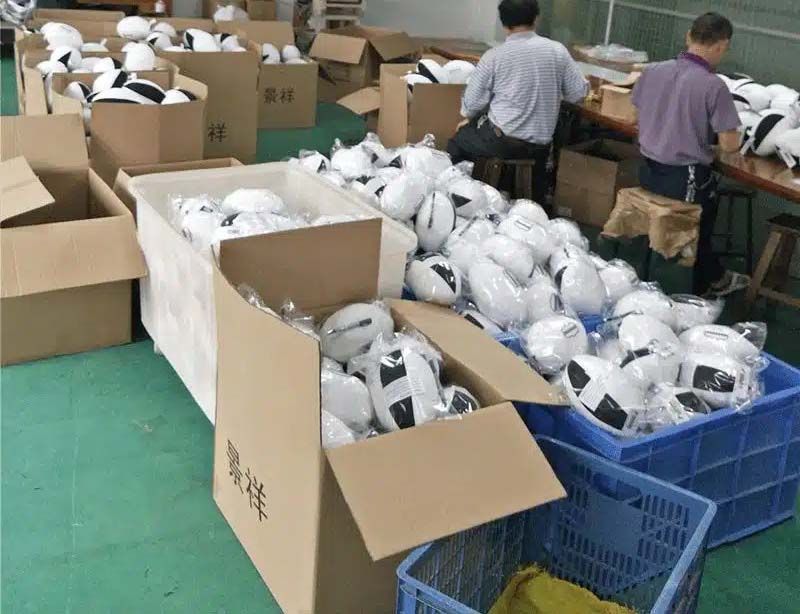
Professional finishing includes trimming threads, brushing the plush surface, checking symmetry, and confirming that all safety and packaging requirements are met. For serious B2B buyers, it also means mechanical tests, metal detection, and carton checks before shipment.
Finishing and QC steps for animal plushies
In our factory, we follow structured finishing and quality control steps. You can use a similar checklist when you talk with your suppliers or review samples.
| Step Type | Example Actions | Why It Matters |
|---|---|---|
| Visual checks | Check face symmetry, ear and tail alignment | Ensures animals look like the approved sample |
| Surface finishing | Trim threads, brush fur, remove lint | Improves first impression and long-term look |
| Structural checks | Squeeze and pull on seams and limbs | Confirms durability under normal use |
| Safety checks | Check small parts, stuffing security, labels | Reduces risk and supports compliance |
| Testing (lab or in-house) | Tension tests, colorfastness tests, needle detection | Meets standards like EN71, ASTM F963 |
| Packing checks | Check polybags, hangtags, barcodes, cartons | Ensures smooth warehousing and retail handling |
As a buyer, you can also create your own AQL (Acceptable Quality Level) rules for animal plushies. This defines what kind of minor issues you can accept and which defects are not allowed, such as open seams, wrong colors, or missing labels.
When you work with a factory like us at Kinwin, QC is not only at the end. We build checks into every stage—pattern, cutting, sewing, stuffing, and packing—so most problems are caught before final inspection. This makes your animal plush orders more stable, even when you reorder or change sizes and colors.
Conclusion
Creating animal plushies is a complete journey—from materials and patterns to sewing, stuffing, and fine finishing—that turns your ideas into safe, soft, and market-ready products. At Kinwin, we help global buyers design, develop, and mass-produce animal plushies that match their brand, meet safety standards, and perform well across retail and e-commerce channels. Contact us at [email protected] or visit kinwintoys.com to discuss your next animal plush project and see how our factory team can support your long-term growth.