Embroidery on plush toys has been the standard method for facial features, brand marks, and decorative elements for decades — and for good reason. It is durable, precise, safe for children, and producible at commercial scale with consistent results. Standard flat embroidery delivers these qualities reliably across most plush toy applications.
But the plush toy market has evolved. Premium products, character-based collectibles, licensed merchandise, and wellness-oriented items are increasingly competing on the richness of their tactile and visual experience — and flat embroidery, excellent as it is for what it does, has a ceiling on the dimensional detail and visual impact it can create.
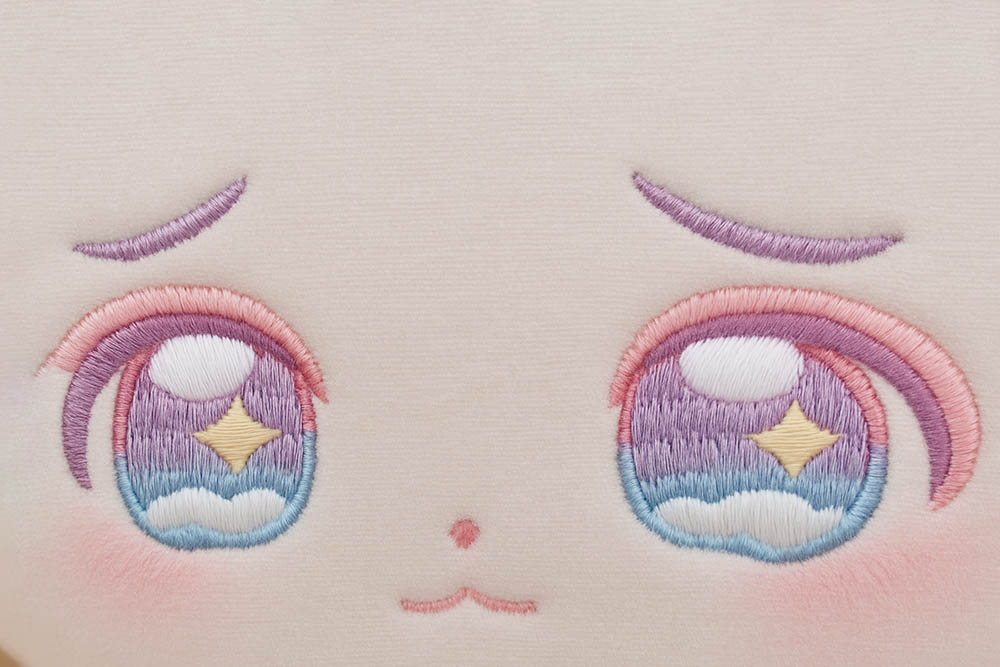
3D embroidery extends beyond that ceiling. By building dimensional relief into embroidered features — creating nose shapes that project from the fabric surface, eye designs with visible depth, decorative elements that have genuine three-dimensional form — 3D embroidery enables a level of visual and tactile character that standard embroidery cannot match. It is the technique that separates the face that looks drawn from the face that looks sculpted.
This guide explains what 3D embroidery is in the context of plush toy manufacturing, why it matters commercially, what it requires technically, and how buyers can evaluate and specify it in their manufacturing relationships.
What Is 3D Embroidery in Plush Toy Manufacturing and How Does It Differ from Standard Embroidery?
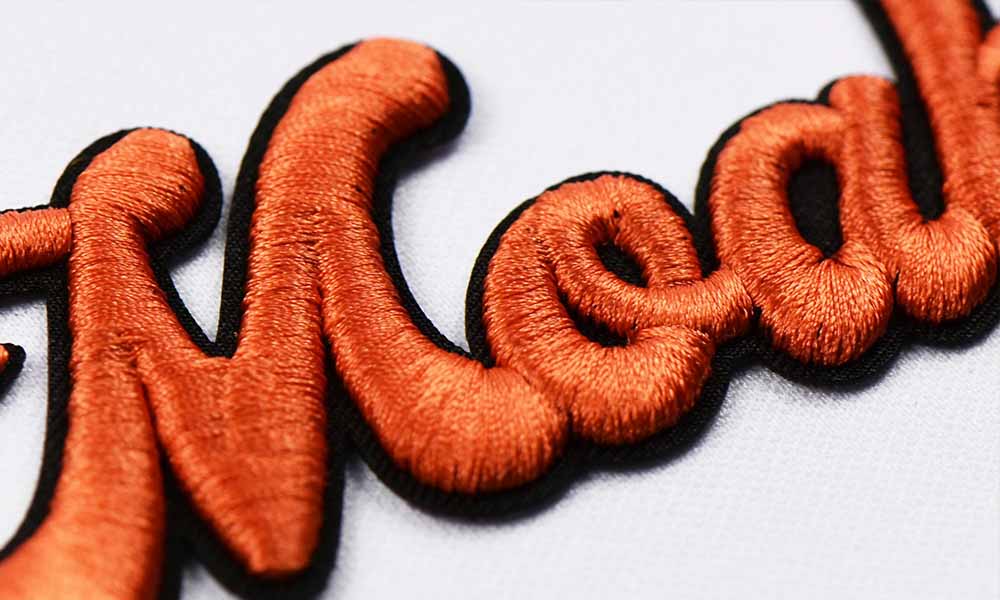
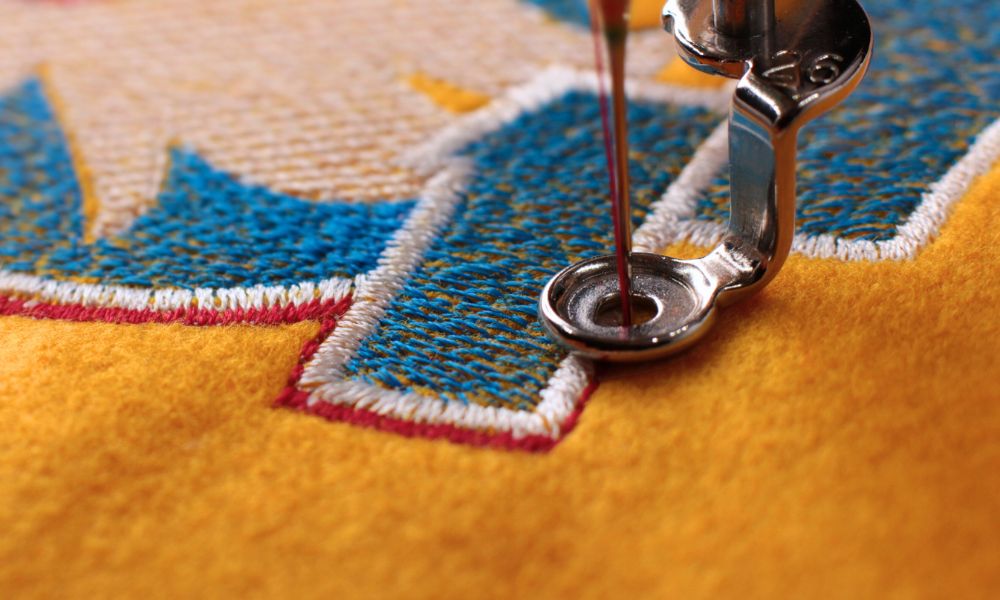
3D embroidery — also called foam embroidery, puff embroidery, or relief embroidery depending on the specific technique — is an embroidery method that creates raised, dimensional designs by building stitching over a foam or fiber backing material that elevates the embroidery above the base fabric surface. The result is embroidered features that have genuine three-dimensional form — projecting outward from the fabric surface with visible depth and relief — rather than the flat surface impression of standard embroidery.
The fundamental difference between 3D and standard embroidery is structural: standard embroidery applies thread directly to the fabric surface, producing a design that is flat (or very slightly raised by thread density alone). 3D embroidery applies thread over an elevated backing material, producing a design that projects meaningfully from the surface in a way that creates both visual dimensionality and a distinctive tactile quality.
Here is a comparison of the two embroidery approaches across the dimensions that matter most for plush toy applications:
| Dimension | Standard Flat Embroidery | 3D Embroidery |
|---|---|---|
| Surface profile | Flat to slightly raised | Visibly raised — 2–10mm projection |
| Visual depth | Minimal — color and line create depth illusion | Actual dimensional depth — light creates genuine shadow |
| Tactile character | Smooth surface with thread texture | Firm, sculptural projection |
| Design suitability | Logos, text, facial lines, detailed artwork | Noses, cheeks, brows, decorative shapes, character features |
| Production complexity | Standard | Higher — requires foam handling and precision |
| Cost | Baseline | 20–60% premium over equivalent flat embroidery |
| Durability | Excellent — thread bonds directly to fabric | Very Good — thread captures foam, durable when correctly done |
| Thread path complexity | Standard — fills and outlines | Requires full coverage of foam with appropriate density |
| Fabric compatibility | All plush fabrics | Best on shorter pile — longer pile can obscure foam edge |
The Foam Substrate — Foundation of the 3D Effect
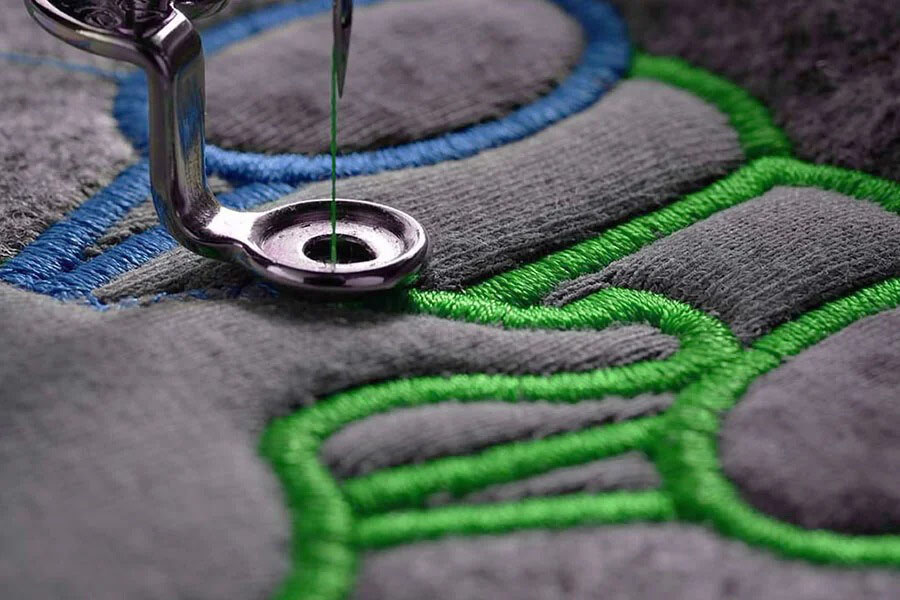
The dimensional quality of 3D embroidery is created by the foam or fiber substrate placed beneath the embroidery design before stitching begins. This substrate — typically EVA foam in thicknesses of 2 to 6mm, depending on the desired projection height — is placed on the fabric in the position of the feature to be embroidered, and the embroidery thread then stitches over and around it, capturing the foam and creating a raised embroidered surface.
The quality of the foam substrate selection — its thickness, firmness, and the precision with which it is positioned — directly determines the quality of the 3D embroidery result. Foam that is too thin creates insufficient projection. Foam that is too firm creates an unnatural rigidity. Foam that is imprecisely positioned creates misaligned features that affect the character’s expression. Professional 3D embroidery in plush toy manufacturing requires precise foam substrate management as a production discipline, not just skilled embroidery execution.
How Does 3D Embroidery Create Commercial Value in Plush Toy Products?

3D embroidery creates commercial value through a mechanism that is distinct from other quality investments in plush toy production: it creates a quality impression that is immediately apparent in product photography and that is confirmed — and often exceeded — when customers handle the product. This dual-channel quality impression — visible and tangible — translates directly into the e-commerce and retail metrics that drive commercial performance.
In product photography — the primary quality assessment tool for e-commerce customers making purchase decisions — 3D embroidered features create natural shadow and depth that makes the product look more premium and more visually interesting than the same product with flat embroidery. The nose that projects realistically, the brow ridge that catches light differently from the surrounding surface, the decorative element that has genuine sculptural form — all of these read as quality and craftsmanship in photographs in ways that flat embroidery cannot replicate.
Here is a framework for understanding how 3D embroidery creates commercial value across different product contexts:
| Product Context | 3D Embroidery Value | Commercial Metric Impacted |
|---|---|---|
| Premium retail plush | Visual quality differentiation from standard products | Conversion rate, price tolerance |
| Licensed character merchandise | Character accuracy and authenticity | Customer satisfaction, review quality |
| E-commerce listings | Photography quality — depth and shadow in listing images | Click-through rate, conversion |
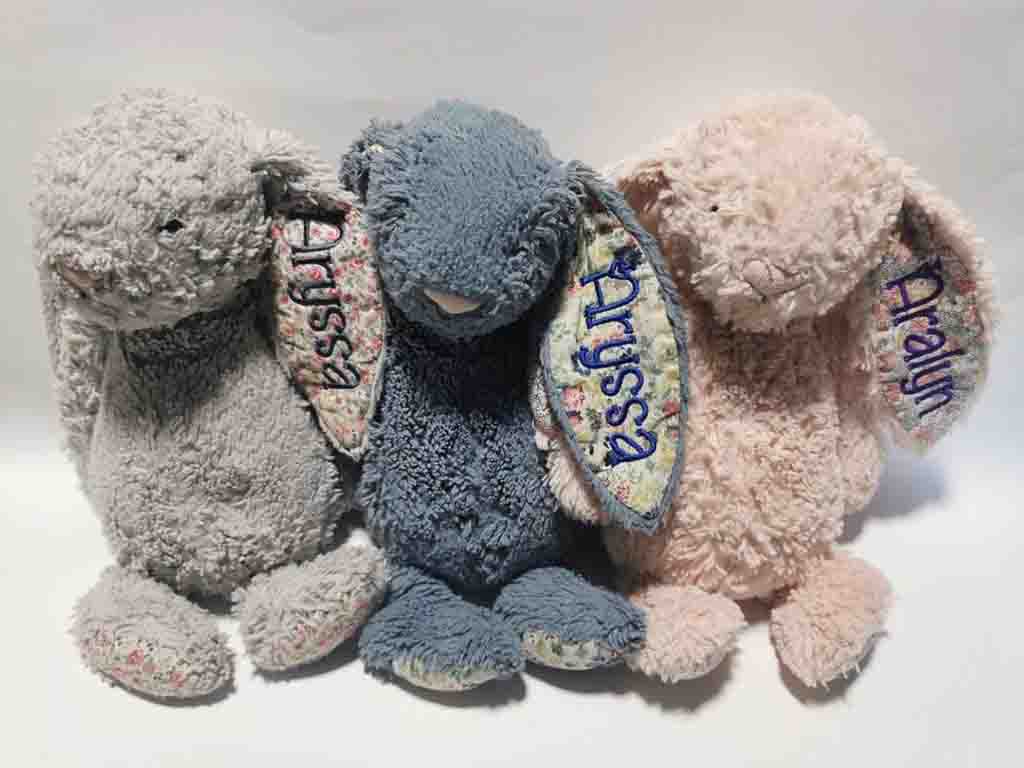
| Collectible and gift products | Perceived craftsmanship and premium positioning | Gifting appeal, price point justification |
| Therapeutic and wellness plush | Emotional connection through character quality | Purchase motivation, brand loyalty |
| Mascot and promotional items | Brand representation quality | Brand impression, recall value |
The Photography Advantage
For e-commerce products specifically — where the product photograph is the primary driver of purchase decisions — 3D embroidery creates a measurable photography quality advantage. Standard flat embroidery photographs as a flat surface pattern: the nose is a shape made of thread, the eyes are filled areas with no depth. 3D embroidery photographs as sculptural form: the nose is a projection that catches light on its upper surface and creates shadow beneath it, the brow has a ridge that creates facial dimensionality.
This dimensional quality in photography creates a quality signal that customers respond to — even customers who have no technical understanding of embroidery technique. The product simply looks better, more crafted, more worth the price. And when the product arrives and customers feel the dimensional features, the quality impression is confirmed rather than disappointed — which is the foundation of the positive reviews that compound commercial performance over time.
What Technical Requirements Does 3D Embroidery Place on Fabric and Product Design?
3D embroidery works most effectively within specific fabric and design parameters — and understanding these parameters is essential for making design decisions that will produce high-quality 3D embroidered results rather than designs that look excellent in concept but prove difficult to execute with the dimensional quality intended.
Here is a comprehensive framework for the technical requirements that 3D embroidery places on fabric selection and product design:
Fabric Requirements
| Fabric Factor | Optimal for 3D Embroidery | Problematic for 3D Embroidery | Why |
|---|---|---|---|
| Pile height | Short to medium — 5–15mm | Very long pile — 25mm+ | Long pile obscures foam edge definition |
| Fabric density | Medium to high density | Very low density | Low density fabrics can distort around foam |
| Pile direction consistency | Consistent directional pile | Irregular or multi-directional pile | Pile direction affects how foam edge reads |
| Fabric stretch | Minimal stretch | High-stretch constructions | Stretch distorts foam shape after embroidery |
| Backing stability | Stable backing | Loose or thin backing | Backing must support foam weight without distortion |
| Color value | Light to medium colors | Very dark colors | Dark fabrics can reduce 3D shadow visibility |
Design Requirements
| Design Factor | Optimal for 3D Embroidery | Challenging for 3D Embroidery | Why |
|---|---|---|---|
| Feature shape | Simple to moderately complex geometric forms | Very intricate or irregular shapes | Complex foam shapes are harder to cut and position precisely |
| Feature size | 10–60mm across largest dimension | Under 8mm or over 80mm | Very small loses definition; very large loses structural integrity |
| Edge definition | Clear, defined edges | Feathered or gradual edges | Foam requires clear boundary for clean edge definition |
| Adjacent features | Features with clear spacing | Overlapping or touching features | Adjacent foam pieces require precise placement management |
| Thread direction | Consistent directional coverage | Complex thread direction changes | Direction consistency affects visual uniformity of projection |
| Design position | Face panels, flat body panels | Very curved or complex seam areas | Curved areas distort foam shape during construction |
The Pile Height Design Constraint
Pile height is the most important fabric constraint for 3D embroidery — because pile height determines whether the foam edge will be cleanly visible or obscured by surrounding pile. This constraint creates a specific design decision in products where 3D embroidery is planned.
For products designed specifically around 3D embroidered features — where the 3D quality is a primary design objective — the fabric pile height should be specified with 3D embroidery compatibility in mind: typically 8 to 15mm for optimal foam edge definition. On longer pile fabrics, the foam edge becomes progressively less distinct as the pile height increases, reducing the visual impact of the 3D effect.
For products where the fabric pile height is driven by other quality requirements — a premium long-pile product where the soft feel is a primary selling point — 3D embroidery can still be applied, but the foam height and stitching coverage must be adjusted to achieve adequate projection above the pile surface. This typically requires thicker foam and higher stitch density, which increases production cost.
How Is 3D Embroidery Programmed and Set Up for Production?
3D embroidery requires a more sophisticated programming and setup process than standard flat embroidery — because the embroidery program must account for the foam substrate’s effect on thread behavior, the specific coverage requirements for complete foam encapsulation, and the positioning precision required for the feature placement to read correctly in the finished product.
Here is a complete guide to the 3D embroidery programming and production setup process:
Programming Stage
| Programming Step | What It Involves | 3D-Specific Requirement |
|---|---|---|
| Design digitization | Converting artwork to embroidery program | Requires 3D-specific settings — underlay, density, path |
| Underlay programming | Setting base stitching under the main embroidery | 3D underlay must secure foam — different from flat underlay |
| Fill density settings | Setting stitch density for foam coverage | Higher density than flat — must fully encapsulate foam |
| Edge satin stitch programming | Programming the edge coverage that secures foam | Critical for foam edge definition — must be precise |
| Path sequence optimization | Setting the order of stitch paths | Foam coverage sequence affects final quality |
| Pull compensation settings | Adjusting for thread tension on foam surface | Foam creates different tension dynamics than flat fabric |
| Test run parameters | Initial production test settings | Must verify foam capture and edge definition |
Foam Substrate Preparation
| Preparation Step | What Is Required | Quality Standard |
|---|---|---|
| Foam thickness selection | Select EVA foam at appropriate thickness | Typically 2–6mm — selected per feature projection requirement |
| Foam cutting precision | Cut foam to exact feature shape | Shape must match embroidery outline within ±0.5mm |
| Foam positioning system | Method for consistent feature positioning | Registration system or template required |
| Foam quality verification | Verify foam density and compression consistency | Consistent foam density ensures consistent projection |
| Foam storage | Manage foam inventory to prevent compression | Foam stored flat — compressed foam loses projection |
Production Setup and First-Off Verification
| Setup Step | Activity | Pass/Fail Criterion |
|---|---|---|
| Machine threading for 3D program | Thread appropriate for foam coverage | Thread type and weight match program requirements |
| Tension calibration for 3D | Set tension for foam surface — different from flat | Thread covers foam without breaking or skipping |
| First foam placement | Place foam in registration position | Foam positioned within ±0.5mm of specification |
| First-off embroidery | Complete first embroidered feature | Full foam coverage, clean edge definition, correct projection height |
| First-off evaluation | Compare to approved design reference | Meets all visual criteria from approved counter sample |
| Production authorization | Authorize run based on first-off result | No production before satisfactory first-off confirmation |
What Are the Most Common 3D Embroidery Applications in Plush Toy Design?
3D embroidery is most effectively applied to design elements where dimensional form adds meaningful visual and tactile quality — where the projection and depth of a 3D feature creates a more authentic, more expressive, or more engaging character impression than flat embroidery could achieve.
Here is a practical guide to the most commercially valuable 3D embroidery applications in plush toy design:
Facial Feature Applications
| Feature | 3D Benefit | Design Consideration | Production Note |
|---|---|---|---|
| Character nose | Most impactful 3D application — nose projection creates realistic facial anatomy | Nose shape must be clean geometric form for foam cutting | Foam shape defines nose proportions — precision critical |
| Brow ridges | Creates facial expression depth — angry, concerned, happy reads differently in 3D | Subtle foam heights work best — avoid over-projection | 2–3mm foam typically sufficient |
| Cheek highlights | Creates rounded facial form — enhances character warmth | Very subtle projection — 2mm foam maximum | Low foam height — high positioning precision |
| Eyelid definition | Creates hooded eye effect for specific character expressions | Complex interaction with eye placement — requires careful programming | Test with character proportions before finalizing |
| Lip/muzzle definition | Creates character mouth area dimensionality | Works best on muzzle-style characters — less effective on simple mouth lines | Combines with flat embroidery for full facial area |
Decorative and Brand Applications
| Application | 3D Benefit | Best Execution |
|---|---|---|
| Logo medallion | Brand mark with dimensional quality — premium impression | Simple geometric logo shapes in foam — complex logos require flat for detail |
| Paw pad details | Dimensional paw pads create tactile quality in interactive areas | 3–4mm foam for natural pad projection |
| Heart or star motifs | Decorative elements with sculptural form | Standard 3D shapes — good for promotional and gift applications |
| Character badges/emblems | Branded character marks with premium dimensionality | Combine flat embroidery for detail with 3D foam for shape |
| Collar or costume details | Dimensional costume elements on character products | Lower foam heights — should not compete with facial features |
Where 3D Embroidery Should Not Be Applied
Understanding where 3D embroidery is not effective is as commercially important as knowing where it excels:
Fine detail elements — very small text, complex artwork with fine lines — lose definition on foam and should be executed in flat embroidery. Large flat fill areas — body markings, color blocks — do not benefit from 3D projection and would require impractical foam quantities. Features on very curved surfaces — tight seam curves, small rounded appendages — distort the foam shape and produce irregular projection.
How Does Quality Control for 3D Embroidery Differ from Standard Embroidery QC?

Quality control for 3D embroidery requires specific inspection criteria and assessment methods that go beyond the standard embroidery QC protocol — because 3D embroidery has additional quality dimensions that flat embroidery does not: foam coverage completeness, projection height consistency, foam edge definition quality, and the structural integrity of the foam-thread bond that determines durability.
Here is a complete quality control framework for 3D embroidery, comparing requirements to standard embroidery QC:
IQC — Incoming Material Quality
| Material | Standard Embroidery QC | Additional 3D Embroidery QC |
|---|---|---|
| Embroidery thread | Color, strength, twist | Same + thread weight appropriate for foam coverage |
| Embroidery backing | Standard backing verification | Same |
| Foam substrate | Not applicable | Thickness measurement, density consistency, cut precision verification |
First-Off Inspection Criteria
| Inspection Criterion | Standard Embroidery | 3D Embroidery — Additional |
|---|---|---|
| Position accuracy | Coordinate measurement against spec | Same + foam positioning accuracy check |
| Color accuracy | Thread color match | Same |
| Thread tension | Visual flatness check | Same + tension on foam surface — no gaps or thread breaks |
| Coverage completeness | Fill coverage visual | Same + foam fully encapsulated — no exposed foam edges |
| Projection height | Not applicable | Measure projection against specification — ±1mm tolerance |
| Edge definition | Clean outline check | Same + foam edge clean and defined — no fraying or irregular edge |
| Profile consistency | Not applicable | Consistent projection across feature — no uneven elevation |
| Durability preliminary check | Not applicable | Press and release — foam must return to original projection |
IPQC Monitoring — Additional Requirements for 3D
| Monitoring Point | Standard Frequency | 3D Additional Requirement | Rationale |
|---|---|---|---|
| Position verification | Every 50 units | Same | Position drift applies equally |
| Projection height check | Not applicable | Every 30–50 units | Foam thickness variation creates projection inconsistency |
| Edge definition check | Not applicable | Every 30–50 units | Edge quality can deteriorate with machine wear or tension change |
| Foam coverage check | Not applicable | Every 30–50 units | Incomplete coverage can develop with machine setting changes |
| Foam waste assessment | Not applicable | Per shift | Foam cutting precision monitored through waste patterns |
FQC — Additional Criteria for 3D Embroidery
| FQC Criterion | Standard Embroidery | 3D Embroidery |
|---|---|---|
| Visual position | AQL 2.5 — coordinate check | Same |
| Thread quality | Visual inspection | Same |
| Projection consistency | Not applicable | AQL 2.5 — projection height within tolerance across sample |
| Edge definition | Not applicable | AQL 2.5 — clean foam edge visible across sample |
| Durability assessment | Pull test for thread strength | Same + compression recovery — foam returns to projection after compression |
| Feature symmetry | Visual check | Visual + tactile — both sides of symmetrical features matched |
How Do 3D Embroidery Costs Compare to Alternative Feature Methods?
The commercial decision to use 3D embroidery involves understanding its cost relative to the alternative methods that can create similar visual and tactile effects — and evaluating whether the quality advantage of 3D embroidery justifies its cost premium for the specific product and market context.
Here is a comparative cost and quality framework for 3D embroidery versus the primary alternatives:
| Method | Relative Cost | Visual Quality | Tactile Quality | Production Complexity | Best Application |
|---|---|---|---|---|---|
| Standard flat embroidery | Baseline | Good | Flat | Standard | Logos, text, detailed artwork |
| 3D puff embroidery | +20–40% | Excellent — dimensional | Excellent — firm projection | Higher | Noses, feature shapes, simple motifs |
| Appliqué — fabric | +10–25% | Good — texture variation | Good | Moderate | Color area variation, pattern elements |
| Molded plastic accessories | +15–30% | Excellent — pre-formed | Excellent — hard | Moderate — component sourcing | Eyes, complex nose shapes |
| Sculpted felt features | +20–35% | Very Good | Good — soft | Higher — hand work | Organic shapes, soft feature definition |
| Machine-cut foam features | +25–45% | Good | Very Good | Higher | Specialty shapes — limited application |
The 3D Embroidery vs Molded Plastic Comparison
The most commercially important comparison for character-defining features like noses is 3D embroidery versus molded plastic accessories — the two methods most commonly used for projecting nose features on premium plush products.
Molded plastic noses create excellent projection and very clean form definition — and they are widely used in premium plush. Their primary disadvantage for children’s products is the safety testing requirement: plastic noses must pass pull force testing under EN71-1 and ASTM F963, and the attachment method must be robust enough to prevent detachment under child-use forces. They also add a component sourcing requirement and a separate attachment production step.
3D embroidered noses create good to excellent projection and very soft, safe tactile quality — important for products intended for young children where hard plastic components can create concerns. They pass safety testing more easily because the embroidered feature is integral to the fabric rather than being a detachable component. And they can be produced entirely within the embroidery production step without additional component sourcing.
For products targeting very young children — under three years — where safety standards are most stringent and soft tactile quality is particularly valued, 3D embroidered features often represent a better design decision than molded plastic accessories, even at somewhat higher embroidery cost.
How Should Buyers Specify and Evaluate 3D Embroidery Capability When Sourcing Plush Toys?
Specifying and evaluating 3D embroidery capability requires going beyond general statements about embroidery quality to specific technical requirements and verification methods that reveal whether a factory can produce consistent, high-quality 3D embroidered features at production scale.
Specification Requirements
| Specification Element | What to Include | Why It Matters |
|---|---|---|
| Feature designation | Explicitly identify which features are 3D versus flat | Ensures 3D is applied where intended |
| Foam substrate specification | Foam thickness for each 3D feature | Controls projection height |
| Projection height tolerance | Target projection in mm with tolerance | Enables objective QC assessment |
| Edge definition standard | Description or visual reference for acceptable edge quality | Defines clean versus unacceptable edge |
| Coverage completeness | Requirement that foam is fully encapsulated | Prevents exposed foam appearance |
| Position coordinates | Same coordinate system as standard embroidery | Ensures 3D features positioned correctly |
| Thread density requirement | Stitch density adequate for full foam coverage | Prevents coverage gaps |
| Durability requirement | Compression recovery standard | Confirms foam integrity through use |
Factory Capability Evaluation
| Evaluation Method | What It Reveals | How to Conduct |
|---|---|---|
| 3D embroidery portfolio samples | Current 3D production quality | Request samples of comparable 3D features from existing products |
| Foam substrate management evidence | Foam handling discipline | Ask to see foam storage, cutting process, positioning system |
| First-off inspection documentation | QC rigor for 3D features | Request first-off report with projection height measurements from recent order |
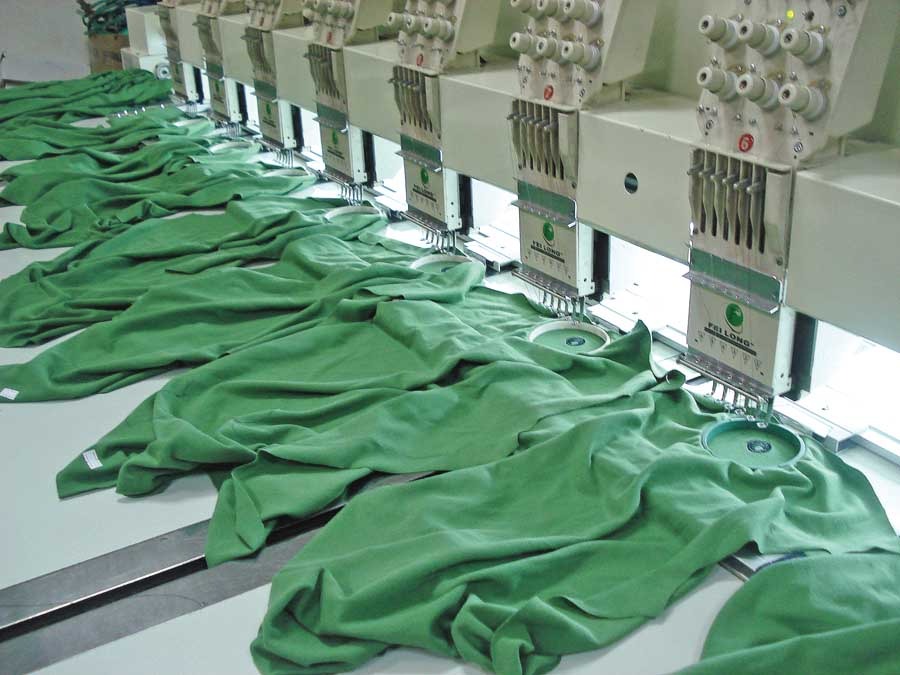
| Production volume capability | Ability to maintain 3D quality at scale | Ask about maximum 3D embroidery units per day with quality maintenance |
| Programmer qualifications | Technical programming capability | Ask about programmer’s 3D digitization experience |
| Equipment specification | Machine capability for 3D programs | Confirm machines are capable of running 3D programs |
| IPQC documentation for 3D | Monitoring during production | Request sample IPQC log showing projection height checks |
Common Quality Failures to Screen For
| Quality Failure | How to Identify in Sample Evaluation | Prevention in Specification |
|---|---|---|
| Incomplete foam coverage — exposed foam edges | Visual inspection of feature perimeter | Specify complete foam encapsulation requirement |
| Uneven projection — one side higher than other | Tactile assessment and visual from side angle | Specify projection consistency tolerance |
| Foam edge fray — ragged edge definition | Close visual inspection of feature border | Specify clean edge definition standard with visual reference |
| Thread break over foam — gaps in coverage | Close visual inspection of coverage area | Specify minimum stitch density |
| Projection collapse — foam compressed permanently | Compress feature and release — check return | Specify compression recovery standard |
| Position deviation — feature shifted from center | Coordinate measurement | Standard coordinate specification |
At Kinwin, 3D embroidery is a production capability we have developed and refined across multiple product types and client requirements. Our programmers are experienced with the specific digitization requirements of foam embroidery — the underlay structures, fill densities, and edge coverage settings that produce clean, consistent 3D results. Our QC protocol for 3D embroidery includes the projection height monitoring, edge definition checks, and compression recovery verification that maintains quality across production runs.
For clients developing products where 3D embroidered features are a design objective — character plush where nose projection is part of the character’s visual identity, premium products where dimensional quality is a primary differentiator, or branded products where a logo medallion needs the impact of dimensional form — we would be glad to discuss specifically how our 3D embroidery capability applies to your product concept, including reviewing the design for foam substrate compatibility and recommending the optimal feature specification for your intended quality level.
Reach out to our team at [email protected] or visit kinwintoys.com to start that conversation.
Conclusion
3D embroidery is one of the most commercially impactful quality investments available in plush toy design — because it creates dimensional quality that improves both photography performance and customer experience simultaneously. The character whose nose projects realistically, whose brow creates genuine shadow, whose decorative elements have sculptural form photographs better, reviews better, and creates the quality impression that supports premium pricing and brand loyalty.
Achieving consistent 3D embroidery quality at production scale requires the specific technical capabilities described in this guide: appropriate foam substrate management, precise digitization programming for foam coverage, accurate positioning systems, and quality control protocols that monitor projection height and edge definition throughout the production run.
Buyers who understand these requirements — and who evaluate their manufacturing partners against them rather than against general embroidery capability claims — consistently achieve better 3D embroidery outcomes than those who assume that any factory offering embroidery services can produce 3D quality at production scale. The capability to produce excellent 3D embroidery is specific, and verifying it specifically is what produces the dimensional product quality that 3D embroidery is designed to create.
FAQ
Q1: Can 3D embroidery be applied to any area of a plush toy, or are there structural areas where it should be avoided?
3D embroidery should be avoided in several specific structural contexts where the foam substrate creates problems rather than adding value. Seam areas — within 5 to 8mm of any seam line — should not receive 3D embroidery because the foam creates bulk at the seam edge that interferes with seam quality during assembly. Very curved surfaces — tightly curved body panels, small circular appendages — distort the foam shape, creating irregular projection that does not read as intended. Closing seam areas should never receive 3D embroidery because foam in the closing seam prevents clean seam closure. And areas that will be compressed in packaging — products that will be vacuum-packed or compressed into tight retail packaging — should either avoid 3D embroidery or be packaged in a way that does not compress the 3D features, because sustained compression can permanently flatten the foam projection.
Q2: How does 3D embroidery hold up to washing, and are there specific care requirements that products with 3D embroidered features need?
Well-executed 3D embroidery maintains its projection through repeated washing when the foam substrate and embroidery construction meet appropriate quality standards. The key durability factors are foam density — lower-density foam compresses permanently more easily than higher-density foam — thread coverage completeness — any exposed foam will absorb water and may not fully recover after washing — and stitch density — higher stitch density better protects the foam from wash mechanical agitation. For products intended for machine washing, specifying EVA foam with minimum Shore A hardness of 25 and verifying projection recovery through a wash test at the counter sample stage provides direct evidence of wash durability before production commitment. Care labels for products with 3D embroidery should typically specify gentle cycle washing and air or low-heat drying — not because the embroidery itself is fragile but because the foam projection recovers better from gentler washing conditions.
Q3: How much additional development time should buyers budget for products with 3D embroidery compared to standard embroidery products?
Products with 3D embroidered features typically require one additional week in the development timeline compared to equivalent standard embroidery products — primarily due to the programming complexity of 3D digitization, the foam substrate preparation and positioning system development, and the additional first-off evaluation steps required to verify projection height and edge quality. For products where 3D embroidery is being applied for the first time on a specific character design, an additional revision round — specifically focused on 3D quality rather than design direction — is common, adding another one to two weeks. The total additional development time relative to standard embroidery is typically two to three weeks. Buyers who account for this in their product development timelines avoid the timeline pressure that leads to rushing the 3D embroidery setup process — which is the most common cause of inconsistent projection quality in production.
Q4: Is 3D embroidery suitable for promotional plush products, or is it primarily a technique for premium retail products?
3D embroidery can be cost-effectively applied to promotional plush products when the specific application justifies the cost premium relative to the promotional product’s total unit economics. The most commercially appropriate 3D application for promotional plush is a brand logo medallion or character nose where the dimensional quality significantly improves the brand impression the product creates. A simple 3D nose on a promotional mascot character — adding perhaps $0.30 to $0.50 to the unit cost — can meaningfully improve the perceived quality of the product and the brand impression it creates, at a cost that most promotional budgets can accommodate. Extensive 3D embroidery across multiple features — appropriate for premium retail products — typically exceeds the cost tolerance of promotional budgets. The practical guideline for promotional 3D embroidery is to identify the one or two feature applications where 3D most directly improves brand representation, and to apply 3D selectively to those features while using standard flat embroidery for all other embroidered elements.
Q5: How should buyers evaluate whether a factory’s 3D embroidery capability is genuine or whether a factory claiming 3D capability actually produces acceptable quality?
The most reliable evaluation method is requesting physical samples of existing products with 3D embroidered features from the factory’s portfolio — not computer-generated images or photography, but actual physical samples. When evaluating these samples, apply four specific assessments. First, projection consistency: press on the 3D feature and assess whether it returns to the same projection height across different points of the feature — inconsistent return indicates foam density variation. Second, edge definition: examine the foam edge closely under good light — the edge should be clean and defined, not frayed or irregular. Third, coverage completeness: look carefully for any exposed foam edges or coverage gaps in the embroidered surface — complete foam encapsulation is the professional standard. Fourth, symmetry for bilateral features: for symmetrical features like cheeks or brows, assess whether both sides of the face have matching projection height and edge quality — asymmetry indicates positioning inconsistency that will appear in production. A factory whose portfolio samples pass all four assessments has demonstrated the specific capabilities that 3D embroidery requires. A factory whose samples fail any of these assessments at the portfolio stage will not produce better results in production.