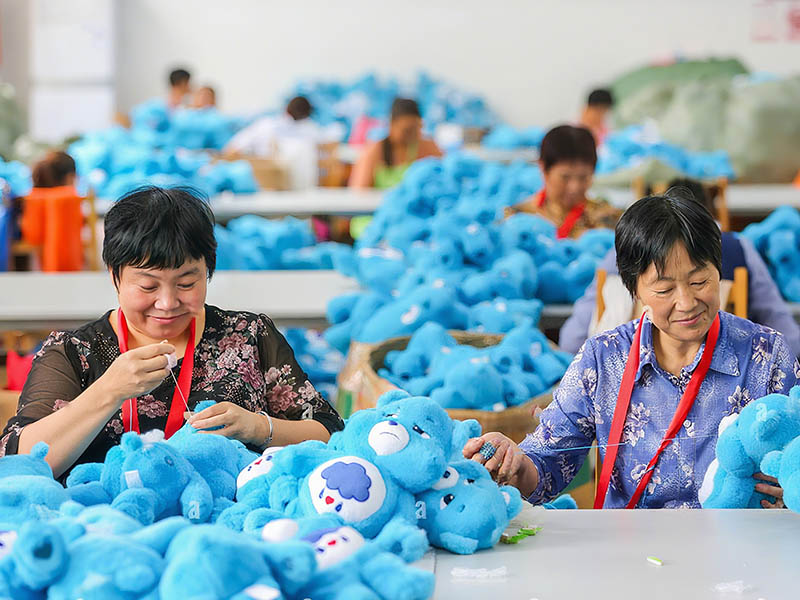
Stitching is the structural foundation of every plush toy. It is what holds the fabric panels together, what contains the filling, what keeps accessories attached, and what determines whether a product maintains its shape and integrity through years of handling, washing, and use. When stitching is done correctly, it is invisible — customers never think about it. When it fails, it is immediately apparent: a seam opens, filling escapes, a limb separates, an eye detaches.
Despite its foundational importance, stitching quality is one of the most commonly encountered defect categories in plush toy production — and one of the most preventable. Unlike some quality failures that require sophisticated systems to address, most stitching defects originate in specific, identifiable causes — incorrect machine settings, inadequate operator training, poor panel preparation, or insufficient in-process monitoring — that can be systematically prevented through the right combination of machine management, operator development, and quality monitoring.
This guide explains what causes stitching problems in plush toy production and what specific preventive measures at each stage of the production process reduce stitching defects to commercially acceptable levels. Understanding these mechanisms helps buyers evaluate their suppliers’ stitching quality management capability and build the right quality requirements into their supplier relationships.
Why Stitching Quality Is One of the Most Commercially Critical — and Most Preventable — Defect Categories in Plush Toys?

Stitching quality is commercially critical in plush toys because stitching failures produce both immediate customer dissatisfaction and potential safety concerns — making them among the highest-impact quality failures in the category. A seam failure in a child’s plush toy that exposes the filling is both a quality defect and a potential safety incident. A seam that opens prematurely in a retail product generates returns, negative reviews, and brand damage that compounds with each unit that reaches a customer in failed condition.
Stitching quality is preventable because the causes of stitching failures are specific and manageable. Unlike quality failures that arise from inherent material variation — batch-to-batch color differences, for example — stitching failures almost always originate in controllable production factors: machine tension settings that can be calibrated, operator techniques that can be trained, panel preparation practices that can be standardized, and seam quality monitoring that can be systematically implemented.
Here is an overview of stitching defect categories, their commercial impact, and their preventability:
| Stitching Defect Category | Commercial Impact | Safety Implication | Preventability |
|---|---|---|---|
| Open seam — filling exposed | High — immediate return or complaint | Medium-High — filling accessible | High — controlled by seam strength and technique |
| Skipped stitches | Medium-High — visible weakness | Medium — potential future failure | High — controlled by machine maintenance |
| Puckered seam | Medium — visible quality defect | Low | High — controlled by tension and technique |
| Thread breakage | High — structural failure risk | Medium-High — seam integrity compromised | High — controlled by thread quality and tension |
| Misaligned panels | Medium — visual quality defect | Low | High — controlled by preparation and technique |
| Uneven stitch density | Medium — visible quality variation | Low-Medium — affects seam strength | High — controlled by machine speed and feed |
| Loose closing seam | High — filling accessible | Medium-High — safety risk | High — controlled by technique and inspection |
| Accessory attachment failure | Very High — safety-critical | High — choking risk | High — controlled by technique and pull testing |
The Cost of Stitching Failures at Scale
At production scale, even a low defect rate on stitching failures generates commercially significant consequences. A 2 percent seam failure rate on a 5,000-unit order means 100 units with stitching defects — each requiring rework, each potentially reaching customers in failed condition if not caught in inspection. At 5 percent, the number reaches 250 units — a rework burden that adds labor cost and timeline extension to every affected order.
The economics of stitching defect prevention are clear: the investment in proper machine setup, operator training, and in-process monitoring is consistently lower than the cost of reworking or replacing units with stitching failures. Every stitching defect prevented at the production stage is a defect that does not require rework, does not reach a customer, and does not generate a return or a complaint.
How Do Machine Setup and Thread Selection Prevent the Most Common Stitching Failures?
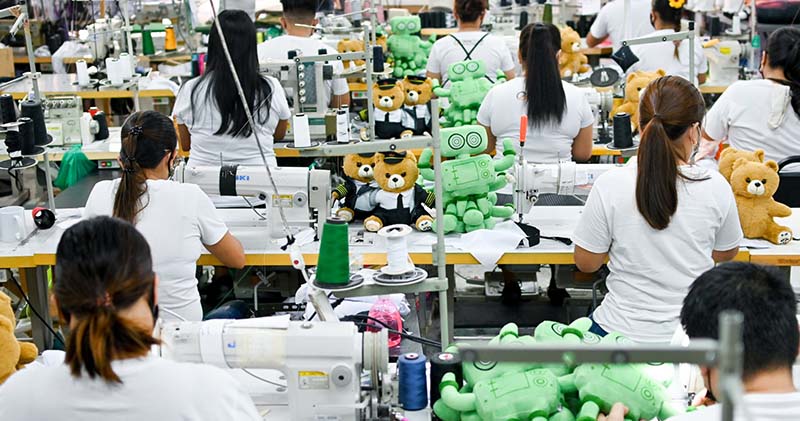
The sewing machine is the primary tool in plush toy stitching — and its setup is the primary determinant of whether the stitches it produces have the correct tension, density, and structural characteristics for the fabric and application being sewn. Incorrect machine setup is the most common cause of the most common stitching defects — and it is the most efficiently addressed through systematic pre-production calibration and in-production monitoring.
Machine setup and thread selection prevent stitching failures through the management of four specific variables: upper thread tension, lower thread tension, stitch density (stitches per centimeter), and stitch length. Each variable affects a specific stitch quality characteristic, and each requires calibration to the specific combination of fabric type, thread weight, and seam application being sewn.
Here is a complete machine setup framework for plush toy sewing:
| Machine Variable | Effect on Stitch Quality | Incorrect Setting Result | Correct Setting Approach |
|---|---|---|---|
| Upper thread tension | Determines thread pull from above | Too tight: upper thread breaks, puckering; Too loose: loops on fabric surface | Set to balance with lower tension for clean, flat stitch |
| Lower thread tension | Determines thread pull from below | Too tight: lower thread breaks; Too loose: loops visible from underside | Set to match upper tension for each fabric weight |
| Stitch density (SPC) | Determines seam strength and appearance | Too few: weak seam; Too many: fabric damage or puckering | Calibrate by application — structural seams need minimum 4 SPC |
| Stitch length | Affects seam flexibility and appearance | Too long: weak seam; Too short: puckering or fabric distortion | Match to fabric weight — heavier fabrics need longer stitch |
| Presser foot pressure | Controls fabric feed consistency | Too high: fabric distortion; Too low: uneven feed | Calibrate to fabric thickness |
| Feed dog height | Affects fabric advancement | Too high: fabric damage; Too low: uneven stitch length | Adjust to fabric pile height |
Thread Selection and Its Impact on Seam Quality
Thread selection is the partner decision to machine setup — the wrong thread for the application produces stitching failures regardless of how correctly the machine is set. In plush toy manufacturing, thread selection decisions must account for the specific demands of each seam application: structural seams that bear the load of the filling and the forces of handling require high-tenacity thread, while decorative or closing seams where appearance is the primary concern may use standard polyester thread.
Here is a thread selection framework for plush toy production:
| Seam Application | Thread Weight | Thread Type | Tension Range | Notes |
|---|---|---|---|---|
| Primary structural seams | Heavy — 40/3 ply | High-tenacity polyester | Moderate-high | Must withstand filling pressure and use forces |
| Face panel assembly | Medium — 50/2 ply | Polyester, color-matched | Moderate | Appearance and strength both important |
| Closing seam | Medium-Heavy — 40/2 ply | High-tenacity polyester | Moderate | Last seam — must be secure and neat |
| Embroidery thread | Embroidery weight | Rayon or polyester embroidery | As machine requires | Twist and sheen affect appearance |
| Accessory attachment | Heavy — 40/3 ply or specialist | High-tenacity, specific to attachment method | Application-specific | Pull-test requirements drive selection |
Machine Warm-Up and Calibration Verification
One of the most commonly overlooked machine management practices in plush toy production is the verification of machine calibration after warm-up — the period during which a machine’s operating temperature and mechanical characteristics change from cold-start to steady-state operation. Many sewing machine tensions and feed characteristics shift slightly during warm-up, and calibrations performed on a cold machine may not accurately reflect the machine’s actual operating characteristics during production.
Professional factories establish machine calibration verification protocols that include a warm-up period before production begins and a calibration confirmation on the first pieces produced after warm-up — not on pieces produced while the machine is still reaching operating temperature. This practice prevents the specific seam quality variation that commonly affects the first units of a production run as machines reach their operating state.
How Does Operator Technique Training Reduce Stitching Defects at the Source?
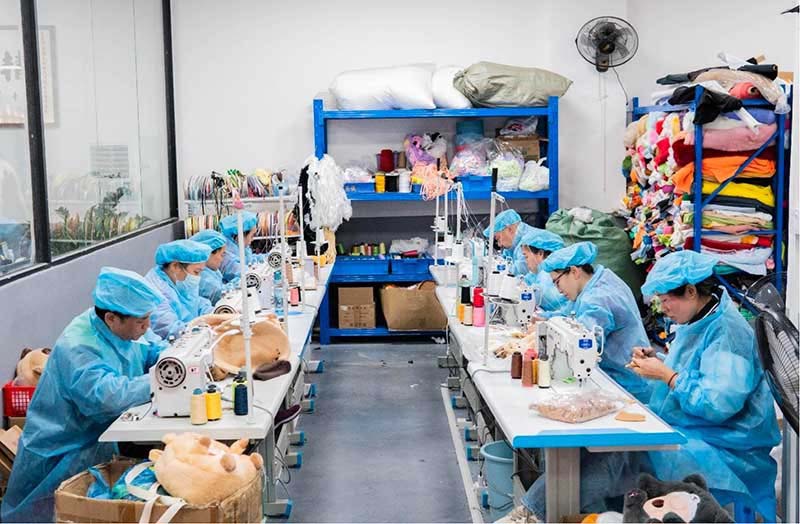
Machine setup establishes the conditions for correct stitching. Operator technique determines whether those conditions are consistently applied across every seam of every unit in the production run. Even correctly set machines produce variable stitching when operated by operators whose technique introduces inconsistency — in feed speed, panel alignment, seam allowance maintenance, and starting and stopping position management.
Operator technique training reduces stitching defects at the source by establishing standardized techniques for each type of seam operation and ensuring that all operators on a production line execute those techniques consistently rather than individually varying their approach based on personal preference or habit.
Here is a comprehensive operator technique training framework for plush toy sewing:
| Technique Area | Training Objective | Common Error Without Training | Stitching Defect Prevented |
|---|---|---|---|
| Seam allowance maintenance | Consistent panel edge-to-needle distance | Variable seam allowance — panels misalign or seam strength varies | Inconsistent seam width, panel misalignment |
| Feed speed management | Consistent material advancement through machine | Variable speed — stitch length inconsistency | Uneven stitch density, puckering at speed changes |
| Panel alignment at entry | Correct relative panel positioning before sewing begins | Misaligned entry — panels out of position through seam | Panel misalignment, proportion errors |
| Curved seam management | Correct panel manipulation through curved sections | Panel pulling — distortion or puckering at curves | Curved seam distortion |
| Starting and ending technique | Lockstitch at both ends, correct positioning | Absent lockstitch — seam begins or ends insecure | Seam opening at ends |
| Corner management | Correct needle position and panel rotation at corners | Pulled corner — shape distortion | Corner distortion, potential weak point |
| Thread trimming technique | Trim length and angle avoiding fabric surface | Too-long threads creating tangling or appearance issues | Surface thread defects |
| Presser foot use | Correct presser foot selection for fabric type | Wrong presser foot — feed inconsistency | Uneven feed, fabric damage |
The Importance of Task Specialization for Stitching Consistency
One of the most effective structural approaches to reducing operator-driven stitching variation is task specialization — assigning operators to specific seam types and panel assembly operations rather than rotating them through all tasks. An operator who performs the same curved seam operation hundreds of times per shift develops the muscle memory and feed-rate sensitivity that produces consistently accurate curved seams. The same operator performing curved seams, straight structural seams, and closing operations without specialization does not develop equivalent expertise in any of them.
Task specialization is particularly important for the precision-critical stitching operations in plush toy production — face panel assembly, curved body sections, closing seams, and accessory attachment. These operations have the highest defect consequence if done incorrectly, and the technique precision required to do them consistently is most reliably achieved through specialization rather than general rotation.
Training Verification and Ongoing Assessment
Training is not a one-time event — it is an ongoing process of technique reinforcement that must continue throughout the production relationship. Technique drift — the gradual reversion of trained operators to personal habits that deviate from the trained standard — is one of the most consistent sources of progressive stitching quality variation across a long production run. Managing it requires not just initial training but periodic verification that trained techniques are being maintained.
Verification approaches include periodic supervisor observation of technique at critical operations, comparison of stitching quality from current production against baseline standards from the beginning of the run, and structured feedback sessions where operators review their work against the quality standard. Factories that invest in ongoing technique verification consistently maintain lower defect rates across long production runs than those that treat training as complete once the initial session is delivered.
How Do Pre-Sewing Preparation and Panel Management Prevent Stitching Problems Before They Start?
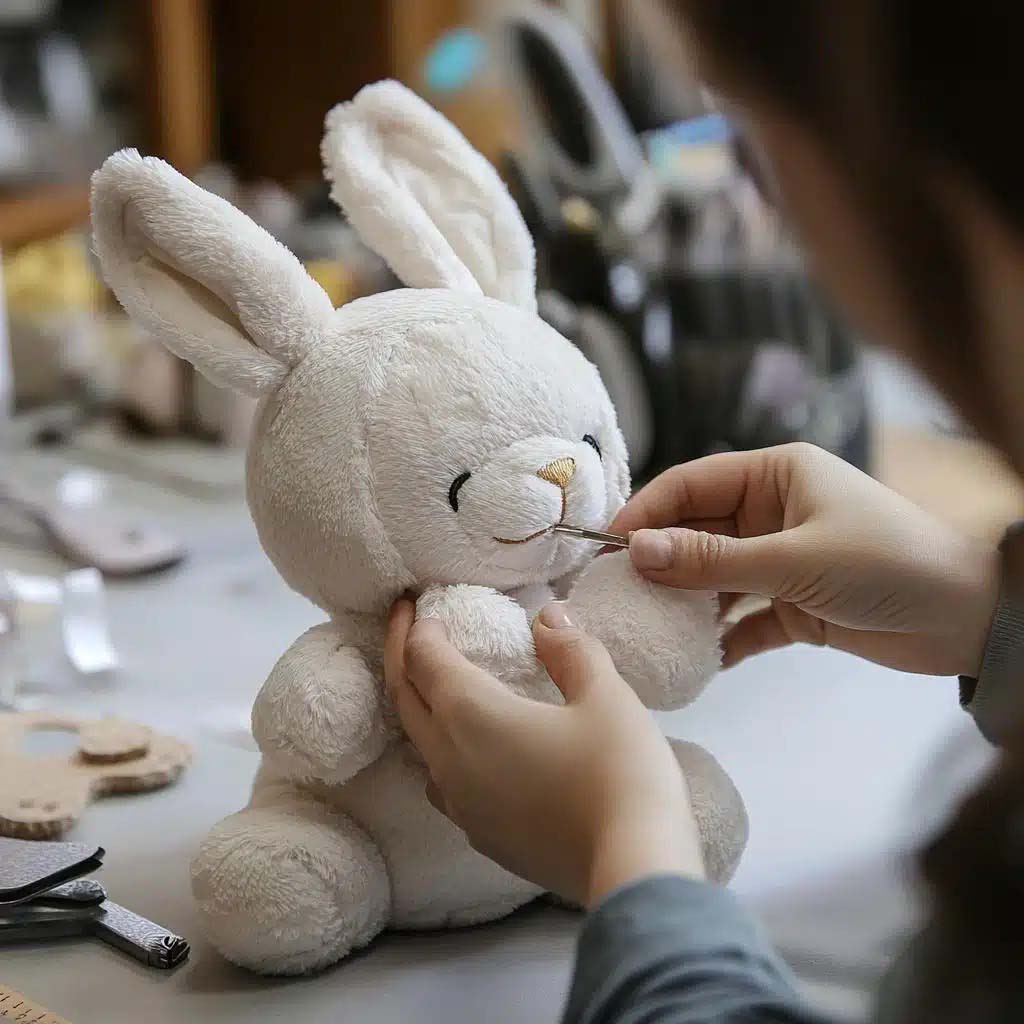
Many stitching problems originate before the needle enters the fabric — in the preparation and management of fabric panels between cutting and sewing. Incorrectly prepared panels, misidentified panels, or panels with cutting defects that are not caught before sewing begins produce stitching problems that cannot be corrected by technique or machine management alone.
Pre-sewing preparation and panel management prevent stitching problems by ensuring that every panel entering the sewing operation meets the dimensional and condition requirements for correct seaming — that it is cut correctly, labeled correctly, oriented correctly, and paired with the correct adjacent panels before stitching begins.
Here is a complete pre-sewing preparation and panel management framework:
| Preparation Element | What Is Managed | Defect Prevented | Verification Method |
|---|---|---|---|
| Panel dimension accuracy | Each panel cut to specified dimensions | Seam allowance inconsistency, proportion errors | Dimensional check on representative panels |
| Grain line orientation | Pile direction consistent with specification | Pile direction inconsistency in finished product | Visual grain line check before assembly |
| Notch accuracy | Alignment marks at correct positions | Panel misalignment during assembly | Notch position verification on sample panels |
| Panel identification | Correct labeling of left/right and component type | Wrong panel in wrong position | Labeling verification before assembly |
| Panel pairing verification | Correct panels matched for each assembly | Mismatched panels producing incorrect product | Pairing check before assembly begins |
| Surface condition | No cutting defects, contamination, or pile damage | Surface defects built into seams | Visual check before sewing |
| Edge condition | Clean cut edges without fraying or distortion | Edge problems creating seam irregularities | Edge inspection on representative panels |
The Panel Pairing Verification Step
One of the most practically important pre-sewing preparation steps — and one of the most commonly omitted — is panel pairing verification: the check that confirms the correct panels have been selected and matched before sewing begins. In multi-panel designs with similar-looking panels that differ only in subtle characteristics — slightly different sizes for left and right variants, or adjacent panels with matching grain lines — it is easy for an operator to inadvertently assemble the wrong combination.
Panel pairing errors produce a category of stitching problem that is particularly difficult to correct — because the seam itself may be technically correct, but the product constructed from incorrectly paired panels will have proportion or shape errors that require the seam to be opened, the panels to be re-sorted, and the seam to be re-sewn. This rework is significantly more labor-intensive than the original sewing operation — making the prevention investment of a pairing verification step before sewing begins a clear economic advantage.
The Pile Direction Check
Pile direction — the orientation of the fabric’s fibers relative to the seam being sewn — is a pre-sewing factor that directly affects both seam appearance and ease of sewing. Plush fabrics are easier to sew and produce cleaner seam results when the pile direction runs away from the seam toward the center of the panel, rather than toward the seam. When pile direction runs toward the seam, fibers can be caught by the sewing machine, creating pile distortion at the seam edge that produces visible surface quality problems.
Verifying pile direction before assembly — and orienting panels correctly relative to the seam direction — prevents both the sewing difficulty and the surface quality problem. This verification is a natural extension of the grain line check during cutting but must be confirmed again at the sewing stage, since panels can be inadvertently rotated during handling between cutting and sewing.
What Are the Most Common Stitching Defects in Plush Toys and How Is Each One Prevented?
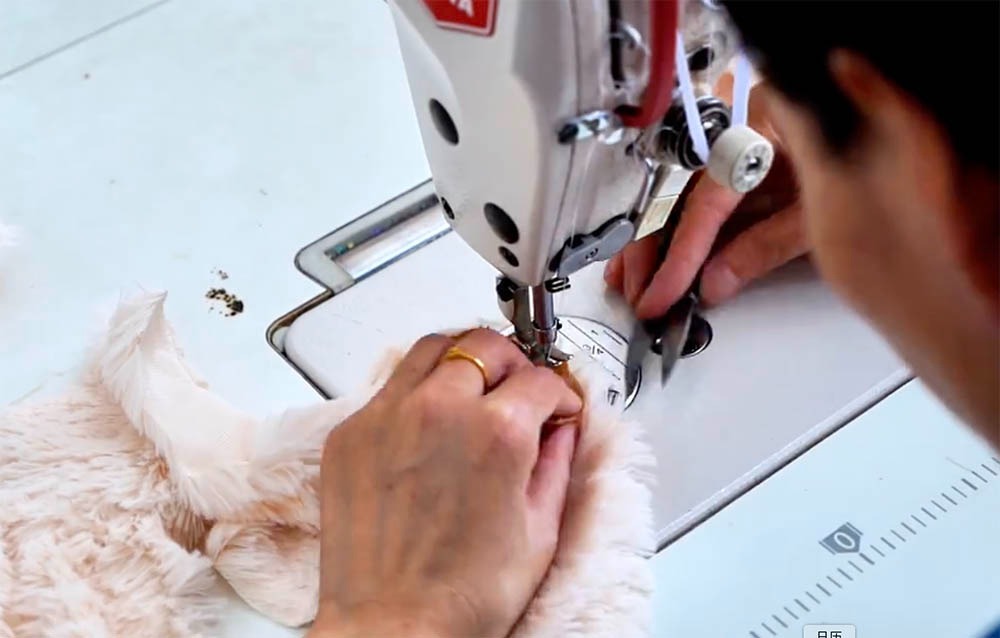
Understanding the specific defect types that most commonly occur in plush toy stitching — and the specific causal pathway that produces each — enables targeted prevention through the specific controls most effective for each defect category rather than general quality improvement efforts that address all defects simultaneously without the specificity required to eliminate any one of them.
Here is a comprehensive defect-by-defect prevention guide for the most common stitching problems in plush toy production:
Skipped Stitches
What it is: A seam section where the needle passes through the fabric but the thread does not form a proper stitch — leaving a gap in the seam that creates a weak point and potential seam opening.
Causes: Needle damage or incorrect needle size for thread, thread not correctly threaded through take-up mechanism, needle deflection from thick fabric intersections, incorrect needle-to-hook timing.
| Prevention Measure | Mechanism | Implementation |
|---|---|---|
| Regular needle inspection | Damaged needles produce skipped stitches | Inspect before each production session, replace at defined intervals |
| Correct needle size selection | Oversized or undersized needles cause skipping | Match needle size to thread weight and fabric weight |
| Thread path verification | Incorrect threading produces skipped stitches | Check threading at machine start and after any thread break |
| Reduced speed at intersections | Needle deflection from bulk causes skipping | Slow machine speed when sewing through multiple layer intersections |
| Machine timing check | Timing drift produces systematic skipped stitches | Professional timing verification at scheduled maintenance intervals |
Seam Puckering
What it is: A gathered or rippled appearance along the seam line that creates visual quality problems and may indicate tension issues affecting seam strength.
Causes: Incorrect thread tension balance, mismatched thread weight for fabric weight, operator pulling fabric during sewing, incorrect stitch length for fabric type.
| Prevention Measure | Mechanism | Implementation |
|---|---|---|
| Tension calibration by fabric weight | Each fabric type needs individual tension setting | Calibrate tension on sample seam before production |
| Matched thread weight | Thread-to-fabric mismatch causes puckering | Select thread weight proportional to fabric weight |
| Operator non-pull technique | Fabric pulling distorts seam | Train and verify non-pull technique at all sewing stations |
| Stitch length optimization | Too short stitch length creates gathering | Test stitch length on sample before production |
| Feed dog adjustment | Incorrect feed creates differential fabric movement | Adjust feed for thick pile fabrics |
Thread Breakage
What it is: The thread breaks during sewing, creating an incomplete seam or requiring a restart that may produce a visible join point.
Causes: Thread tension too high, thread quality defects (inconsistent twist, weak sections), needle eye damage creating abrasion, incorrect thread path through machine guides.
| Prevention Measure | Mechanism | Implementation |
|---|---|---|
| Tension reduction from break threshold | High tension is primary break cause | Set tension to lowest effective level for seam quality |
| Thread quality IQC | Defective thread creates break points | Test thread tensile strength at incoming inspection |
| Needle inspection | Damaged needle eye abrades thread | Inspect needle eye condition, replace at intervals |
| Thread path check | Incorrect path creates abrasion points | Verify threading including all guides at machine start |
| Thread storage and handling | Tangled or cross-wound thread causes breaks | Proper thread storage, FIFO management |
Seam Opening at Ends
What it is: A seam that is technically sewn correctly along its length but has insecure starting or ending points that allow the seam to unravel from either end.
Causes: Absent or incorrect backstitching at seam ends, incorrect start/stop technique, thread not trimmed correctly leaving tail that can be pulled.
| Prevention Measure | Mechanism | Implementation |
|---|---|---|
| Backstitch standard | Lockstitching at both ends secures seam | Train and verify backstitching technique at all starting and ending points |
| Minimum backstitch length | Too short backstitching still allows unraveling | Specify minimum 1cm backstitching at all seam ends |
| Thread trimming length | Too-long threads at seam ends can be pulled | Specify maximum thread tail length after trimming |
| Starting position technique | Starting too close to edge creates insecure beginning | Train correct starting distance from edge |
| End-position reinforcement | Verify seam end security in QC sampling | Include seam end pull test in IPQC protocol |
Panel Misalignment
What it is: Fabric panels that are not correctly aligned relative to each other before or during sewing, producing seams that are correctly sewn but produce incorrect product proportions or shape.
Causes: Incorrect panel pairing, notch misuse during alignment, operator technique error in holding alignment during feed, incorrect panel orientation.
| Prevention Measure | Mechanism | Implementation |
|---|---|---|
| Panel pairing verification | Correct panels selected before sewing | Pre-assembly pairing check standard procedure |
| Notch use training | Notches are alignment references — their use must be trained | Verify notch use in operator technique training |
| Alignment hold technique | Operator must maintain alignment through feed | Train and verify alignment hold technique |
| Pinning or clip use for complex alignments | Mechanical alignment for difficult seams | Specify pinning where alignment is critical |
| First-unit alignment check | Catch alignment errors before they repeat | Check alignment of first few units in each production session |
Accessory Attachment Failure
What it is: Safety eyes, noses, buttons, ribbons, or other attached components that are not securely attached — either immediately apparent as loose or becoming loose under use forces.
Causes: Incorrect attachment technique (insufficient force for eye backing), incorrect tool use, incorrect accessory selection for attachment point, sewing-attached accessories with incorrect stitch type or density.
| Prevention Measure | Mechanism | Implementation |
|---|---|---|
| Technique training by accessory type | Each accessory type has correct attachment method | Specific training for each accessory category |
| Tool calibration for snap-in accessories | Safety eye tool must deliver consistent force | Tool inspection and calibration at defined intervals |
| Pull test before production | Verify attachment achieves minimum force standard | Test first attachment of each session, document result |
| Sewing specification for sewn accessories | Stitch type, density, and reinforcement specified | Provide stitch specification for each sewn attachment |
| IPQC pull testing | Ongoing verification during production | Pull test at defined intervals throughout production |
How Does In-Process Monitoring Catch Stitching Quality Changes During Production?
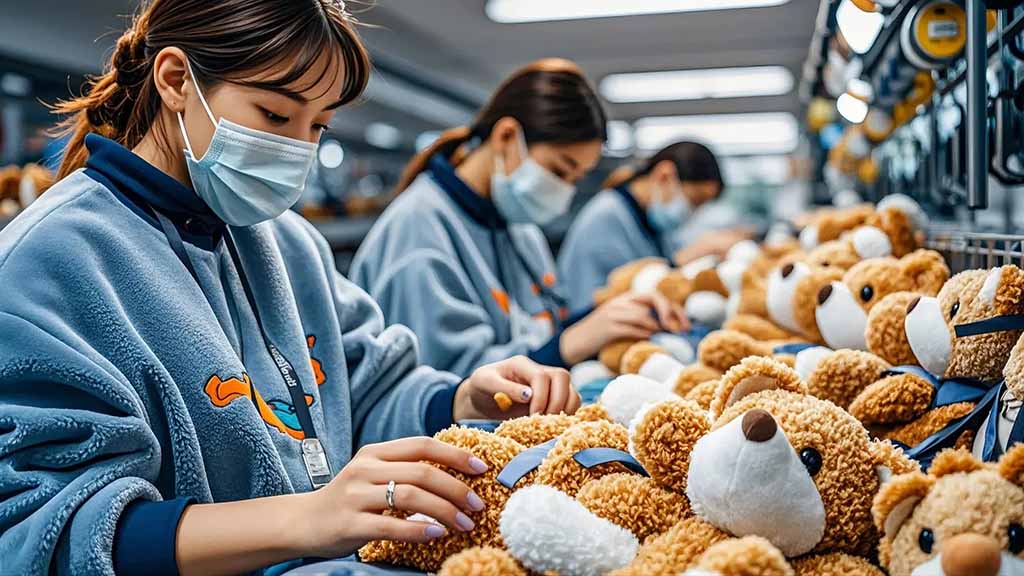
In-process monitoring for stitching quality is the systematic checking of seam quality at defined intervals throughout the production run — catching stitching problems when they first develop rather than when they have accumulated across large production quantities. It is the mechanism that addresses the specific quality risks of long production runs: machine drift that changes stitch characteristics, operator technique drift from fatigue, and thread quality variation from roll changes.
In-process monitoring for stitching quality operates through a structured inspection protocol that checks specific seam quality attributes at defined production intervals and triggers corrective action when attributes fall outside the acceptable range.
Here is a complete stitching IPQC protocol:
| Monitoring Checkpoint | What Is Checked | Monitoring Interval | Inspection Method | Corrective Action Trigger |
|---|---|---|---|---|
| Seam tension appearance | Surface stitching appearance — loops, puckering | Every 60–90 minutes | Visual inspection of 5 units | Any visible tension problem |
| Stitch density | Stitches per centimeter on structural seams | Every 90–120 minutes | Count on 5 units from 3 seam types | Any reading below minimum SPC |
| Seam end security | Backstitching present and adequate | Every 60 minutes | Pull test on seam ends of 5 units | Any detachment under defined pull |
| Panel alignment | Seam alignment across adjacent panels | Every 90 minutes | Visual check against counter sample | Any visible misalignment |
| Accessory attachment | Pull force on all accessory types | Every 2 hours | Pull force measurement on 5 units | Any reading below ASTM/EN71 threshold |
| Thread break frequency | Number of thread breaks per operator per hour | Continuous count | Operator break log | Rate above threshold triggers machine check |
| Seam strength spot test | Destructive test of seam sample | Every 3–4 hours | Tension test to seam failure | Failure below specified strength |
Using Thread Break Rate as a Leading Indicator
One of the most practical real-time stitching quality monitoring tools is the thread break rate — the frequency of thread breakage per operator per unit time. Thread breaks are not just a productivity disruption — they are a leading indicator of machine and thread condition that can signal emerging seam quality problems before those problems are visible in the produced seams.
A machine experiencing increasing thread break frequency is typically experiencing a condition — tension drift, needle damage, thread quality variation, or thread path obstruction — that will affect the quality of the stitches it produces even when thread does not break. Tracking thread break rate per operator and flagging any operator whose break rate exceeds a threshold triggers a machine and thread inspection that catches the underlying condition before it produces defective stitching.
This monitoring approach requires operators to log thread breaks as they occur — a simple record-keeping practice that adds negligible production time but provides early warning of conditions that would otherwise only be discovered in formal IPQC inspection.
How Do Seam Strength and Structural Integrity Requirements Differ for Different Plush Products?
Seam strength requirements in plush toy manufacturing are not uniform across all products — they vary based on the product’s intended use, the forces that will be applied to the seams in normal and foreseeable misuse conditions, the weight and density of the filling contained by the seams, and the age grade and regulatory requirements applicable to the product.
Understanding how seam strength requirements vary across different plush product types enables appropriate specification of stitch type, thread weight, stitch density, and seam construction for each application — rather than applying a single seam specification uniformly across products with very different structural requirements.
Here is a seam strength requirement framework across different plush product categories:
| Product Type | Primary Seam Stress | Seam Strength Requirement | Thread and Stitch Specification | Testing Standard |
|---|---|---|---|---|
| Standard children’s plush | Pulling, compression from child use | High — must withstand child use forces | High-tenacity thread, minimum 4 SPC | EN71-1, ASTM F963 |
| Weighted plush toys | Filling weight + use forces | Very High — weighted filling adds constant stress | Heavy thread, reinforced seams at stress points | EN71-1, ASTM F963 + weight-specific |
| Adult comfort plush | Compression, occasional pull | Medium-High — adult use forces | Medium-heavy thread, 3–4 SPC | EN71-1 or equivalent |
| Promotional plush | Minimal use | Medium — display and occasional handling | Standard thread, 3 SPC minimum | Market-dependent |
| Plush with electronic components | Opening/closing for battery access | High at closure seam | Reinforced closure with security features | EN71-1 + electrical standards |
| Large plush (60cm+) | High filling volume weight | Very High — filling mass creates significant seam load | Heavy thread, reinforced seams throughout | EN71-1, ASTM F963 |
| Miniature plush | Fine work forces | Medium — small scale, difficult sewing | Appropriate fine thread, higher SPC | EN71-1, ASTM F963 |
Weighted Plush Seam Requirements — The Most Demanding Category
Weighted plush toys represent the most demanding seam strength requirements in standard plush manufacturing — because the glass bead or pellet filling creates a constant gravitational load on all seams that standard PP cotton filling does not. Every seam in a weighted plush product must support not just the forces of handling and use but the ongoing weight of the filling, distributed across whatever seam area is bearing it at any given moment.
This weight load means that the minimum acceptable seam strength for weighted plush products is significantly higher than for standard plush — and that the typical production seam specifications that are adequate for PP cotton-filled products are often insufficient for weighted applications. Specific requirements include heavier thread weight throughout, higher stitch density on all structural seams, reinforcement stitching at seam intersections where stress concentrations occur, and double-layer inner bag construction for the weighted filling compartment.
The seam strength testing for weighted plush products must also account for the dynamic loading that occurs when the product is picked up, repositioned, or held — which applies momentary forces significantly higher than the static weight of the filling. Testing to the EN71-1 or ASTM F963 seam strength requirements provides the baseline, but professional weighted plush manufacturers typically apply more stringent internal specifications that account for the additional loading characteristics of weighted products.
How Can Buyers Verify Stitching Quality Standards Before and During Production?
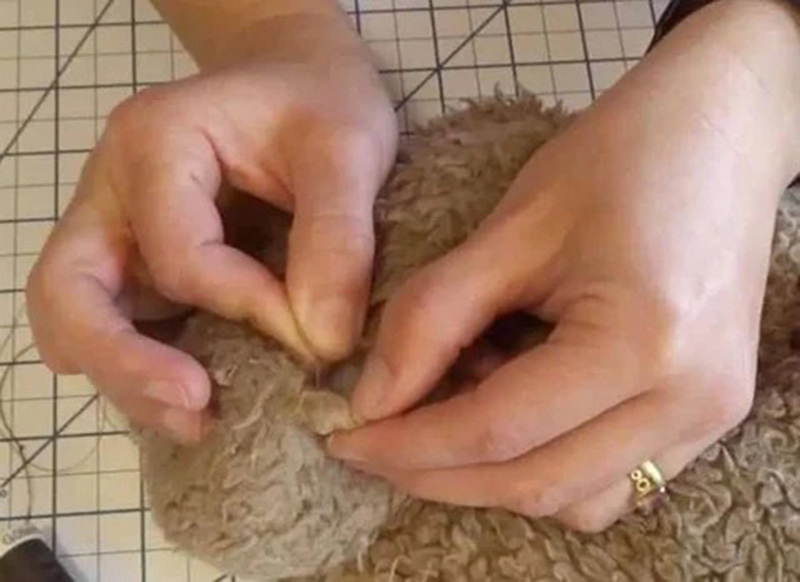
Stitching quality is one of the most directly evaluable quality dimensions available to buyers — because seam quality can be assessed through physical inspection and testing methods that produce objective, measurable results rather than subjective assessments. Buyers who know what to evaluate and how to evaluate it can assess stitching quality at every stage of the manufacturing relationship — from initial supplier evaluation through production monitoring.
Here is a complete buyer verification framework for stitching quality:
Supplier Evaluation Stage
| Verification Method | What It Reveals | How to Conduct | What Good Looks Like |
|---|---|---|---|
| Portfolio sample seam inspection | Factory’s baseline seam quality | Request samples of comparable products, inspect all seam types | Clean, consistent, well-tensioned seams with no visible defects |
| Seam pull test on portfolio sample | Actual seam strength | Apply manual pull force to primary structural seams | No separation or thread breakage under strong manual pull |
| Accessory pull test | Attachment security | Apply manual pull to all attached accessories | No movement or detachment under firm manual pull |
| Machine setup question | Calibration practice | Ask how they set machine tension for plush fabrics | Specific answer — tension by fabric weight, calibration record |
| Seam specification request | Documentation discipline | Request stitch specification for a comparable product | Specific thread weight, SPC, and stitch type by seam application |
Pre-Production Stage
| Verification Method | What It Reveals | How to Conduct | Standard Applied |
|---|---|---|---|
| Counter sample seam inspection | Production-environment seam quality | Inspect counter sample seams comprehensively | Within specification for stitch density and tension appearance |
| Counter sample pull test | Production seam strength | Pull test on primary seams and accessory attachments | Pass at EN71/ASTM force threshold |
| Seam specification confirmation | Production specification in place | Request confirmed seam specification for production | Specific thread, SPC, reinforcement requirements stated |
| Operator training confirmation | Technique standards in place | Ask how operators are trained for seam quality | Specific training described, verification method identified |
During Production Stage
| Verification Method | What It Reveals | How to Conduct | Action Trigger |
|---|---|---|---|
| First-off inspection report request | Production seam quality at run start | Request first-off report with seam quality notes | Any tension or alignment issue triggers investigation |
| IPQC seam quality updates | Ongoing seam consistency | Request IPQC summary at 50% completion | Any trend toward deviation triggers discussion |
| Thread break rate monitoring | Machine and thread condition | Request thread break log summary | Above-threshold break rate triggers machine check |
| Mid-production sample request | Physical verification at scale | Request random unit from production for inspection | Send specific seam quality criteria for evaluation |
Pre-Shipment Stage
| Verification Method | What It Reveals | How to Conduct | Standard Applied |
|---|---|---|---|
| FQC report seam quality section | Final batch seam quality | Review FQC report seam findings | AQL 1.5 for critical seam defects |
| Third-party inspection seam check | Independent seam quality assessment | Commission SGS/Intertek with seam pull test in scope | Same AQL and force threshold |
| Physical sample from batch | Seam quality of actual production units | Request physical sample from FQC inspection lot | Visual and pull test confirmation |
At Kinwin, stitching quality is managed through every element of the framework described in this guide — from machine calibration protocols before production begins, through operator technique training and verification, to the IPQC seam monitoring that catches quality changes during production and the FQC seam assessment that confirms batch quality before shipment.
We include seam pull testing in both our IPQC and FQC protocols as standard — not as an optional addition for premium orders — because we understand that stitching integrity is the structural foundation of every plush product’s quality and safety performance. For weighted plush products specifically, we apply reinforced seam specifications that account for the additional stress of weighted filling, and we verify seam strength at the counter sample stage before authorizing bulk production.
If you want to understand specifically how our stitching quality management works — what machine specifications we use, how operators are trained, what IPQC protocols we apply, and what documentation we produce at each stage — we would be glad to walk through it with you directly.
Reach out to our team at [email protected] or visit kinwintoys.com to start that conversation.
Conclusion
Stitching problems in plush toys are among the most preventable defect categories in the entire manufacturing process — because every significant stitching failure type has specific, identifiable causes that can be systematically addressed through the right combination of machine management, thread selection, operator training, panel preparation, in-process monitoring, and appropriate seam specification for the product type.
The factories that achieve consistently low stitching defect rates are those that approach stitching quality as a system — managing every contributing factor at the stage where it is most efficiently controlled rather than relying on final inspection to catch whatever the production process produces. Machine calibration prevents skipped stitches and puckering from occurring. Operator training prevents technique-driven misalignment and seam end failures from developing. Panel preparation prevents incorrect assembly from producing seam problems that the sewing process cannot correct. In-process monitoring prevents drift from accumulating across large production quantities.
For buyers, understanding this system provides the framework to evaluate suppliers’ stitching quality capability before orders are placed, to set the right quality standards and monitoring requirements in supplier agreements, and to interpret the stitching-related quality information that flows through production monitoring and inspection reporting.
At Kinwin, we build every element of this system into our production management — because we believe that stitching quality is not a matter of careful attention on good days but of systematic prevention across every production run.
FAQ
Q1: How should buyers specify seam strength requirements in their purchase agreements to create enforceable quality standards?
Seam strength requirements should be specified in the purchase agreement’s quality annex in measurable terms that can be verified through objective testing. The most practical specification references the applicable safety standard force threshold as the minimum requirement — for example, “all primary structural seams must pass the EN71-1 seam strength test at the applicable force level for the product’s age grade designation.” This links the seam strength requirement to an independently verifiable standard rather than leaving it as a subjective judgment. For weighted plush products or other high-demand applications, a factory-internal specification above the standard minimum can be added — for example, “in addition to EN71-1 compliance, all seams in the weighted filling compartment must pass a 50N pull test without detachment or visible distortion.” These specific, measurable requirements transform seam quality from a general expectation into a contractually enforceable standard with clear pass/fail criteria.
Q2: What is the most common stitching problem that buyers discover only after delivery, and how can it be prevented before it reaches that stage?
The most commonly discovered-at-delivery stitching problem is seam opening at the closing seam — the final seam that closes the plush toy after stuffing, which is often hand-sewn rather than machine-sewn and is therefore more susceptible to technique variation. Closing seam failure allows filling to escape and renders the product unsaleable or returnable. Preventing it requires two complementary controls. First, a specific closing technique standard — the minimum number of stitches, the thread type, the stitch density, and the backstitching requirement — documented in the work instructions and trained to all operators performing this operation. Second, closing seam pull testing included in the IPQC protocol — testing a sample of closing seams at defined production intervals rather than leaving this safety-critical seam to visual inspection only. Including closing seam quality explicitly in the FQC criteria — with a defined pull force test in the final inspection protocol — provides the last line of defense before shipment.
Q3: How does sewing machine age and maintenance status affect stitching quality, and what should buyers ask about machine condition?
Sewing machine age and maintenance status directly affect stitching quality through mechanical wear that causes tension inconsistency, timing drift that produces skipped stitches, and feed mechanism wear that causes uneven fabric advancement. Older machines with inadequate maintenance are the most common source of the intermittent, difficult-to-diagnose stitching problems that escape per-interval IPQC monitoring because they occur irregularly rather than systematically. Buyers evaluating factories should ask specifically about the factory’s machine maintenance schedule — how frequently machines are professionally serviced, how needle replacement intervals are managed, and what the factory’s protocol is when a machine shows signs of timing or tension problems. Professional factories maintain documented machine maintenance logs that can be shown on request. A factory that cannot describe a specific maintenance protocol or that lacks maintenance records for its production machines is operating with a significant stitching quality risk that per-unit inspection alone cannot fully mitigate.
Q4: Can stitching defects that are identified in final inspection be effectively reworked, or do they typically require product destruction?
Most stitching defects identified in final inspection can be reworked without product destruction — but the rework labor cost and timeline impact are significant enough that prevention is consistently more economical than rework. Seam tension problems visible in the finished product typically require the affected seam to be unpicked, the panels to be re-aligned, and the seam to be re-sewn — a process that takes 3 to 5 times longer than the original sewing operation. Seam openings at ends require the seam end to be re-sewn with correct backstitching after careful inspection of the seam’s full length. Accessory attachment failures require the component to be removed and correctly re-attached with pull test verification. Closing seam failures require the filling to be partially removed, the seam re-sewn with the correct technique, and the product re-stuffed to the correct density. None of these rework operations are impossible, but each is significantly more expensive than the defect-prevention practices that would have avoided the failure — which is the economic argument for the investment in machine management, operator training, and in-process monitoring described in this guide.
Q5: How do stitching quality requirements change for plush toys that will be machine-washed, and what should buyers specify for washable products?
Plush toys intended for machine washing face higher stitching integrity demands than those for decorative or light-handling use — because the wash cycle subjects every seam to repeated mechanical stress, temperature variation, and detergent exposure that accelerates the degradation of substandard stitching. For washable products, buyers should specify several enhanced requirements. Thread selection should prioritize colorfast, high-tenacity polyester thread that maintains strength and color stability through multiple wash cycles — not standard polyester that may yellow or weaken over washing. Seam density should be at the higher end of the specification range — 4 to 5 SPC rather than 3 to 4 — because wash-cycle stress benefits from the additional seam strength that higher density provides. All seam ends should have extended backstitching — minimum 1.5cm rather than the standard 1cm — to resist the unraveling forces of tumble drying. And accessory attachment should be verified through post-wash pull testing on the sample stage — applying pull force after a wash cycle rather than only to unwashed product — to confirm that attachment security is maintained through the product’s washing life.