Plush Toy Embroidery — Complete Guide
Plush Toy Embroidery — Complete Guide
Face Embroidery · Logo Embroidery · Thread Color Matching · Digitization · Stitch Types · Placement Engineering · Quality Standards
Embroidery is the most critical craft element in plush toy manufacturing — and the one that most separates premium products from commodity ones. A plush toy’s embroidered face is the first thing a customer looks at and the primary driver of their emotional response. A symmetrical, expressive, precisely placed face creates an instant connection. A misaligned or poorly executed face makes even a beautifully stuffed toy look cheap.
Embroidery is also the primary method for applying brand logos, character names, copyright notices, and branding details to plush toy surfaces. Done well, it communicates premium quality and brand confidence. Done poorly, it communicates the opposite. This guide covers everything brands need to know about plush toy embroidery — from face design principles to logo digitization to quality control standards.
The Three Functions of Embroidery in Plush Toy Manufacturing
The Three Functions of Embroidery in Plush Toy Manufacturing

1. Character Face Construction
The face is the soul of the plush toy. Eyes, nose, mouth, eyebrows, blush marks, eyelashes, whiskers — every facial feature that gives a character personality and emotional resonance is created through embroidery. Face embroidery must achieve anatomical accuracy, symmetry, and consistent execution across every unit in the production run.
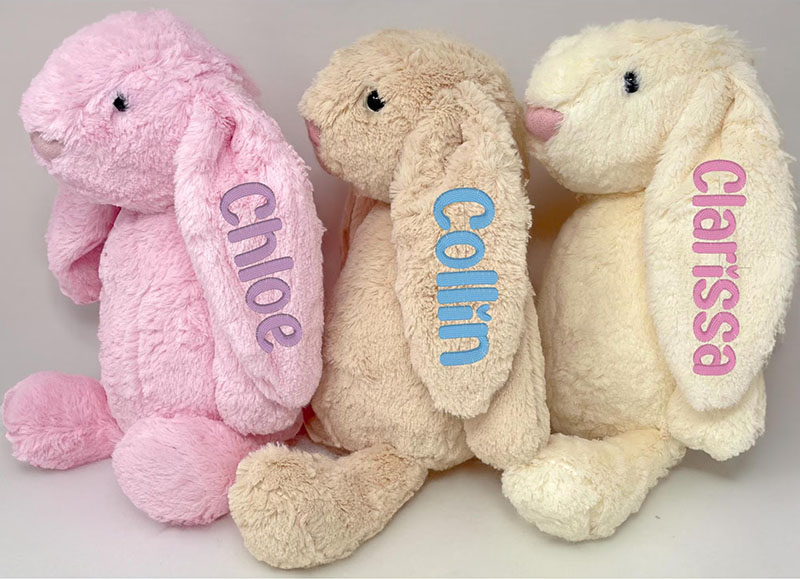
2. Logo & Brand Identity Application
Embroidered logos on plush toy bodies, foot pads, ears, or accessories are the most durable and premium branding method available. Unlike printed labels that peel or fade, embroidery becomes part of the toy’s structure — it cannot be removed without destroying the product. This permanence communicates brand quality and ownership more powerfully than any alternative method.

3. Detail & Texture Elements
Beyond faces and logos, embroidery creates surface detail that adds visual interest and premium craft perception: paw pad textures, belly markings, fur pattern accents, stripe patterns on character clothing, decorative stitching on accessories, and copyright text. These details reward close inspection — the quality signal premium brands want to send.
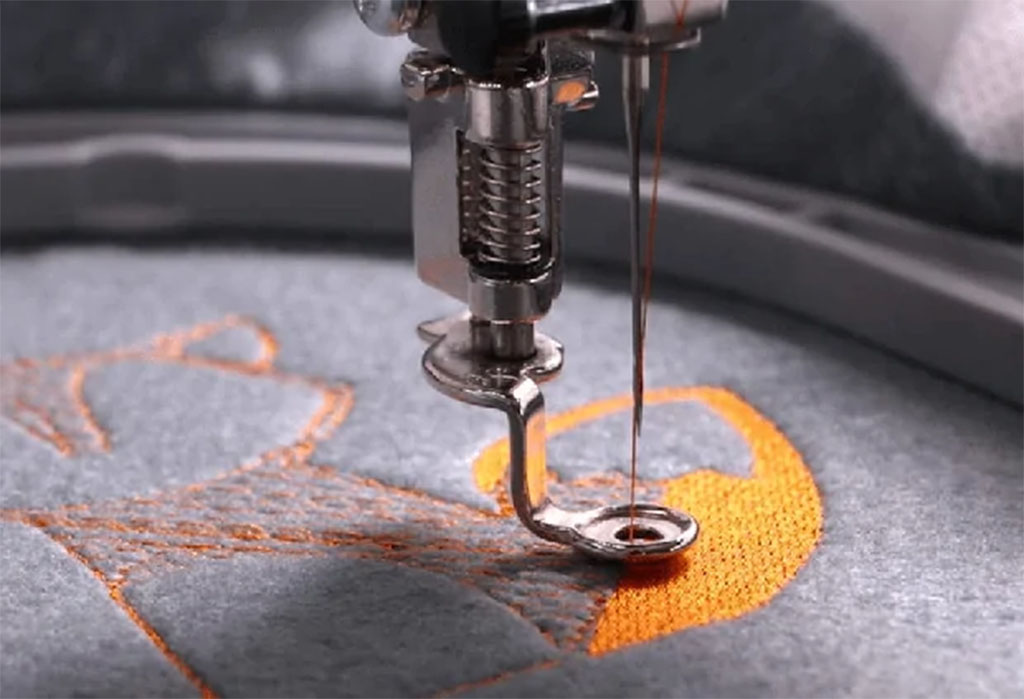
Embroidery Stitch Types Used in Plush Toy Manufacturing
Embroidery Stitch Types Used in Plush Toy Manufacturing
Different elements of a plush toy’s embroidery require different stitch types. Understanding which stitch type is appropriate for each element is essential for achieving the correct visual result.
- Satin Stitch: Eye fills, nose fills, solid logo areas — smooth shiny surface; excellent color coverage; ideal for small to medium solid shapes
- Running Stitch: Mouth lines, outline details, whiskers — clean single-line execution; ideal for curves and fine lines
- Chain Stitch: Decorative outlines, thick feature borders — rope-like texture; slightly raised; good for bold outline effects
- French Knot: Small highlight dots, pupils, freckles — raised dot; excellent for precise small details
- Fill Stitch: Large logo areas, fur texture fills — dense coverage for larger areas; can simulate texture through angle variation
- Appliqué Stitch: Large color blocks, layered fabric elements — fabric piece anchored with embroidery; efficient for large areas
Face Embroidery Engineering
Face Embroidery Engineering
Face embroidery is the most technically demanding element of plush toy production — requiring precise placement, correct stitch specifications, appropriate thread selection, and rigorous quality control across potentially thousands of units.
Symmetry — The Most Critical Requirement
The human brain is extraordinarily sensitive to facial symmetry. A minor horizontal misalignment between the left and right eye — even as little as 1–2 mm — is immediately perceived as ‘wrong’ and creates an unsettling, uncanny valley effect. KINWIN’s embroidery team uses placement templates (physical guides applied to the toy face before embroidery) and in-process symmetry checking for every unit to ensure left-right accuracy.
- Placement templates used for every unit before embroidery begins
- In-process symmetry checking — not statistical sampling
- ±0.5 mm placement accuracy target across entire production run
- Left-right axis verification on both horizontal and vertical planes
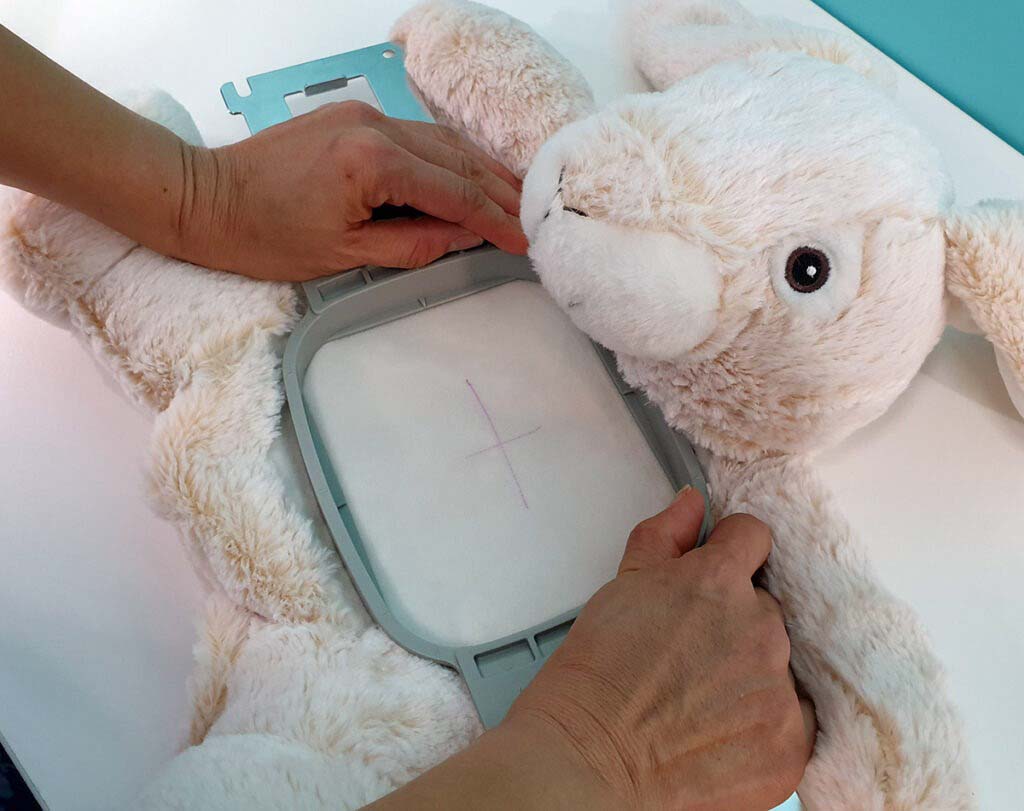
Placement on Pile Fabric — A Unique Challenge
Plush toy faces are embroidered onto pile fabric — which creates specific challenges that flat fabric embroidery does not have. Pile fabric shifts under the embroidery foot; the needle must penetrate the pile layer before reaching the base fabric; pile can obscure the stitching if not properly managed.
- Appropriate stabilizer backing used for all face embroidery positions
- Embroidery operators trained in pile management techniques
- Pile direction controlled before and after embroidery execution
- Post-embroidery pile grooming to ensure embroidery is fully visible
Thread Tension & Density Calibration
Too much thread tension pulls the fabric and distorts the toy’s face shape. Too little tension creates loose, looping stitches that catch on things and pull out over time. Thread density — the number of stitches per unit area — must be calibrated to the specific fabric pile height and density.
- Tension calibrated per fabric type for every project
- Stitch density specified per element in the embroidery file
- Long pile: higher density to prevent pile showing through
- Short pile: moderate density to prevent base fabric puckering
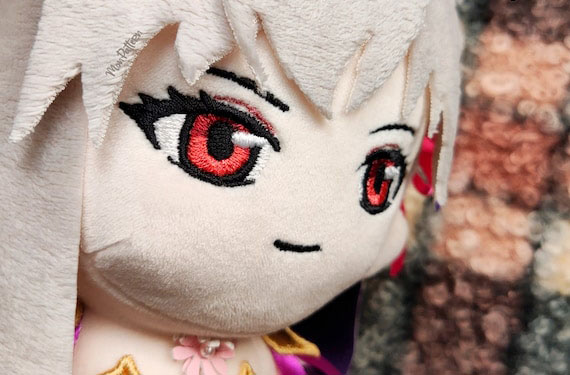
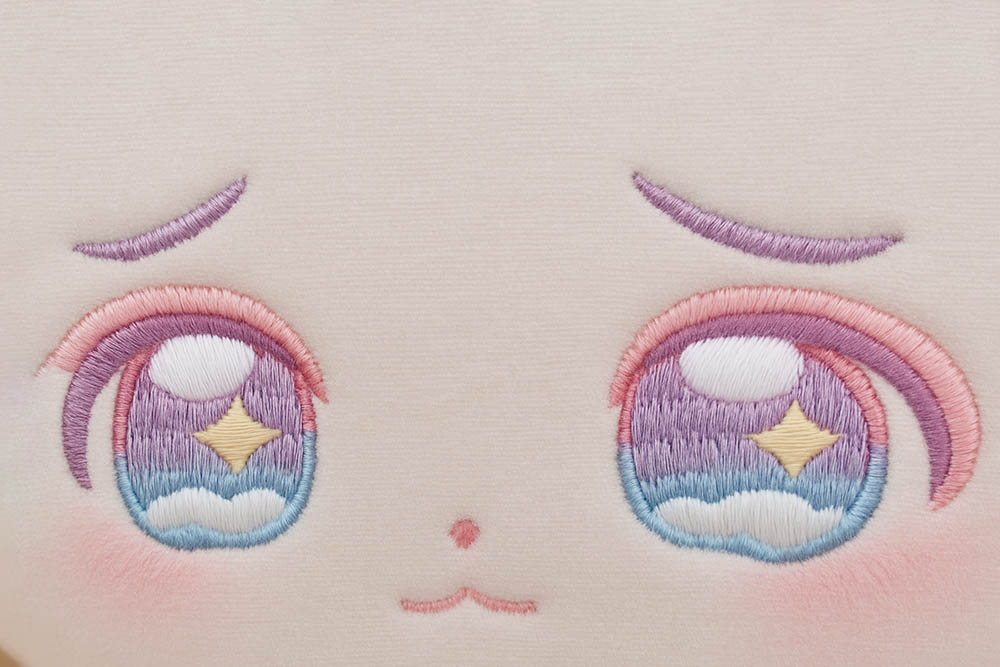
Eye Design & Expressiveness
The eyes are the single most important element of a plush toy’s face — they are what customers first look at and what determines the character’s perceived personality. Small differences in eye shape, size, angle, and positioning create dramatically different emotional expressions.
- Eye size specified in mm (height × width) in the tech pack
- Stitch type: typically satin stitch fill with highlight dot
- Thread color: Pantone TPX matched with physical confirmation sample
- Position coordinates defined relative to face panel center axis
Logo Embroidery on Plush Toys
Brand logo embroidery on plush toys requires a different approach from face embroidery — the technical requirements center on legibility, color accuracy, and durability rather than expressiveness.
Logo Digitization
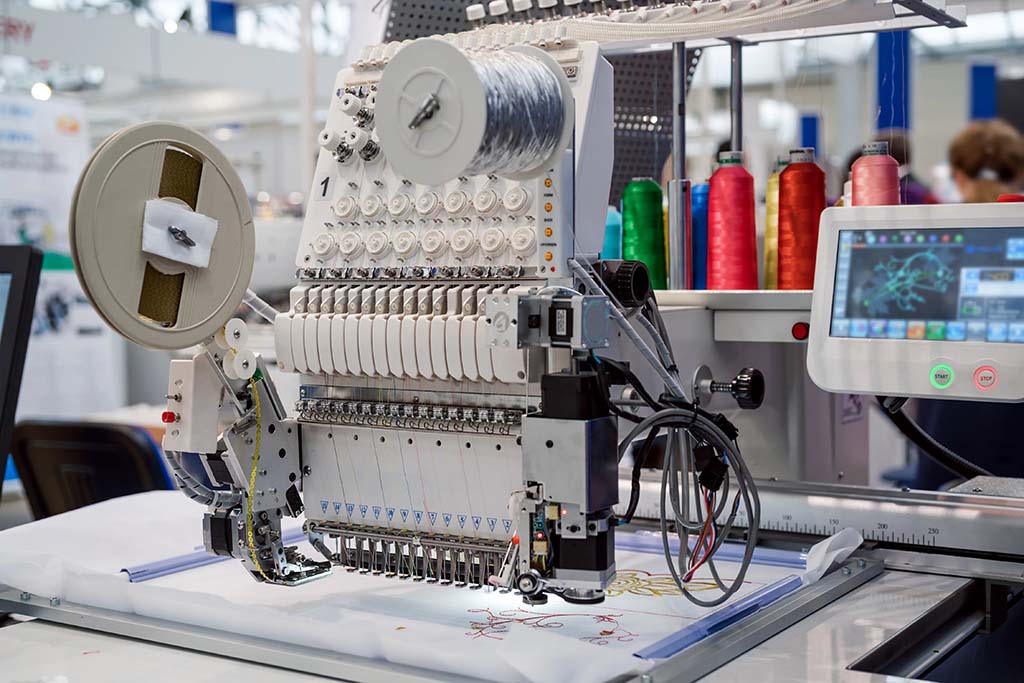
Before any logo can be embroidered on a plush toy, it must be digitized — converted from a vector or bitmap artwork file into an embroidery stitch file (.DST, .PES, .EXP format) that the embroidery machine can execute. Digitization is not automatic or AI-generated — it requires a skilled digitizer who understands how different stitch types, densities, and directions interact on pile fabric to produce the intended visual result.
- Stitch type selection by element: satin stitch for text and small shapes; fill stitch for large solid areas
- Underlay stitching: stabilizing stitches prevent pile movement and create a smooth base
- Pull compensation: stitches slightly enlarged to compensate for fabric pull
- Stitch direction: chosen to optimize thread sheen and visual consistency
- Color sequencing: efficient order minimizes thread changes and production time
Minimum Logo Size for Plush Embroidery
Pile fabric creates a unique challenge for small logo embroidery — the pile height obscures fine detail. General minimum size guidelines for plush toy embroidery:
- Short pile plush (2–5 mm): min. text height 4 mm, min. line weight 2 mm
- Long pile plush (15–35 mm): min. text height 8 mm, min. line weight 4 mm
- Sherpa / Teddy: min. text height 7 mm, min. line weight 4 mm
- Minky / Crystal Soft: min. text height 4 mm, min. line weight 2 mm
Logos with very fine detail, thin strokes, or small text that fall below these minimums should be redesigned or simplified for plush embroidery. KINWIN’s design support team advises on logo adaptation for embroidery production — modifying fine details to be production-feasible without compromising brand identity.
Logo Placement Positions
- Foot pad / sole — most common; flat surface provides ideal embroidery base; visible when toy is displayed sitting
- Chest / belly — highly visible in photography and on shelf; works well for character name or brand name
- Back of neck / collar area — clean, professional position for brand mark; mimics apparel labeling
- Ear — subtle, premium feel; works for simple logo marks or initials
- Clothing or accessories on character — if character wears clothing, logo on chest of outfit
Thread Color Matching for Plush Toy Embroidery
Thread Color Matching for Plush Toy Embroidery
Embroidery thread color matching is a separate process from fabric color matching and uses a different color reference system. Getting thread colors right is critical for character face accuracy and brand logo integrity.
Thread Color Reference Systems
The primary embroidery thread color systems used in professional plush toy manufacturing are Madeira, Sulky, Robison-Anton, and Isacord. These systems are cross-referenced to Pantone colors, but the correspondence is approximate rather than exact. KINWIN cross-references your Pantone TPX specifications to our thread color library and produces physical thread color confirmation samples for your approval before sampling begins.
KINWIN's Color Matching Process
- Pantone TPX specifications cross-referenced to thread color library
- Physical thread color confirmation samples produced before sampling
- Separate color confirmation for embroidery vs fabric — different systems
- Color records retained for batch-to-batch consistency on repeat orders
Common Color Issues & How to Avoid Them
- Eye highlight dots: always specify size in mm in the tech pack — too small disappears into pile; too large looks unnatural
- Nose color on light fabric: dark embroidery can ‘bloom’ lighter on pile than on flat swatch — always confirm on physical sample
- Multi-color face elements: ensure sufficient stitch density to prevent visual bleeding between adjacent colors on pile fabric
- Thread sheen vs fabric sheen: high-sheen polyester thread on Minky fabric may be less visible — thread type selection should consider base fabric surface

Embroidery Quality Control Standards
Embroidery Quality Control Standards
KINWIN applies a multi-stage embroidery quality control process across every production run — from pre-production golden sample through to final shipment.
Pre
Golden Sample Establishment
- Approved final sample establishes the golden standard for all embroidery elements
- Face placement coordinates, symmetry, thread colors, and stitch density documented
- Logo positioning and size confirmed against approved brand file
- Golden sample retained throughout production run as visual benchmark
During
In-Process Checks
- Left-right eye symmetry checked on every unit — horizontal and vertical alignment
- Correct facial feature placement relative to face panel center verified
- Thread color consistency confirmed against golden sample
- Stitch density adequacy and absence of thread loops or loose ends
- Any unit with embroidery defects removed from line for correction or rejection
Final
100% Visual Inspection
- Every finished unit visually compared against golden sample before packaging
- Symmetry, color match, stitch coverage completeness checked
- Absence of puckering or fabric distortion verified
- Highlight dot placement confirmed
- Brand logo legibility and alignment verified
- Failed units rejected before packaging — no exceptions
Embroidery vs Other Branding Methods
Embroidery vs Other Branding Methods — When to Choose What
For brand logos on premium plush toys, embroidery is the default recommendation — it is the only method that communicates permanent quality and brand ownership without risk of peeling, fading, or removal. For highly detailed or multi-color graphics, heat transfer printing on smooth fabric areas can supplement embroidery. Woven labels are ideal for care instructions and legal information.
Why Embroidery Is the Default Choice for Premium Plush
- Permanent — cannot be removed without destroying the product
- Communicates premium quality and brand ownership
- Durability: ★★★★★ — unaffected by washing, handling, or age
- Best for: logos, brand marks, character faces, detail elements
- No risk of peeling, fading, or removal
- Becomes part of the toy’s structure — not applied on top
When Other Methods Complement Embroidery
- Woven Label: best for brand name, legal info, care instructions — permanent, highly detailed, low cost
- Heat Transfer: best for complex multi-color graphics on smooth fabric — very high detail, but ★★★☆☆ durability
- Silicone Patch: best for 3D logo effect and texture detail — very good durability, medium cost
- Screen Print: best for flat logo on smooth fabric areas — good durability, low cost
- Hangtag: best for brand story, QR codes, barcodes — highest detail possible, but removable
Why KINWIN’s Embroidery Capability Stands Apart
Why KINWIN's Embroidery Capability Stands Apart
In plush toy manufacturing, the face is everything — and embroidery is what creates the face. KINWIN’s embroidery team has the specialist expertise, quality control systems, and production discipline to get it right, every unit, every batch.
✓ Dedicated embroidery team with specialist training in plush toy face construction
✓ Placement template system for consistent face positioning — ±0.5 mm accuracy
✓ Pantone TPX cross-reference to thread color library with physical confirmation samples
✓ In-process symmetry checking on every unit — not statistical sampling
✓ Full logo digitization service from your vector artwork or brand file
✓ Logo size and detail adaptation advice for pile fabric compatibility
✓ Embroidery color confirmation samples before sampling begins
✓ 100% final visual inspection comparing every unit to golden sample
✓ 30+ years collective pattern-making and embroidery experience in the team
In plush toy manufacturing, the face is everything — and KINWIN gets it right, every unit, every batch.
Frequently Asked Questions — Plush Toy Embroidery
Frequently Asked Questions — Plush Toy Embroidery
Q1. Why does my plush toy face look slightly different from my 2D character artwork?
Some degree of translation difference between 2D artwork and 3D embroidered plush toy face is inherent and unavoidable. Pile fabric has texture and depth that flat digital artwork does not; embroidered stitches have physical texture and sheen that digital color fills do not replicate exactly; and the three-dimensional curved surface of a plush toy face changes how embroidery elements relate to each other. KINWIN’s design alignment process reviews these factors before sampling begins and pre-agrees how the character will be interpreted in embroidery form. Our 95%+ similarity target accounts for the inherent 2D-to-3D translation difference.
Q2. How do I provide my logo for embroidery — what file format do you need?
For logo embroidery, the ideal input is a vector file (AI, EPS, or SVG format) with clear separation of colors and clean outlines. If you only have a raster file (PNG, JPG), high resolution (300 dpi+) with a transparent background is acceptable. KINWIN’s digitization team converts your logo artwork into an embroidery stitch file — you do not need to provide a pre-digitized embroidery file. We produce a digital stitch preview and a physical embroidery sample on the actual fabric before confirming the logo for production. If your logo has very fine details or thin strokes that may not reproduce well at small sizes on pile fabric, our team will advise on simplification options.
Q3. Can embroidery details be consistent across large production runs of thousands of units?
Yes — this is exactly what KINWIN’s production system is designed to achieve. Consistency across large production runs is achieved through: digitized embroidery files (the same machine file eliminates human variation), placement templates (physical positioning guides ensure identical coordinates across all units), in-process checking (operators verify symmetry and color on every unit), and golden sample comparison at final QC. For face embroidery specifically, our template system achieves ±0.5 mm placement accuracy across the production run.
Q4. What is the minimum size logo that can be embroidered on a plush toy?
Minimum embroiderable size depends on the fabric type. On short pile plush (2-5mm pile), text can be as small as 4mm height and line weights as thin as 2mm. On long pile plush (15-35mm pile), minimum text height rises to 8mm and minimum line weight to 4mm. At these minimums, fine detail will be lost and only clean, simplified shapes will read clearly. For logos with complex detail, fine text, or thin strokes, KINWIN recommends creating a simplified embroidery-optimized version for small-size plush applications, alongside your full-detail logo on hangtags or packaging.
Q5. Can face embroidery be changed between production batches — for seasonal expression variants?
Yes. Changing face embroidery between batches is one of the most cost-effective ways to create product variants from the same base character. Seasonal expression variants — Halloween concerned expression, Valentine heart-eye edition, Christmas winking version — share the same body pattern, fabric, and filling, requiring only a new embroidery file and confirmation sample. This dramatically reduces development cost compared to creating an entirely new character design. KINWIN maintains your approved embroidery files on record and can produce new expression variants with a 5-7 day sampling turnaround from your expression brief.
If You Can lmagine lt,We Will Create lt!
1.Tell Us What You Need
Tell us as specific as possible of your needs and share your idea.
2.Get Solution & Quote
We will work on the best solution according to yourrequirements,the specific quote will be provided within 24 hours.
3.Approve for Mass Production
We will start mass production after getting your approval.