When people design plushies, they often focus on the head, face, and overall body. But the hip area is where balance, sitting pose, and body shape really come together. If the hip pattern is wrong, your plushie may fall over, twist, or look “flat” from the side.
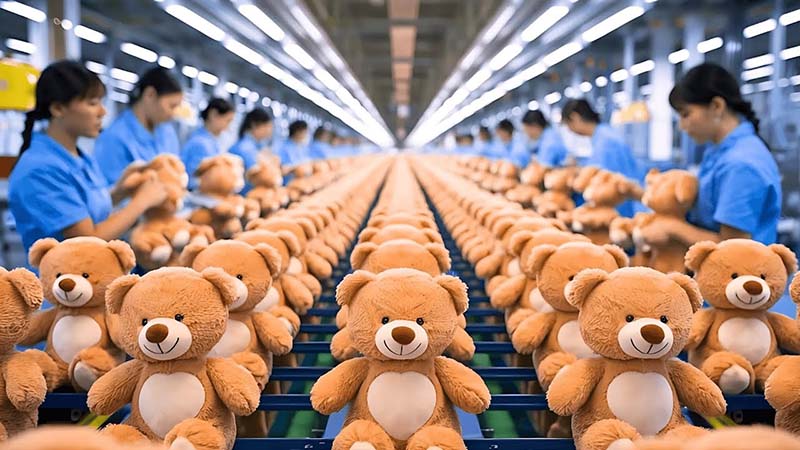
As a plush toy manufacturer in China, I work with pattern makers who spend a lot of time on hips, tummies, and lower bodies. In this guide, I’ll show you, in simple English, how to design and build a strong, cute plushie hip—from materials and pattern drafting to stitching, stuffing, and final quality checks.
What materials and tools are needed to make a plushie hip piece?
Before you start drafting or sewing, it helps to prepare a small “hip toolkit.” The hip piece will carry a lot of weight from stuffing, so you want stable fabric, reliable thread, and clear measuring tools. You do not need expensive equipment; you just need the right combination.
For most plush hip designs, you will use the same main fabric as the rest of the body, but sometimes you may add inner support fabric or extra reinforcement at the hip seam. This is useful for plushies that need to sit firmly or stand without falling.
Here’s how I think about the essentials:
- Outer fabric: short plush, minky, velboa, or similar.
- Inner support (optional): woven fabric patch where joints and hip curves need more strength.
- Stuffing: good polyester fiberfill or mix with pellets for weight.
- Tools: rulers, curve rulers, pins, clips, markers, sewing machine or hand-sewing tools.
A small amount of extra planning at this stage makes pattern work and testing smoother later.
Table 1 – Materials and tools for a plushie hip piece
| Category | Recommended Options | Why They Help for Hip Construction |
|---|---|---|
| Outer fabric | Short plush, minky, velboa | Soft touch, good stretch, easy to shape around curves |
| Inner support (optional) | Thin woven cotton or polyester patches | Adds strength where body and hip seams meet |
| Thread | Polyester sewing thread | Strong, low stretch, handles repeated stuffing pressure |
| Needles | Universal or ballpoint (machine), sturdy hand needle | Suitable for knit-plush backing, reduces skipped stitches |
| Stuffing | Polyester fiberfill, high-resilience fiber | Keeps hip firm but still squeezable |
| Added weight (optional) | Pellets in inner pouch | Helps plush sit or stand more stably |
| Marking tools | Fabric pen, tailor’s chalk, fine marker for paper | Clear hip cutting and alignment markings |
| Measuring tools | Ruler, tape measure, grid paper | Controls width, height, and curve placement |
| Fixing tools | Pins or clips | Holds hip panels together while sewing curves |
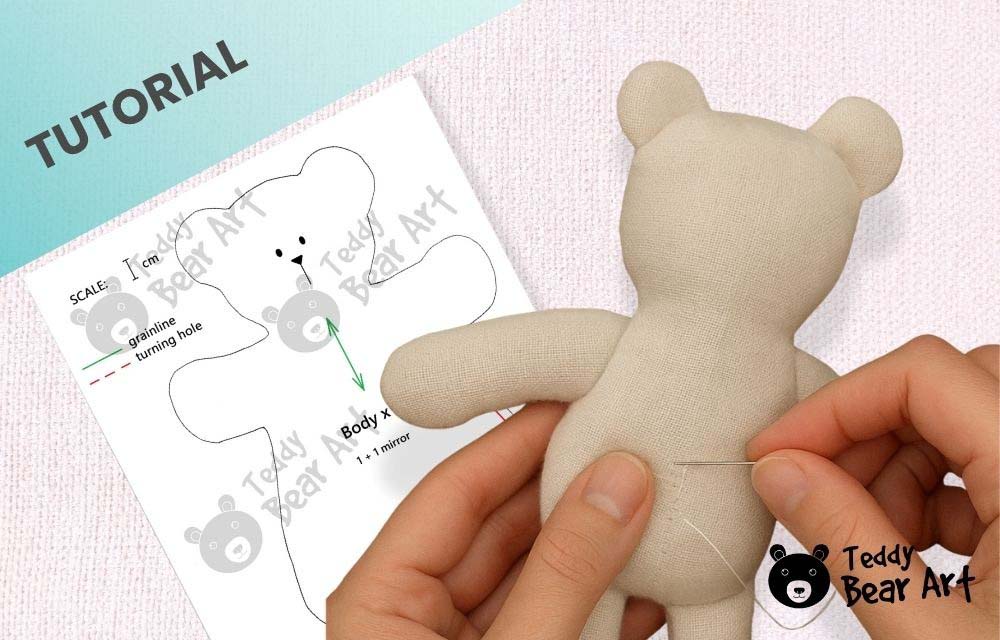
How do you draft a hip pattern that fits your plushie’s proportions?
A good hip pattern starts from overall body proportion. The hip area is not isolated; it must match the waist, legs, and tail (if any). When I draft a plushie body, I decide key measurements first and then create hip curves that support the pose.
A simple process looks like this:
- Decide total body length and how much of that is hip/upper leg area.
- Draw a side view of the plushie at full size (profile) and mark the hip zone.
- Draw a front view and define how wide the hips should be relative to the chest.
- Break the body into upper torso and hip/lower body panels if needed.
- Draft flat hip shapes based on these widths and curves.
For beginners, a basic hip can be drafted as part of a single body piece, then later refined into separate hip pieces for more advanced shapes.
Table 2 – Planning hip pattern proportions
| Design Decision | Typical Approach | Effect on Hip Pattern |
|---|---|---|
| Overall plush height | Choose a target (e.g., 25 cm, 35 cm, 45 cm) | Sets the framework for hip height and width |
| Hip height vs body height | 1/3 or 1/4 of total body length for many plushies | Decides how “long” the lower body will look |
| Hip width vs chest width | Same as chest for neutral style; wider for “chubby” | Affects stability and visual weight |
| Hip depth (side view) | Slight curve back for sitting plushies | Supports stable sitting position |
| Connection to legs | Decide if legs are separate pieces or formed by darts | Controls how complex the pattern must be |
| Tail or back detail | Add extra seam or notch if tail attaches at hip | Prevents distortion when tail is stuffed and attached |
When you draft, always include center lines and notches at important points—such as side seams and leg joins—so you can align pieces correctly when you sew.
How do stitching methods shape and reinforce the plushie’s hip area?

Stitching is where the hip pattern turns into a real structure. The hip seams must handle both stuffing pressure and movement when the plush is squeezed, sat on, or repositioned.
In factory work, we treat hip seams as high-stress areas, similar to neck and underarm seams. Even for DIY plush, you can copy this thinking:
- Use shorter stitch length (e.g., around 2–2.5 mm on most machines).
- Sew curves slowly, keeping seam allowance even.
- Reinforce key joints with a second line of stitching or backstitching.
If legs are attached at the hip seam, this seam becomes even more important. Sometimes we add a small inner patch of woven fabric behind the joint area to stop stretching and tearing.
Table 3 – Stitching choices and their impact on hip performance
| Stitching Aspect | Recommended Method | Benefit for Hip Shape and Strength |
|---|---|---|
| Stitch length | Shorter stitch (around 2–2.5 mm) | Stronger seam, better control on curves |
| Seam type | Straight stitch plus optional second pass | Extra security for high-stress zones |
| Reinforcement | Backstitch at start/end; extra lines at leg joins | Prevents seams from opening under stuffing |
| Inner patch support | Small woven patch at hip joint | Reduces stretch and tearing near leg seams |
| Curve sewing technique | Sew slowly, turn fabric gradually, keep allowance steady | Cleaner curves and fewer puckers |
| Hand-sewing finishing | Ladder stitch for closing openings in hip area | Nearly invisible finish and strong closure |
Smooth, strong hip seams help your plush sit “naturally.” Poorly sewn seams can cause strange bulges, asymmetry, or visible wrinkles once stuffing goes in.
How is stuffing applied to achieve stable hip structure and balance?
Stuffing is where many plushies win or lose their shape. The hip area is a foundation: it supports the body and sometimes the legs. Too soft, and the plush falls over. Too hard, and it looks stiff and uncomfortable.
I like to think of hip stuffing in layers:
- Base layer – A firm, even layer that defines the basic curve.
- Support layer – Extra stuffing where weight needs to sit (for example, at the back for sitting plushies).
- Surface layer – A softer layer near the fabric to keep the outside smooth.
If you use pellets, it is safer to put them into a separate inner pouch (a small fabric bag) located deep inside the hip, and then surround that pouch with fiberfill. This prevents pellets from leaking and keeps the outside still soft.
Table 4 – Stuffing strategies for a stable plushie hip
| Stuffing Step | Practical Approach | Effect on Hip Structure |
|---|---|---|
| Base stuffing | Pack fiberfill into deepest part of hip first | Builds a solid base so plush doesn’t collapse |
| Back support zone | Add extra stuffing behind hip (especially for sitting designs) | Helps plush sit upright without falling back |
| Side balance | Add stuffing evenly on both sides; compare by touch | Keeps hips symmetrical and prevents leaning |
| Surface smoothing | Use small pieces near fabric, avoid large “chunks” | Reduces lumps and uneven lines |
| Pellets (optional) | Place in inner pouch, then surround with fiberfill | Adds weight without hard spots near fabric |
| Testing balance | Sit or stand plush on a flat surface, adjust stuffing slowly | Fine-tunes stability and centre of gravity |
Take your time here. Often, a few extra minutes adjusting the hip stuffing will make the difference between a plush that always tips over and a plush that looks “alive” and balanced on a shelf.
How do you adjust hip curves for different plushie styles and poses?
Different plush styles need different hip shapes. A chubby, sitting plush has a very different hip curve from a slim, standing character. When we design for clients, we always start from the intended pose and personality of the plush.
Some common hip styles:
- Sitting plush – More rounded back and base, sometimes wider hips, strong support at the bottom.
- Standing plush – More vertical hip curve, smoother transition into legs, balanced front and back.
- Chibi or super-deformed style – Wider hips and body for a “squishy” look.
- Elegant or slim characters – Narrower hips with softer curves, less volume.
You can adjust hip curves by:
- Adding or removing width in the hip region of the body panel.
- Changing the curve of the side seam (from waist to leg join).
- Modifying darts or adding extra panels to control volume.
Table 5 – Hip curve adjustments for different plush styles
| Plush Style / Pose | Hip Curve Characteristics | Pattern Adjustment Ideas |
|---|---|---|
| Sitting plush | Fuller back curve, flatter bottom surface | Add width at lower back, flatten base curve |
| Standing plush | More vertical side seam, moderate hip width | Reduce back bulge, keep bottom slightly rounded |
| Chubby / “cute” style | Wide hips, strong belly and back volume | Add width on side seams and center front/back |
| Slim / elegant style | Narrower hips, soft but smaller curve | Trim width, use gentle S-curve on side seam |
| Dynamic pose (leaning, tail up) | Asymmetry or targeted volume | Adjust one side more than the other, plan for tail support |
| Tail-heavy designs | Extra support above tail area | Increase volume and reinforcement near tail join |
When you change curves, always test with a new prototype. Even a small change in hip curve can shift the way the plush stands or sits.
How do quality checks ensure a clean, symmetrical finished hip?

Quality checks are the last step, but they are just as important as pattern or stitching. A clean, symmetrical hip area makes the whole plush look more professional—especially when customers view it from the side or back.
In our factory, inspectors always check the lower body carefully:
- Are seams straight and smooth?
- Are left and right hips the same shape and size?
- Does the plush sit or stand as planned?
- Are there any wrinkles, empty spots, or overstuffed areas?
You can create a small hip checklist for your own work.
Table 6 – Hip quality checklist for finished plushies
| Checkpoint | What to Look For | If There’s a Problem, Consider… |
|---|---|---|
| Symmetry | Left/right hip size and curve match | Adjust stuffing or revise pattern on one side |
| Seam smoothness | No obvious wrinkles, tucks, or pulled spots | Review stitching tension and seam allowance |
| Balance | Plush sits/stands without leaning or rolling | Rebalance stuffing, add or move weight |
| Hip–leg connection | Legs attached at matching height and angle | Correct attachment points or refine join shape |
| Surface texture | Fabric not overstretched or distorted | Reduce stuffing, or increase hip pattern volume |
| Overall look | Hip matches intended style (chubby, slim, etc.) | Minor pattern tweaks to hip width or curve |
If you produce many pieces, taking sample photos of front, side, and back views can help you compare batches and keep a consistent “Hip Standard” for your plush line.
Conclusion
A well-made plushie hip is quietly doing a lot of work: it supports the body, anchors the legs, stabilizes the pose, and shapes the overall silhouette. When you choose suitable materials, draft hip patterns that match body proportions, sew strong curves, plan stuffing carefully, adjust hip shapes for different styles, and finish with clear quality checks, your plushies will look more balanced, sit or stand better, and feel truly professional in the hands of your customers.
At Kinwin, my team and I use this kind of detailed thinking in every OEM & ODM project—from simple mascots to complex characters. If you want help turning your plush ideas into factory-ready patterns with strong, stable body and hip construction, you are very welcome to contact me at [email protected] or visit kinwintoys.com to explore how our factory can support your next plush collection.