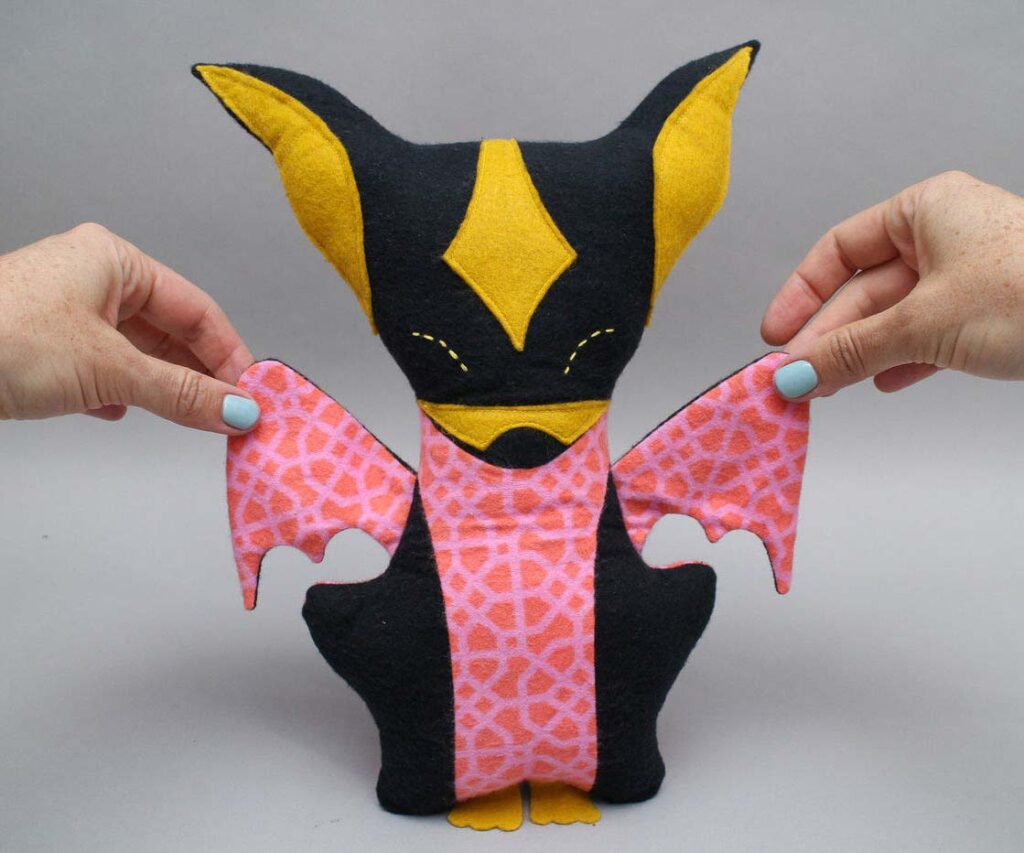
Making your own plushie is one of the best ways to test ideas, explore new characters, and understand how plush toys really work. Even if you later move to factory production, a handmade sample helps you see problems early and communicate better with your supplier.
A good plushie comes from a clear plan: the right materials and tools, a simple but correct pattern, strong and tidy sewing, controlled stuffing, safe details, and careful finishing. When you follow a step-by-step process, your handmade plushie will not only look cute, but also feel durable and professional enough to show to partners, buyers, or factories.
In this guide, I will share how I think about “make your own plushie” from both a DIY and manufacturing point of view, so you can enjoy the creative process and also prepare for future scale-up.
What materials and tools are essential for making your own plushie?
Before you cut or sew anything, it is important to gather the right materials and tools. The quality of your plushie depends more on these basics than on any single trick. Good fabric, safe stuffing, and simple but reliable tools make the work smoother and the final plushie stronger.
For a typical handmade plushie, you need soft fabric (like minky or fleece), polyester stuffing, strong thread, and a small set of tools: fabric scissors, pins or clips, hand needles, a sewing machine if you have one, and a marking pen. You do not need expensive equipment to make a good first plushie. The key is clean tools, safe materials, and a calm, step-by-step approach.
Core materials for a beginner-friendly plushie
Here is a simple overview you can use as a shopping or checking list:
| Item Type | Recommended Choice for Beginners | Why It Helps |
|---|---|---|
| Main fabric | Minky, velboa, or soft fleece | Soft, forgiving, easy to sew and cuddle |
| Lining (optional) | Thin cotton or polyester | Supports thin areas like neck or base |
| Stuffing | Polyester fiberfill | Light, washable, easy to control by hand |
| Thread | Polyester all-purpose thread | Stronger and less stretchy than cotton |
| Needles | Universal machine needles + sharp hand needles | Smooth sewing and neat hand finishing |
| Marking tool | Fabric pen, chalk pencil | Lets you draw patterns without permanent marks |
Basic tools that make plushie making easier
You can sew a small plushie with only a hand needle and scissors, but a few extra tools improve accuracy and save time.
| Tool | Main Use | Tip from Factory Practice |
|---|---|---|
| Fabric scissors | Cutting fabric cleanly | Keep them only for fabric, not for paper |
| Small snips | Trimming threads | Help keep seams tidy and professional |
| Pins or clips | Holding pieces together before sewing | Clips are safer around thick pile fabrics |
| Ruler / tape | Measuring pattern pieces | Helps keep both sides of the plushie symmetrical |
| Seam ripper | Carefully undoing mistakes | Normal in both DIY and factory work |
| Stuffing stick | Pushing stuffing into small areas | A smooth chopstick also works very well |
Once you have these basics ready, the whole process feels much less stressful. You can then focus on design and shaping, not on fighting with poor tools.
How do you design and draft patterns for accurate plushie shaping?
Your plushie pattern is the “skeleton” of the toy. Even with beautiful fabric, a weak pattern will create strange proportions, twisted bodies, and shapes that do not sit or stand well. A clear pattern, even if simple, gives you control over the final look.
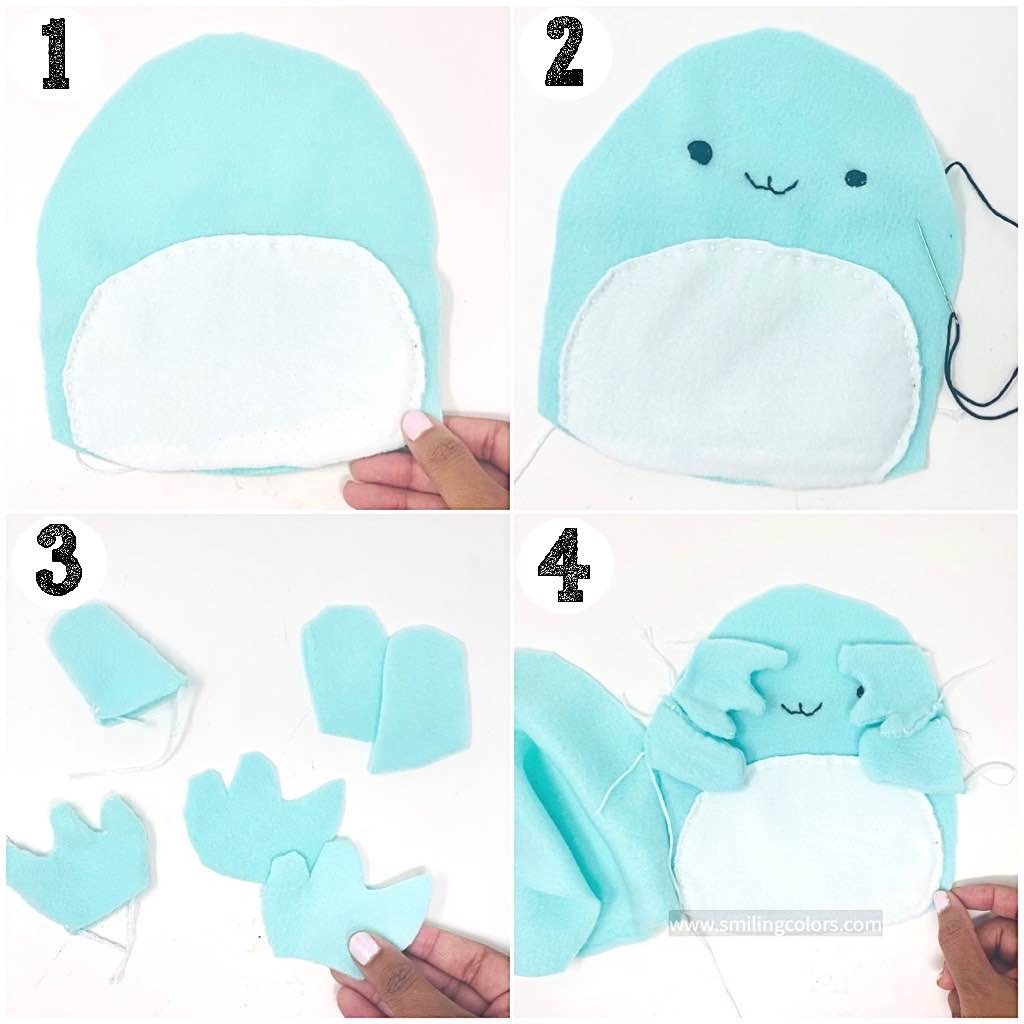
To design a pattern, you start with a front and side sketch of your plushie, decide how simple or detailed you want it to be, then break the drawing into pattern pieces with seam allowance. You do not need art-school skills. What you need is clear reference images, a defined style (realistic or chibi), and patience to test and adjust one or two times.
Simple workflow for drafting a plushie pattern
Here is a beginner-friendly pattern flow you can follow:
| Step | What You Do | What to Watch For |
|---|---|---|
| 1. Collect refs | Gather 2–3 photos or drawings of your character | Look at head size, body length, limb thickness |
| 2. Rough sketch | Draw front and side views on paper | Keep shapes simple; focus on silhouette |
| 3. Decide style | Choose realistic, semi-realistic, or chibi | Bigger head = cuter but less realistic |
| 4. Split pieces | Mark where seams should go (sides, back, belly) | Avoid too many tiny pieces at first |
| 5. Add allowance | Add 0.5–1 cm around each piece for seams | Keep seam allowance consistent across pieces |
| 6. Test pattern | Cut from cheap fabric, sew, and stuff a test | Mark on the sample where you want changes |
Tips to make your pattern more accurate
- Keep it symmetrical: Fold the paper in half when drawing one side, then cut so left and right match.
- Start with fewer panels: A simple two-panel body (front and back) is easier than a complex multi-panel design.
- Use “test fabric” first: Old sheets or cheap fleece are perfect for the first try. Save premium plush fabric for your second or third sample.
- Adjust from the stuffed sample, not only on paper: Once stuffed, you will see real-world issues like a neck that bends too much or legs that are too short.
This is the same logic we use in our factory R&D. We always treat the first sample as a learning step, not a final product. You can do the same at home or in your studio.
What sewing and assembly techniques create clean, durable plushies?
Once your pattern is ready, sewing and assembly decide how strong and tidy your plushie will be. Clean seams, correct sewing order, and small reinforcements at stress points make a big difference to how your handmade plushie survives daily hugs.
For most plushies, a simple straight stitch with a medium stitch length is enough for major seams. You sew details first (ears, tails), then larger panels (head, body), and finally close the opening by hand after stuffing. Reinforcing high-stress areas such as neck, limb joins, and base helps your plushie stay solid over time.
Basic seam choices for handmade plushies
You do not need many techniques to start. Focus on one or two strong, simple seams and repeat them consistently.
| Seam / Technique | Where to Use It | Why It Helps |
|---|---|---|
| Straight stitch | Most body seams | Strong and easy to sew on any machine |
| Backstitch (hand) | Small areas, repairs, no machine | Strong hand stitch, good for tiny pieces |
| Ladder stitch | Final closing point after stuffing | Nearly invisible, keeps surface smooth |
| Reinforcement stitch | Start and end of seams, limb joins | Prevents seams from opening with use |
Assembly order that keeps things under control
A clear assembly order reduces confusion and mistakes. Here is a simple order used in many plush projects:
- Prepare details first
- Sew ears, tails, small fins, or wings.
- Add any embroidery or small appliqué while pieces are still flat.
- Sew the head
- Join head panels as the pattern shows.
- Attach ears and maybe a separate muzzle if your design has one.
- Sew the body
- Join body panels, leaving one opening for stuffing (often at the back or bottom).
- Attach tail into the seam if needed.
- Attach limbs
- Sew arms and legs, turn right side out, and lightly stuff if your design needs firmer limbs.
- Attach them to the body seam line or hand sew them on later.
- Combine head and body
- Either sew as a single unit from the beginning, or attach the stuffed head to the stuffed body with tight hand stitches.
This is almost the same logic we use on industrial lines, just slower and by hand. If you practice one simple sewing route, your results will quickly look more professional.
How is stuffing applied to achieve balanced softness and structure?
Stuffing gives your plushie its volume, softness, and posture. Too much stuffing makes seams hard and faces distorted. Too little stuffing makes the plushie look tired and empty. The goal is balance: a plushie that feels soft and springy, but still holds its shape.
The easiest way to control stuffing is to work in small pieces, fill from far areas toward the opening, and treat each body zone differently. The head often needs more density than the body; the base may need extra filling or pellets to sit well; limbs need enough stuffing to feel stable but still squeezable.
Stuffing strategy by zone
You can use this simple guide while you stuff by hand:
| Plushie Zone | Target Feel | Stuffing Tips |
|---|---|---|
| Head | Smooth, full, expressive | Add small tufts; shape cheeks and top carefully |
| Face / muzzle | Well-defined but soft | Avoid one big lump; press from outside to shape |
| Body / torso | Medium soft, no big hollows | Add a bit, then test by squeezing from both sides |
| Limbs | Enough firmness to hold shape | Push stuffing to ends first (hands/feet) |
| Base / bottom | Stable sitting or standing | Pack slightly firmer; pellets optional if safe |
Practical stuffing tips from factory experience
- Use small pieces of fiberfill instead of one big piece. This gives a smoother surface.
- Keep checking symmetry. Compare left and right sides with your hands and eyes.
- Shape while you go, not only at the end. Gently roll and press the plushie with your palms to blend the stuffing.
- If you want a weighted feel, place pellets inside a small inner bag (made from plain fabric) and put that bag deep inside the body. This helps avoid leaks and keeps the weight in the right place.
If something feels wrong, do not be afraid to open the seam again and remove or adjust stuffing. In both DIY and factory work, editing the stuffing is normal and often necessary.
How do you add facial details and accessories safely and securely?
The face is the heart of your plushie. One millimeter up or down can change the mood completely. At the same time, facial details and accessories must be safe, especially if children may use the toy. Good design here means both charm and security.
For most handmade plushies, embroidered or felt faces are the safest and most stable options. If you use plastic safety eyes or noses, you must install them correctly and understand that they are not suitable for very young children. Accessories like scarves, bows, or bags should be sewn on firmly or made removable for older users.
Options for safe and stylish faces
Here is a simple overview of common face methods and when they work best:
| Feature Type | Technique | Best For | Safety Note |
|---|---|---|---|
| Eyes (soft) | Embroidered or felt appliqué | All ages, especially babies and toddlers | No hard parts; very secure when sewn well |
| Eyes (plastic) | Safety eyes with washers | Older children, teens, adults | Must be attached before stuffing |
| Nose & mouth | Embroidery or small felt pieces | Most plushies | Keep stitches tight and thread ends hidden |
| Blush / detail | Fabric paint, soft pastel (sealed) | Decorative pieces, adult collectors | Test for colorfastness before selling |
Accessories that stay cute and secure
Accessories help your plushie show more character and match certain themes or seasons. For example, a small scarf makes a winter plush; a tiny bag or badge makes a student or worker theme.
Simple rules to keep them safe:
- Avoid very small beads or loose charms if children might use the plushie.
- Sew key accessories (like scarves) at a few points so they do not come off in normal use.
- If accessories are meant to be removable for styling, make this clear and keep them bigger and safer in size.
- Always secure threads well and hide knots inside the plush or accessory.
In our factory work, we often build face and accessory steps into the flat stage (before assembly) for better control. You can do the same at home: add most details before you close and stuff the plushie, so you can still work comfortably.
What finishing steps and quality checks ensure a polished handmade plushie?
Finishing is where your homemade plushie starts to look like a product. Small actions such as trimming threads, checking seams, and smoothing the surface can change the first impression from “home project” to “professional sample.”
Good finishing means cutting all loose threads, checking for holes or weak seams, brushing or steaming the fabric if needed, and doing a short safety check. Even if you make just one plushie, this habit will help a lot when you later send samples to factories or buyers.
Simple finishing checklist for your plushie
Use this table as a final review before you gift, sell, or show your plushie:
| Check Area | What to Do | Pass Condition |
|---|---|---|
| Threads | Trim all visible loose threads | No long threads hanging from seams or face |
| Seams | Gently pull along seams and limb joins | No gaps, no cracking sounds, no open stitches |
| Stuffing | Squeeze body, head, and limbs | No hard lumps or empty spots |
| Symmetry | Compare left and right sides | Ears, eyes, arms, and legs align visually |
| Surface | Brush or smooth fabric with hand or soft brush | Fur lies nicely, no big wrinkles |
| Accessories | Pull lightly on bows, scarves, tags | They stay in place as planned |
Quick safety and use tests
For any plushie that may go to a child or frequent use, add these quick tests:
- Shake test: Hold the plushie and shake it. Check that no parts loosen or fly off.
- Tug test: Pull gently on ears, arms, and tail. They should not feel like they will come off.
- Color check: Rub a small white cloth on colored areas with a bit of water. Make sure the color does not transfer easily.
This careful finishing mindset is very similar to what we do with mass production. When you already think like this in your handmade work, you are much better prepared to communicate quality expectations to a factory partner later.
Conclusion
Making your own plushie is a powerful way to explore design, understand construction, and prepare for future professional production. At Kinwin, we help global buyers turn these early ideas into safe, scalable plush lines that keep their softness and charm from sample to mass order—email [email protected] or visit kinwintoys.com to discuss how our factory can support your next plushie project.