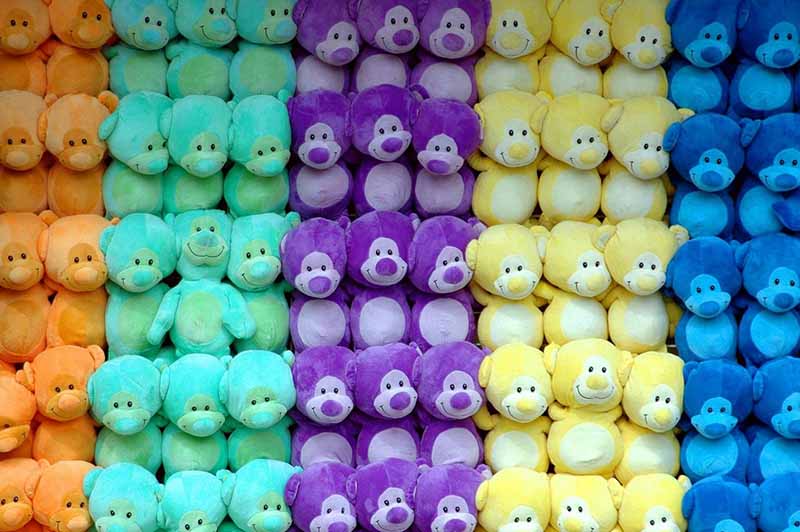
Weighted stuffed animals are becoming very popular with kids, teens, and even adults who want extra comfort, focus, or a deeper sense of calm. When the design and construction are done well, a weighted plush feels like a hug you can pick up any time. When done badly, it can be unsafe, unbalanced, or easy to break.
I’m Amanda from Kinwin, a plush toy factory in China. In this guide, I’ll walk you through how to make weighted stuffed animals in a way that is safe, durable, and realistic for long-term use. I’ll keep the language simple so you can use this as a reference whether you are a DIY maker, a small brand, or a buyer planning a new product line.
We’ll look at materials, safe weight rules, sewing and reinforcement, internal containment, basic safety standards, and final testing—step by step.
What materials and tools are required to make weighted stuffed animals?
Weighted stuffed animals start from the same basics as regular plush, but with extra attention on filling quality and seam strength. If you choose poor materials, the toy will feel uneven, wear out quickly, or even leak pellets.
From my factory experience, I always think in three layers:
- Outer shell – plush fabric, lining, and small details.
- Soft filling – fiberfill for shape and hug feel.
- Weight system – pellets or beads, wrapped and contained.
For durability and comfort, each layer has to be chosen carefully.
Recommended materials and tools
| Category | Recommended Options | Why They Work Well for Weighted Plush |
|---|---|---|
| Outer fabric | Short plush, minky, fleece | Soft handfeel, strong enough to support extra weight |
| Lining (optional) | Tricot knit, light woven fabric, felt panels | Adds strength in belly, base, and high-stress zones |
| Soft filling | High-quality polyester fiberfill | Keeps plush cuddly, fills gaps around weight bags |
| Weight materials | Poly pellets, glass beads in sewn inner pouches | Provide consistent weight; easier to control and contain |
| Thread | Strong polyester sewing thread | Holds seams under extra stress and repeated handling |
| Needles | Universal or ballpoint machine needles, hand needles | Suitable for plush fabrics and multiple layers |
| Tools | Scissors, pins/clips, measuring tape, chalk, stuffing tool | Enable accurate cutting, sewing, and filling |
| Safety extras | Seam ripper, fabric patches, extra labels | For repairs, reinforcement, and clear user information |
If you plan to sell your weighted plush, it’s worth standardizing your materials so you can repeat the same feel and performance from batch to batch.
How do you determine safe weight, filling type, and distribution?
Weight is the heart of a weighted stuffed animal. Too light and users feel nothing. Too heavy and the toy becomes uncomfortable or even unsafe—especially for children or people with certain health conditions.
There is no single global rule for weighted plush, but many people borrow guidance from weighted blankets, which are often recommended around 5–10% of body weight when used under professional advice. For plush, I suggest staying lighter and focusing on comfort and control rather than pushing weight limits.
Practical weight-planning ideas
| User Type / Scenario | General Weight Approach* | Notes |
|---|---|---|
| Young children | Very light weight; focus on comfort, not therapy | Always supervised; avoid chest/neck placement |
| Older children / teens | Light–moderate weight that feels clearly present | Use on lap, beside body, or for hugging |
| Adults | Moderate weight that feels grounding, not restrictive | User must move toy away easily |
| Sensory-use / OT context | Weight discussed with therapist | Follow professional advice on duration and placement |
*These are practical ideas, not medical rules or prescriptions. Users with health conditions should consult a healthcare professional before using weighted items.
Choosing a filling type
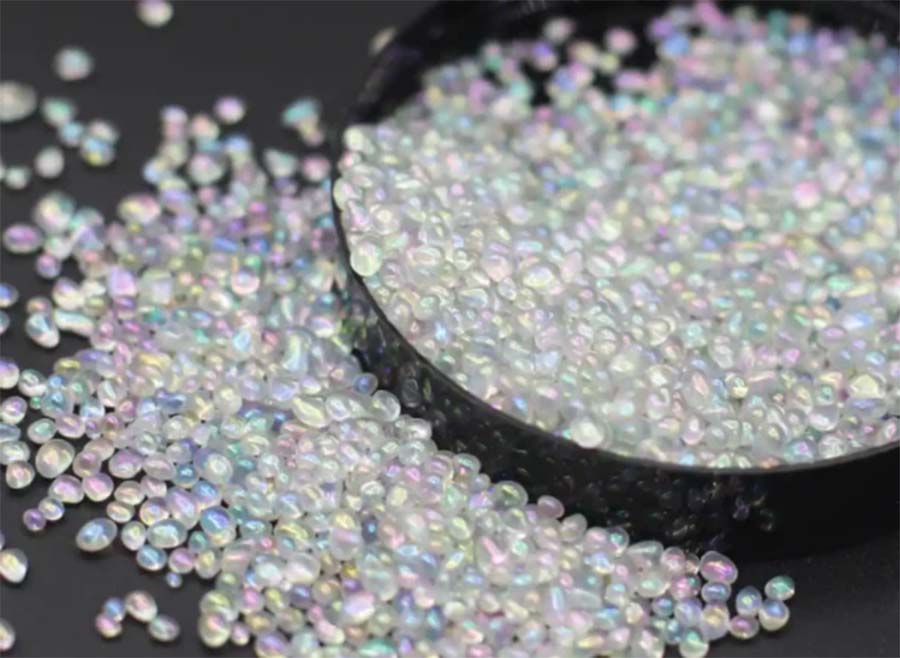
- Poly pellets
- Plastic beads commonly used in toys.
- Easy to measure and distribute; washable when properly contained.
- Glass beads
- Smaller, heavier per volume.
- Allow a more compact weight but can feel “denser.”
- Mixed system
- Weight bags filled with pellets or beads + fiberfill around them.
- Gives both pressure and softness at the same time.
Key points when planning distribution
- Keep the heaviest area in the core (belly, torso, main body).
- Avoid extreme weight in head or limbs that makes the toy hard to pose.
- Aim for even, predictable pressure, not random hard spots.
Balanced distribution is what makes a weighted stuffed animal feel like a calm companion instead of an awkward, sagging object.
How do sewing and reinforcement methods ensure durability under added weight?
Weighted toys face more mechanical stress than normal plush. When users lift, drop, and hug them, the seams, fabric, and joints all carry extra load. If you use the same sewing approach as a cheap giveaway plush, your weighted design will fail quickly.
To prevent this, you need to:
- Use strong seams on all structural areas.
- Reinforce stress points like neck, limb bases, and belly.
- Plan seam allowance and stitching so the fabric doesn’t tear under tension.
Reinforcement strategies
| Area / Component | Recommended Technique | Benefit Under Added Weight |
|---|---|---|
| Main body seams | Machine lockstitch with shorter stitch length; backtack at ends | Strong core seam, resists pulling and dropping |
| Neck and shoulder | Extra stitching, possibly internal tape or felt panel | Prevents head droop or seam splitting |
| Limb attachment | Sew into body seam + internal reinforcement patch | Reduces risk of tearing at arm/leg bases |
| Base / bottom | Double-stitched seams and possible internal circle panel | Helps toy sit and supports weight distribution |
| Opening for weight | Reinforced opening with tight ladder stitch closure | Prevents pellets from pushing seam open |
| Fabric near weight bags | Use lining or extra layer | Spreads pressure, reduces point load on plush |
Sewing tips specific to weighted plush
- Use a consistent seam allowance (for example 5–7 mm) so seams don’t become weak spots.
- Clip curves carefully without cutting into the stitching line; smooth shapes spread tension better.
- For heavy designs, consider a double seam in key areas like the torso.
- Avoid overly thin fabrics or loose knits unless backed with a stabilizing layer.
When you build these small reinforcements into your sewing plan, you protect both your users and your product reputation.
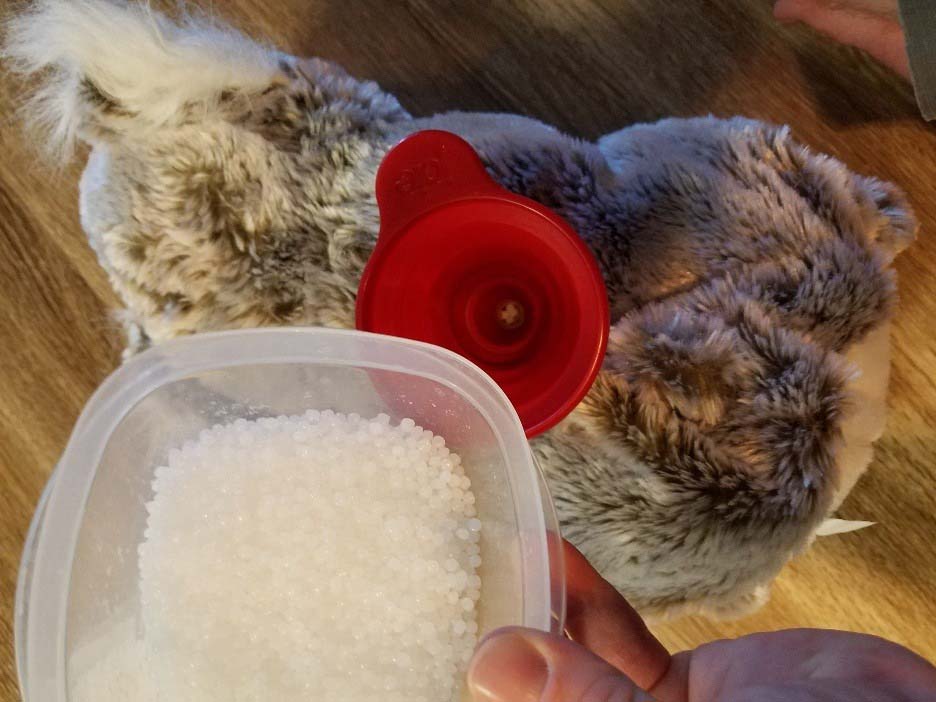
How is weighted filling securely contained inside the plush structure?
The most important safety feature in a weighted stuffed animal is how the weight is contained. You should never pour loose pellets directly into the outer shell and hope the seams hold forever. If a seam fails, you will have a leak, a choking hazard, and a very upset customer.
The best practice is to use a two-layer system:
- Inner weight bags that fully contain pellets or beads.
- Outer plush shell that holds both weight bags and fiberfill.
Steps to create secure weight containment
- Sew inner pouches
- Use a strong woven fabric (e.g. polyester or cotton).
- Sew small pillow-like bags with tight seams and minimal gaps.
- Fill pouches with pellets or beads
- Use a funnel for clean filling.
- Weigh each bag to keep your overall product weight consistent.
- Close pouches with strong stitches
- Machine stitch and backtack or double-stitch the opening.
- Check for any escaping pellets before inserting them into the plush.
- Position pouches inside the plush body
- Place them in belly, torso, or base according to your design.
- Surround them with fiberfill to create a smooth, cushioned feel.
- Secure internal position if needed
- For some designs, you may tack the pouch to the lining or inside seam to keep it from shifting too much.
Containment options compared
| Containment Method | Description | Pros | Cons |
|---|---|---|---|
| Single large weight pouch | One central bag in body | Simple to make and insert | Weight may feel concentrated in one area |
| Multiple small pouches | Several smaller bags placed in body/limbs/base | More even distribution, better shaping | More sewing time and complexity |
| Sectioned pouch (baffled) | One pouch divided into chambers | Controls pellet movement within one structure | Requires more careful sewing |
| Loose pellets (not recommended) | Pellets poured directly into shell | Fast, low cost | High risk of leaks; uneven distribution; not safe |
If you are selling weighted plush, this internal containment system is one of the first things a serious buyer or lab will look at during inspection.
What safety and compliance standards apply to homemade weighted plush?
Even if you make weighted stuffed animals at home, it’s important to respect basic safety principles. If you plan to sell them—especially across borders—then you must consider formal toy regulations in your target markets.
I cannot give legal or full regulatory advice here, but I can highlight the main areas you should pay attention to and discuss with a testing lab if you go commercial.
Core safety aspects
- Mechanical and physical safety
- No small parts that can detach and be swallowed (for young children).
- Seams strong enough to prevent weight bags from leaking.
- No sharp points or hard internal pieces that can hurt a user.
- Chemical safety
- Fabrics, threads, and fillings should be free from restricted chemicals, heavy metals, and harmful dyes according to your target standards (for example EN71-3, CPSIA).
- Flammability
- Plush products often have flammability requirements; check local regulations.
- Labeling
- Age grading (e.g. 3+).
- Warnings (for example “Not recommended for children under 3 years” or “Use under adult supervision”).
- Care instructions and fiber content for some markets.
Safety considerations for weighted designs
| Safety Area | What to Check | Why It Matters |
|---|---|---|
| Age suitability | Avoid weighted plush for babies; mark clear age recommendations | Reduces risk of suffocation or improper use |
| Weight vs body size | Do not make toys so heavy that a child cannot move them away | Prevents feeling trapped and supports self-removal |
| Internal leaks | Ensure weight bags are sealed and seams are strong | Avoids choking hazards and messy spills |
| Health conditions | Advise users with respiratory, cardiac, or mobility issues to consult a professional | Weighted items can affect comfort and safety |
| Washability | Clarify if the product is surface clean only or machine washable | Incorrect washing can damage structure and safety |
For commercial projects, my team works with clients to align designs with standards like EN71, ASTM F963, CPSIA, and we send products to certified labs for testing before mass production and export. As a home maker, you may not need full lab testing, but you can still learn from these standards to design safer products.
How do you finish, test, and adjust the plush for comfort and long-term use?
Once your weighted stuffed animal is sewn, filled, and closed, your work is not finished. A final comfort and durability check will tell you if your design is truly ready for long-term use.
Think about three levels of testing:
- Comfort and ergonomics – How does it feel to hold, hug, and rest on?
- Function and balance – Does the toy sit, lie, or drape as you expected?
- Durability and safety – Do seams, accessories, and weight bags hold up under basic stress?
Practical finishing and testing steps
- Visual check
- Look for symmetry in the face and body.
- Confirm there are no visible holes, loose threads, or crooked lines.
- Touch and hug test
- Hug the toy and move it in different positions (lap, chest, side).
- Look for hard lumps, sharp transitions, or uncomfortable corners.
- Stress tests
- Gently pull arms, legs, and tail to simulate normal use.
- Shake the toy lightly to see if internal weight shifts too aggressively.
- Weight check
- Weigh the final toy and record the value for your own quality records.
- Make sure it matches your planned range.
- User feedback (for brands and makers)
- Have a small group of testers (adults or supervised older children) use the toy and share honest feedback about comfort, weight, and feel.
Testing and adjustment checklist
| Test Type | What You Do | Possible Adjustments Based on Feedback |
|---|---|---|
| Comfort | Hug, rest, and hold plush in different positions | Change stuffing density; reposition weight bags |
| Balance & posture | Check if toy sits or lies the way you planned | Add or remove weight from base or head |
| Seam strength | Pull limbs and body gently, bend toy repeatedly | Reinforce seams, add internal patches |
| Internal movement | Shake toy and observe weight shifting | Add compartments or adjust bag placement |
| Surface inspection | Check for pilling, loose threads, or marks | Improve fabric choice or finishing process |
| Long-term trial | Use toy over days or weeks (for your own testing) | Fine-tune weight, materials, or sewing pattern |
Small adjustments at this stage can dramatically improve the long-term experience and reduce the chance of returns or complaints later.
Conclusion
A good weighted stuffed animal is not just heavier than a normal plush. It is soft, balanced, secure, and thoughtfully designed so users feel comfort and calm without sacrificing safety. When you choose quality materials, plan safe weight and distribution, reinforce seams, contain filling correctly, and respect basic safety standards, you create a weighted plush that can support daily life instead of adding new worries.
At Kinwin, my team and I help global buyers develop weighted plush ranges that combine reliable construction, attractive design, and compliance with key safety standards. If you’re planning a new weighted plush collection—whether for anxiety support, sensory use, or simply cozy gifting—you’re very welcome to contact me at [email protected] or visit kinwintoys.com to explore how our factory can support your next project and long-term growth.