When someone hugs a stuffed toy you made, they don’t see the pattern work, the careful seams, or the stuffing tests behind it. But all those hidden steps decide whether the toy feels soft, safe, and professional—or cheap and forgettable.
I’m Amanda from Kinwin, a plush toy factory in China. Every day I help global buyers turn ideas into real stuffed toys for retail, e-commerce, and promotional projects. In this guide, I’ll walk you through materials, patterns, sewing, stuffing, finishing, and quality checks—in simple English, step by step. You can use this whether you sew at home or work with a factory.
What materials and tools are needed to make stuffed toys?
Before you stitch anything, you need the right materials and tools. They decide how the toy feels, how long it lasts, and how safe it is for children.
For most stuffed toys, you need four main material groups:
- Outer fabrics – what people see and touch
- Stuffing – what gives shape and softness
- Threads and reinforcements – what holds everything together
- Details and trims – what bring the character to life
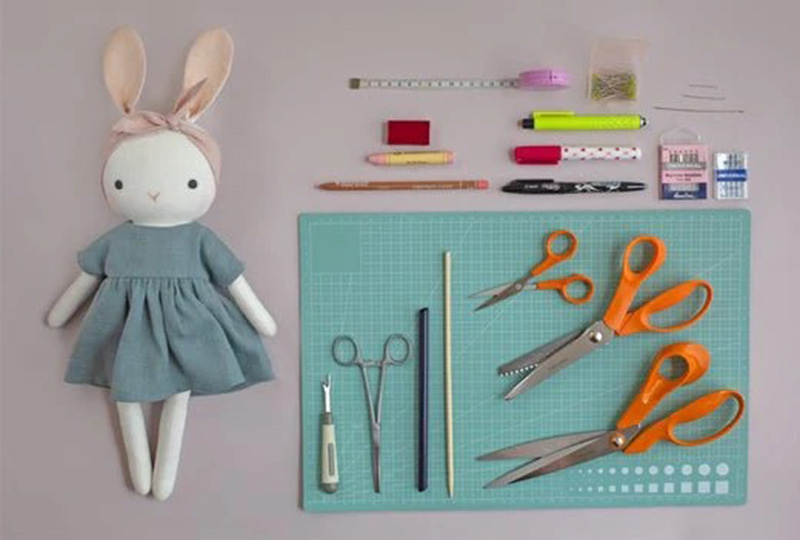
On top of that, you need tools that help you cut cleanly, sew accurately, and manage small parts without frustration.
Key materials and tools at a glance
| Category | Examples | Why It Matters |
|---|---|---|
| Outer fabrics | Minky, velboa, fleece, short plush, faux fur | Controls softness, look, and target age group |
| Inner stuffing | Polyester fiberfill, high-resilience fiber, pellets | Defines softness, bounce, and weight balance |
| Threads | Polyester sewing thread, embroidery thread | Affects seam strength and facial detail quality |
| Hard parts | Safety eyes, safety noses, buttons (for older users) | Adds expression and character |
| Reinforcements | Interfacing, inner cotton, felt patches | Supports weak zones and thin fabrics |
| Cutting tools | Fabric scissors, rotary cutter, small snips | Clean edges and precise shapes |
| Measuring tools | Ruler, tape measure, pattern paper, chalk | Accurate pattern transfer and placement |
| Sewing tools | Sewing machine, needles, pins, clips | Clean seams and efficient assembly |
| Stuffing tools | Stuffing sticks, chopsticks, tweezers | Better control in small or narrow areas |
If you plan to scale production later, it is worth choosing fabric and stuffing types that are easy to source again. Consistency is a big part of a professional stuffed toy line.
How do you create patterns and prototypes for accurate toy shapes?
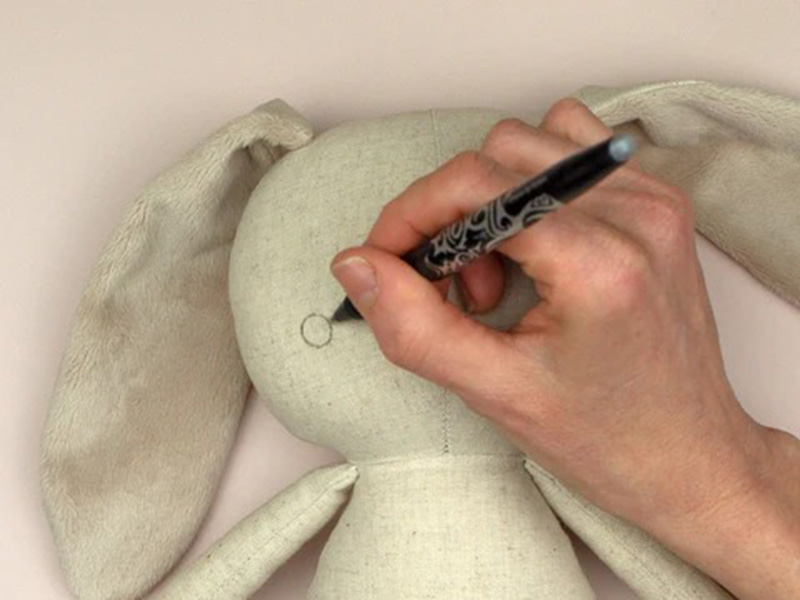
A stuffed toy starts as a flat pattern. If the pattern is wrong, no fabric or stuffing can save it. Good pattern design is the foundation of a balanced, expressive plush.
The usual pattern development steps are:
- Define the concept
- Who is this toy for? Baby, child, teen, adult?
- What is the main mood? Cute, funny, elegant, realistic?
- Draw a simple sketch
- Front, side, and sometimes back view.
- Mark key features: eyes, nose, ears, tail, clothes.
- Break the sketch into shapes
- Head, body, limbs, ears, tail, accessories.
- Decide where seams will run, and how many pieces you need for smooth curves.
- Create flat pattern pieces
- Draw each piece on pattern paper.
- Add seam allowance (usually 3–5 mm for plush).
- Mark grain line / pile direction, notches, and labels.
- Build the first prototype
- Sew a sample using the real or similar fabric.
- Stuff it and check: proportion, balance, and facial placement.
- Adjust and repeat
- Change seam lines, adjust curves, tweak head or body sizes.
- Make new samples until the shape and expression are correct.
Pattern and prototype components
| Step | What You Focus On | Typical Adjustments |
|---|---|---|
| Concept & sketch | Target user, style, and pose | Head size, body length, limb thickness |
| Shape breakdown | How to split toy into panels | More panels for rounder shapes, fewer for simple toys |
| Pattern drafting | Curves, seam allowance, notches | Smoothing sharp corners, correcting symmetry |
| First prototype | Overall silhouette and stability | Enlarging head, refining neck, adjusting body width |
| Facial layout | Eye, nose, mouth, ear positions | Small moves can change expression a lot |
| Final pattern set | Clean, labelled pieces ready for bulk production | Pattern graded for different sizes if needed |
In my factory work, I always treat pattern and prototype as a conversation: the sketch “talks,” the sample “answers,” and we keep improving until both match.
What sewing and assembly techniques ensure clean and durable construction?

Once your pattern is ready, sewing and assembly turn flat fabric into a real, huggable toy. At this stage, you are building both appearance and strength.
Basic sewing principles
For most stuffed toys, we use:
- Straight stitch with medium-short length for strong seams.
- Lockstitch or backstitch at the start and end of seams.
- Double stitching at stress points like neck, arm joints, and base.
You generally sew from small to large parts:
- Ears, tails, small features
- Arms and legs
- Head panels
- Body panels
- Attach limbs and head (depending on design)
Always leave a stuffing opening in a less visible area, such as the back seam, side seam, or base.
Assembly order for clean results
If you add embroidery or appliqué details, it’s usually best to do them before assembling the full 3D shape. For example:
- Embroider eyes and cheeks on flat head panels.
- Sew appliqué patches on body pieces while they are still flat.
This gives you more control and a cleaner finish.
Sewing and assembly methods overview
| Area | Best Practice | Benefit |
|---|---|---|
| Seam type | Straight stitch, reinforced at start/end | Strong, long-lasting seams |
| Stitch length | Medium-short (not too long) | Reduces gaps and seam weakness |
| Stress points | Double stitching or extra reinforcing fabric | Better resistance to pulling and rough play |
| Assembly order | Small parts first, then head/body, then final joining | Easier handling and fewer mistakes |
| Stuffing opening | Hidden in back, side, or base seam | Cleaner visual appearance after closing |
| Pre-assembly detail | Embroider or appliqué before sewing 3D form | More accurate placement and neater finish |
For home sewing, take your time with curves. Sew slowly around the head, snout, and belly so the lines stay smooth when turned and stuffed.
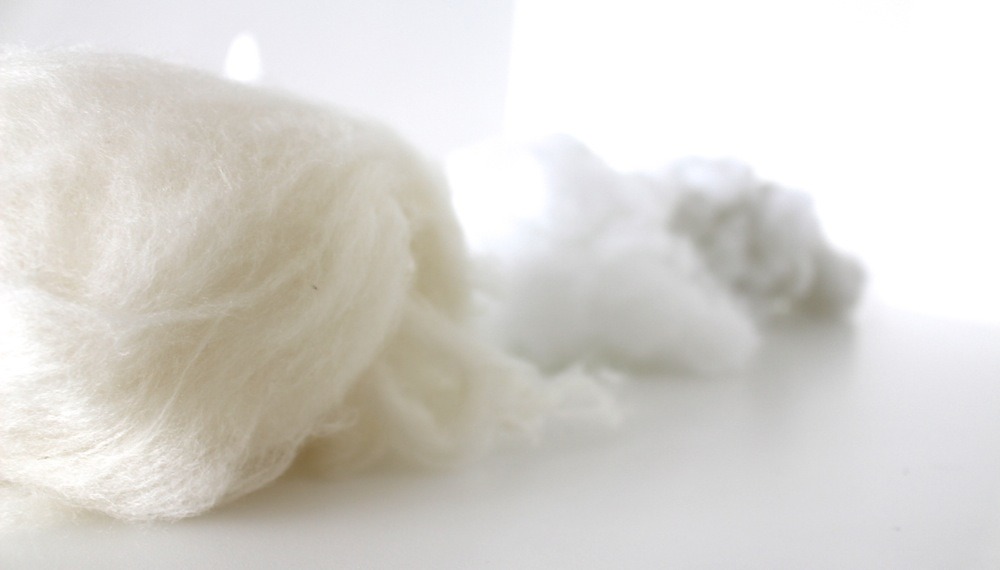
How is stuffing applied to achieve balanced softness and structure?
Stuffing is where your toy comes to life. The same pattern can feel cheap or luxurious depending on how you manage filling. The goal is a toy that looks well-shaped, feels comfortable, and holds up over time.
Choosing stuffing materials
Most stuffed toys use:
- Polyester fiberfill – standard filling, soft and light.
- High-resilience polyester fiber – better recovery and less clumping.
- Pellets or beads in pouches – for weighted bases, hands, or feet.
You can mix these to achieve different feels. For example, use soft fiberfill in the upper body and a small weighted pouch in the base for stability.
Stuffing technique and zones
Stuffing works best when you treat the toy as several zones, not one big bag:
- Head – slightly firmer so facial details stay clear.
- Body – medium softness for hugging; not too stiff.
- Limbs – enough fill to avoid “empty” feeling, but not so much that they stick out awkwardly.
- Base – sometimes denser or weighted to help the toy sit upright.
Steps:
- Start with small areas (ears, snout, narrow arms).
- Fill the head, pushing stuffing evenly around the sides and top.
- Fill the body in layers, checking symmetry from both sides.
- Adjust limbs and base to match the planned pose.
- Close the opening with a ladder stitch for an invisible finish.
Stuffing approaches and effects
| Stuffing Style | Description | Resulting Feel and Look |
|---|---|---|
| Soft cuddle fill | Light, even fiberfill throughout | Very soft and huggable, less defined structure |
| Medium-density fill | Moderate stuffing; zone-based control | Balanced softness and shape, good for most toys |
| Firm structural fill | High-density stuffing, especially in head/legs | Very stable, suitable for mascots or display toys |
| Weighted base | Pellets or beads in inner pouch at bottom | Helps toy sit and feel more “grounded” |
| Mixed textures | Firm head + soft body + weighted feet | Rich tactile experience and better posing |
For production, we record target stuffing weights for each size, so every toy in the batch feels consistent. For personal projects, you can trust your hands—just keep checking symmetry and comfort.
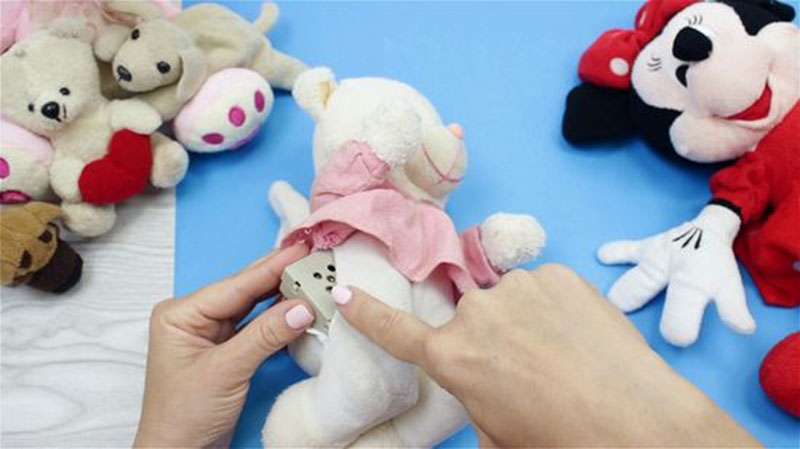
How are facial details, trims, and accessories safely added to stuffed toys?
The face is where people connect emotionally with a stuffed toy. But it’s also where safety and durability matter most, especially for children.
Facial details
You have three main options:
- Embroidery
- Safest option for babies and toddlers.
- No hard or detachable parts.
- Can show fine detail and soft expressions.
- Safety eyes and noses
- Plastic parts with locking washers inside the head.
- Suitable for age 3+ when properly installed and tested.
- Must be fitted before closing and stuffing the head.
- Felt or fabric appliqué
- Eyes, cheeks, or noses cut from felt or fabric and sewn on.
- Needs strong stitching all around the edge.
Trims and accessories
These include bows, scarves, clothes, buttons, labels, and other decorative parts. For children’s toys:
- Use sewn-on trims instead of glued trims.
- Avoid small, hard pieces for baby products.
- Choose soft labels and safe printing methods.
Safe detail placement overview
| Feature Type | Best Construction Method | Age-Safety Notes |
|---|---|---|
| Eyes (baby) | Embroidered or securely appliquéd | No hard parts; safest for under 3 years |
| Eyes (3+ years) | Safety eyes with locking backs inside the head | Must pass pull tests; no loose movement |
| Nose & mouth | Embroidery or firmly stitched fabric | Avoid plastic parts for under 3 years |
| Cheeks / spots | Felt or fabric appliqué with dense stitching | No loose edges or weak glue |
| Bows & ribbons | Sewn down in at least 2–3 points | Avoid long, loose lengths that can wrap around |
| Clothes | Simple removable clothes for older kids; sewn-on for babies | Check for small parts like snaps and buttons |
A professional toy must not only look cute on photos. It must also pass physical testing and long-term play. That starts with choosing safe facial and trim methods.
What quality checks ensure a professionally finished stuffed toy?
The final step is to think like a quality inspector, not like a designer. You need to look for anything that could break, disappoint, or feel cheap to the end user.
Visual and structural checks
Go over each toy and review:
- Shape and symmetry – Does the toy match the approved sample? Is the head centered, and are limbs aligned?
- Seam quality – Are stitches even? Any gaps, skipped stitches, or loose threads?
- Stuffing balance – Any sagging areas, hard lumps, or asymmetry?
- Face alignment – Are the eyes level? Is the nose in the right place?
Safety and durability checks
For professional production, we also do:
- Seam pull tests – Tug seams gently to check for openings.
- Part strength tests – Pull on eyes, noses, and trims to confirm they hold.
- Needle detection – Scan finished toys with a needle detector to make sure no broken metal is inside.
- Label and compliance check – Confirm correct labels, warnings, and tracking info are attached.
Final quality checklist
| Check Type | What You Look For | Why It Matters |
|---|---|---|
| Overall appearance | Clean shape, correct proportions, no stains | First impression and brand image |
| Seam integrity | No holes, fraying, or missed stitching | Prevents stuffing leaks and returns |
| Stuffing consistency | Even feel, no lumps, toy sits or stands as planned | Professional, comfortable hug experience |
| Face & details | Symmetrical face, secure eyes and trims | Emotional appeal and safety |
| Metal and tool safety | No broken needles or sharp objects inside | Critical for child safety and compliance |
| Label accuracy | Correct care, fiber content, and safety warnings | Legal requirements and customer trust |
Whether you make one prototype or tens of thousands of units, quality habits will decide how people feel about your stuffed toys.
Conclusion
Making stuffed toys is a complete process—from material choice and pattern work to sewing, stuffing, finishing, and quality checks. When each step is handled with care, the result is not just a “cute plush,” but a soft, safe, and reliable product that people want to keep.
At Kinwin, my team and I support global buyers through this full journey: concept, pattern creation, sample development, safety testing, and mass production. If you are considering your own stuffed toy line or want to improve an existing range, you’re welcome to contact me at [email protected] or visit kinwintoys.com to explore how our factory can support your success.