When people ask me “How do you make a stuffed doll that looks professional?”, they are usually not asking about just one step. They want to understand the whole pipeline—from fabric choice and pattern design to stuffing, facial details, clothing, and final safety checks.
I’m Amanda from Kinwin, a plush toy manufacturer in China. Every season, my team turns sketches and rough ideas into safe, soft, and durable stuffed dolls for brands, retailers, and e-commerce sellers around the world. In this guide, I’ll walk you through the key steps we focus on in factory production, in simple English and from a practical B2B perspective.
What materials and tools are essential for making stuffed dolls?
A good stuffed doll starts with the right materials and tools. If fabric is too thin, stuffing too rough, or thread too weak, you will fight problems in every later step. If you choose carefully at the beginning, sewing becomes smoother, shapes are more stable, and the doll feels better in the customer’s hand.
For stuffed dolls we always think in layers: skin and hair on the outside, stuffing and structure inside, and details plus labels on top. Matching each layer to your target age group, price level, and brand story is the first key decision.
| Category | Typical Options for Stuffed Dolls | Main Function in Doll | Notes from Factory Practice |
|---|---|---|---|
| Skin fabric | Short plush/velboa, minky, fleece, cotton jersey | Face, arms, legs, body “skin” | Choose soft, non-scratchy fabric; avoid very thin materials |
| Hair fabric | Long pile faux fur, fleece, felt, yarn (for handmade styles) | Hair, fringe, ponytails | Test shedding & direction before bulk production |
| Clothing fabric | Cotton, polyester blends, knit, denim-look fabrics | Dresses, shirts, jackets, school uniforms | Keep weight reasonable so clothes don’t distort the doll |
| Stuffing | Polyester fiberfill, recycled fiberfill | Inner volume and softness | Use consistent grade; fluff before use for even density |
| Weight elements | Plastic pellets in inner pouches, discs for joints | Stable sitting, “premium” handfeel | Never use loose pellets in baby or under-3 dolls |
| Facial detail material | Embroidery thread, felt, safety eyes/noses | Eyes, nose, mouth, blush | For under-3, prefer embroidery and felt only |
| Accessories | Hats, shoes, bags, ribbons, props, brand labels | Style, play value, branding | Must be age-appropriate and firmly attached |
| Sewing thread | Polyester sewing thread (various thicknesses) | All seams and topstitching | Use strong, colourfast thread |
| Tools (basic) | Fabric scissors, pins/clips, sewing machine, hand needles | Cutting and sewing | One pair of scissors only for fabric to keep blade sharp |
| Tools (support) | Fabric chalk, rulers, stuffing sticks, seam ripper, lint roller | Marking, stuffing, corrections, cleaning | Simple tools, but they decide how “clean” the finish looks |
H3 – Matching materials to market level
- Entry / promo level – Short plush or basic fleece, standard polyfill, minimal accessories.
- Mid-range retail – Soft short plush or minky, better stuffing, simple but neat clothing.
- Premium / collector dolls – Ultra-soft skin fabrics, high-grade stuffing, removable outfits, more detailed hair and accessories.
If you already know your target retail price, you can work backwards: choose the highest material level that still protects your margin.
How do you design patterns and body proportions for accurate doll shaping?
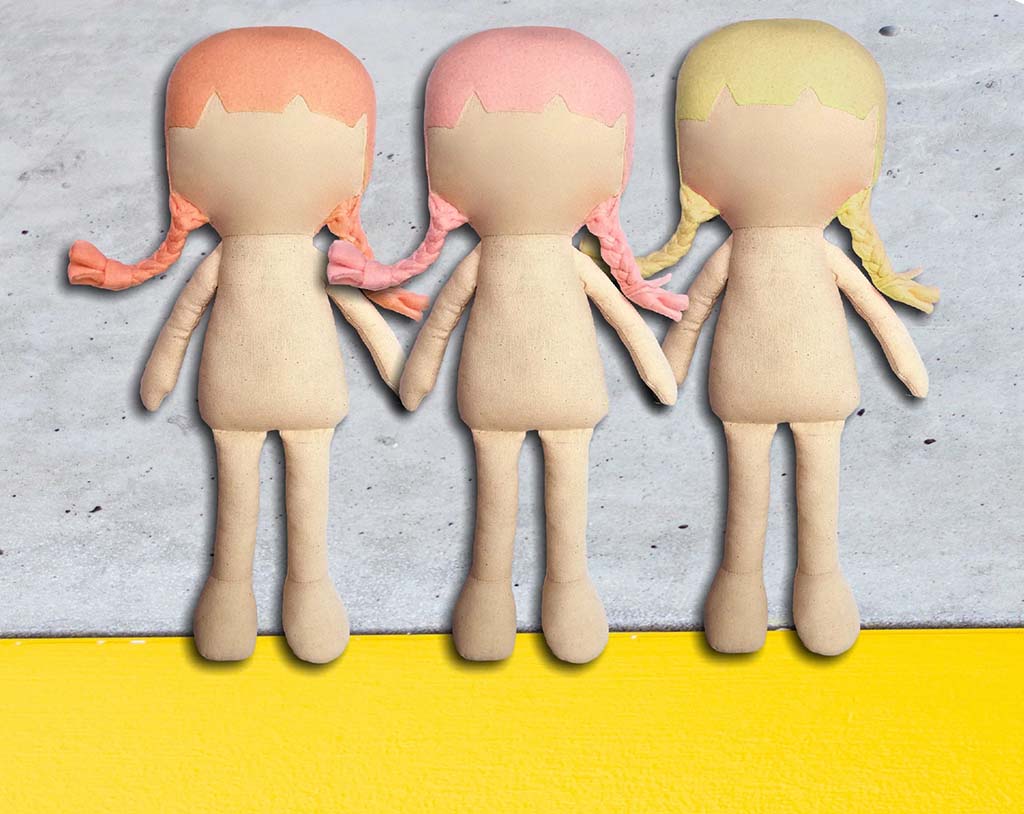
Pattern design is the “skeleton” of a stuffed doll. If proportions are wrong or panels don’t work together, the doll will look twisted, flat, or unbalanced—no matter how expensive the fabric is. A clear pattern and proportion plan is also what lets you scale from a handmade master to stable factory production.
Before we cut fabric in our sampling room, we always lock three things: overall height, head-to-body ratio, and limb style (straight, curved, or stylised). Only after this we start drawing pattern lines.
| Body Area / Element | Design & Proportion Guideline | Effect on Final Look & Feel | Factory-Level Tips |
|---|---|---|---|
| Head | Often 1/3–1/2 of total height for “cute” dolls | Child-like, friendly appearance | Use 4–6 panels for rounder head, not just 2 pieces |
| Torso | Slight taper at waist; wider shoulder than neck | More natural body shape | Add small side darts if you need more curve |
| Arms | Slight elbow curve; wider at top than wrist | More relaxed pose and hugging comfort | Avoid very thin wrists – difficult to stuff |
| Legs | Slight flare at thigh; enough width for stuffing | Better sitting / standing stability | Check both legs same length on first prototype |
| Hands & feet | Simplified shapes (mitten-style hands, round feet) | Easier to sew and turn; fewer weak points | Add finger details with stitching, not tiny pieces |
| Neck | Wider than you think; reinforced seam | Head doesn’t wobble or break seams | Sometimes add internal strip or stay for strength |
| Hair base | Cap pattern that follows head shape | Clean hairline and coverage | Plan bangs/fringe as separate piece if needed |
| Seam allowance | 0.5–1 cm, consistent across pieces | Predictable size, easier assembly | Mark notches for matching critical points |
H3 – Pattern development workflow
In our factory, we usually follow this sequence:
- Design sheets – Front, side, and sometimes back view with clear measurements.
- Basic block pattern – Create head, body, arms, and legs blocks based on proportions.
- Detail pattern – Add hair panels, face panels, ears, collars, pockets, etc.
- Seam allowance & notches – Add consistent allowance, mark joint points.
- Mock-up in test fabric – Sew one or two dolls in cheaper but similar fabric.
- Review & adjust – Check balance, expression, sitting/standing; adjust pattern.
Only when the pattern passes this “body and balance” check do we move to colour and fabric selection for final samples.
What stitching and assembly methods ensure structural strength and precision?
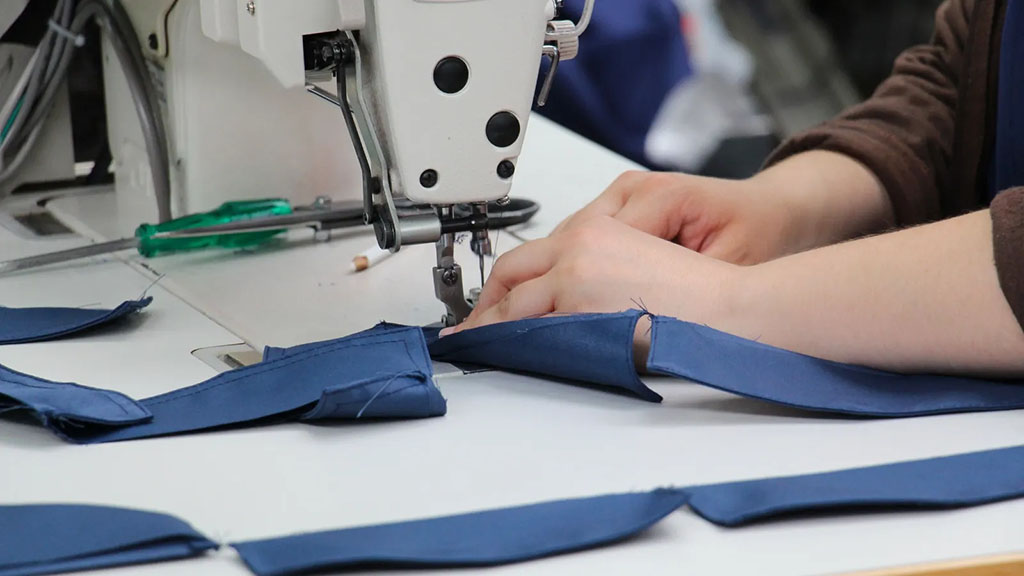
Even with a good pattern, poor stitching will ruin the product. Strong seams and a logical assembly order keep your stuffed doll safe, neat, and scalable. For factory work, we train workers to follow standard operating procedures (SOPs) so every doll matches the approved sample.
The three main stitching topics we watch are: stitch type, seam allowance, and reinforcement points.
| Area / Step | Recommended Method | Why It Matters | Common Mistakes to Avoid |
|---|---|---|---|
| Basic seams | Straight stitch, 2–2.5 mm length on curves | Smooth curves, less seam stress | Long stitches that pop under tension |
| Seam allowance | 0.5–1 cm depending on size and fabric | Prevents fraying and seam break | Very narrow seams that tear after stuffing |
| High-stress points | Double stitching at neck, armholes, crotch, openings | Protects key areas from play and pulling | Only one stitch line in high-pull areas |
| Edge finishing | Zigzag or overlock on woven fabrics | Stops fraying and keeps inside tidy | Raw edges on easily fraying materials |
| Curves & corners | Clip curves, notch inner corners after sewing | Helps pieces turn smoothly | Not clipping, causing bulky, wrinkled edges |
| Assembly order | Small details → head → limbs → body → final join | Gives best access and clean finish | Attaching face or small parts at very late stage |
| Closing openings | Ladder (invisible) stitch with strong hand-sewing thread | Clean finish, less visible repair line | Simple whipstitch that looks rough and pulls apart |
H3 – Example factory assembly flow for a standard stuffed doll
- Prepare small pieces
- Sew ears, hair pieces, small accessories.
- Build the face
- Add embroidery or appliqué to head front; attach ears and hair fringe.
- Sew head panels
- Join front and back/side panels, leaving a stuffing opening.
- Sew arms and legs
- Sew pairs, leave small opening for stuffing and attachment.
- Sew torso
- Join front and back; leave neck and base openings.
- Attach limbs to body
- Insert arms and legs at marked positions and sew securely.
- Turn all parts right-side out
- Inspect seams before stuffing.
This structured flow reduces errors, keeps seam lines clean, and helps us maintain efficiency on production lines.
How is stuffing applied to achieve balanced softness and stable form?
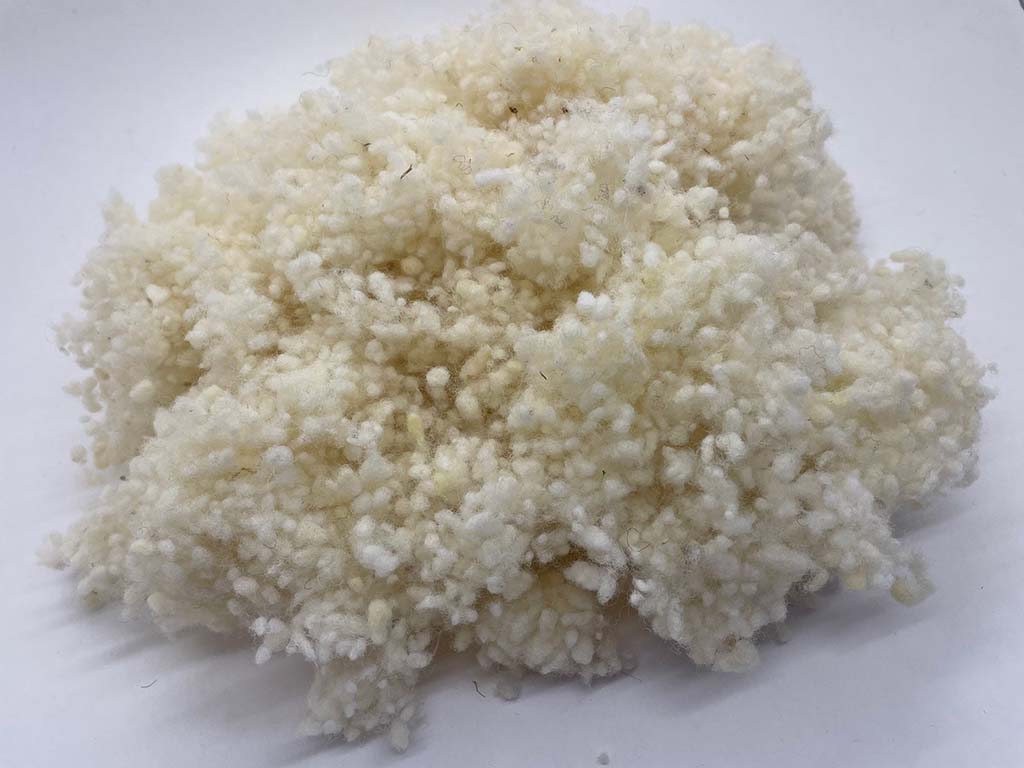
Stuffing turns a flat fabric shell into a 3D doll. The same pattern can feel completely different depending on how we apply stuffing. For comfort-focused dolls we want soft but not floppy. For display or mascot dolls we want more structure in key areas.
In our factory, we think of stuffing in zones: head, face, torso, hips, limbs, and neck. Each zone may need a slightly different density or even different materials (fiberfill + pellet bags, for example).
| Doll Zone | Typical Stuffing Density & Material | Target Feel & Performance | Practical Tips for Control |
|---|---|---|---|
| Head core | Medium-firm polyfill, evenly layered | Keeps face shape, supports features | Stuff in small portions, check from all angles |
| Cheeks & muzzle | Slightly softer than core, well rounded | Soft expression, no “flat spots” | Use fingers to shape; avoid sharp lumps |
| Torso / chest | Medium density; focus on front and back balance | Good hugging feel, stable silhouette | Compare front and back by feel and visual check |
| Hips / base | Medium polyfill + pellet pouch (optional) | Stable sitting, pleasant hand weight | Always enclose pellets in strong inner bags |
| Arms & legs | Medium-soft; not fully firm at joints | Natural drape; easy posing and cuddling | Stuff from end to shoulder/thigh in stages |
| Hands & feet | Slightly firmer for clear outline | Defined shapes that still feel soft | Use small stuffing tool; avoid over-packing |
| Neck area | Firm but not rock-hard; may add internal strip | Supports head; prevents wobble and seam stress | Stuff last and test by gently moving the head |
H3 – Stuffing workflow we use in production
- Fluff the filling
- Open bales; shake and fluff fiberfill so it’s not clumped.
- Stuff small parts first
- Hands, feet, arms, and legs. Workers use sticks to push fill into corners.
- Stuff the head
- Fill from the top and sides, paying special attention to cheeks.
- Check the face against the approved sample photo.
- Stuff torso and base
- If using pellets, put inner pellet bag in position first.
- Add filling around it and shape by hand.
- Check symmetry and weight
- Compare left and right limbs, front and back.
- Weigh random samples to stay within the target weight range.
- Close openings
- Use ladder stitch or machine topstitch depending on design.
When stuffing is controlled properly, dolls from the same batch feel consistent, which is important for customer trust and online reviews.
How are facial features, hair, and clothing safely crafted and attached?
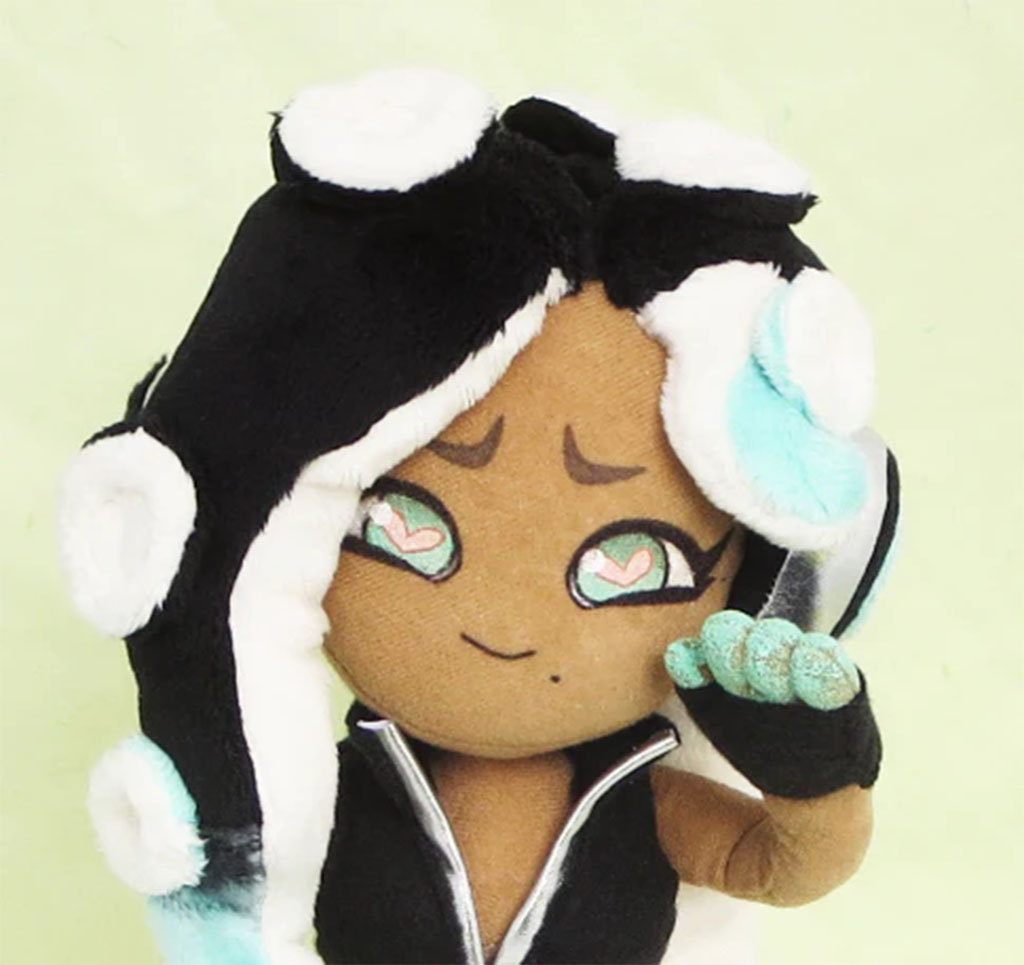
Facial features, hair, and clothing turn a simple stuffed shape into a “someone”. They are also where many safety and durability problems appear if not handled correctly. As a manufacturer, I always try to balance style, play value, and safety.
For younger age groups we prefer soft, embroidered features and fixed clothing. For older kids and collectors we can use safety eyes, jointed hair styles, and removable outfits.
| Component Type | Common Construction Method | Benefits for Design & Play | Safety & Durability Notes |
|---|---|---|---|
| Eyes (baby/under-3) | Embroidered with backing fabric | No hard parts, very safe, easy to wash | Use strong thread and secure stitch density |
| Eyes (3+ years) | Plastic safety eyes with locking backs | Shiny, expressive, faster to apply in volume | Must be tested as “safety eyes”; avoid cheap snap-ins |
| Nose & mouth | Embroidery or felt appliqué | Soft, simple expression | Keep lines clean and not too close to seam edges |
| Blush / cheeks | Felt circles, embroidery, or safe textile paint | Adds warmth and personality | For toys, choose tested materials, not craft paint |
| Hair | Faux fur caps, fleece panels, yarn wefts, felt pieces | Big visual impact; many style options | Avoid loose long fibers for under-3 dolls |
| Basic clothing | Sewn-on or removable garments | Supports storytelling and fashion play | For young ages, partially or fully attach clothing |
| Shoes & socks | Felt or fabric shoes with elastic or Velcro | Finishes the look, supports character role | No tiny buckles, long laces, or sharp trims |
| Accessories | Hats, bags, scarves, props | Strong branding and gift appeal | For kids, use short straps and stitched attachment |
H3 – Design logic by age group
- 0–3 years
- Embroidered face; no plastic eyes; soft hair (fleece or very low-shedding fur); clothing mostly fixed; no small removable accessories.
- 3–8 years
- Safety eyes possible; more detailed hair; simple removable clothes; small accessories only if they pass pull tests and age-grade is clear.
- 8+ / collectors
- More complex hair styles (yarn, layered wigs), removable outfits with fasteners, shoes, bags, and props; but still built with strong seams and attachments to reduce breakage and complaints.
In production we also do pull tests on eyes, bows, buttons, and other attachments to make sure they meet the force requirements from toy safety standards.
What quality and safety checks finalize a professionally made stuffed doll?
The final difference between a “cute idea” and a “professional stuffed doll” is quality and safety control. Even if your design and materials are good, loose threads, uneven faces, or weak seams will damage your brand image and create returns.
In our factory we use multi-stage QC (materials, in-process, final), but even small makers can follow similar principles on a smaller scale.
| Check Area | What to Inspect or Test | Why It Matters | Simple Methods or Factory Practices |
|---|---|---|---|
| Visual appearance | Stains, marks, fabric defects, correct colours | First impression, gift-worthiness | 100% visual check under good light |
| Symmetry & proportion | Face alignment, limb length, body balance | Doll looks “correct”, not strange | Compare with master sample and spec sheet |
| Seams & stitching | No open seams, skipped stitches, or long loose threads | Prevents stuffing leaks and fast damage | Pull seams gently at neck, limbs, and body |
| Stuffing distribution | No hard lumps or obvious hollow areas | Comfort and premium feel | Squeeze key areas; compare left/right consistency |
| Attachments | Eyes, nose, hair, accessories firmly fixed | Safety and durability | Manual pull test; lab pull test for toy standards |
| Sitting / standing | Doll can sit or stand as design requires | Usability and display | Place on flat surface and observe stability |
| Labels & tags | Brand label, care label, age warning, CE/other marks | Legal compliance and customer guidance | Check position and text on random pieces |
| Odour & surface feel | No strong chemical smell, fabric pleasant to touch | Customer comfort and trust | Spot-check from each carton |
H3 – Safety testing for export markets
For dolls that go into children’s channels, we also support our clients with:
- EN71 tests for Europe/UK (mechanical/physical, flammability, migration of certain elements)
- ASTM F963 + CPSIA tests for the USA
- Other regional standards such as ISO 8124 as needed
We send pre-production samples to accredited labs and only start mass production after we receive “PASS” reports. During bulk production we keep the same materials, patterns, and processes that were tested, so the final dolls match the certified sample.
Even if you are still small today, designing your stuffed dolls with these standards in mind from the beginning will make it much easier to enter bigger markets and platforms later.
Conclusion
A well-made stuffed doll is more than fabric and stuffing. It is the result of clear pattern design, stable materials, strong stitching, controlled stuffing, safe facial details and clothing, plus honest quality and safety checks. When these pieces work together, your dolls feel professional in the customer’s hands and protect your brand in the long term. At Kinwin, we help global buyers turn sketches into export-ready stuffed dolls that pass EN71, ASTM, and other standards while still feeling soft, modern, and full of personality. If you are planning a new doll line or want to upgrade your current products, you are welcome to contact me at [email protected] or visit kinwintoys.com so we can explore how our factory can support your next collection.