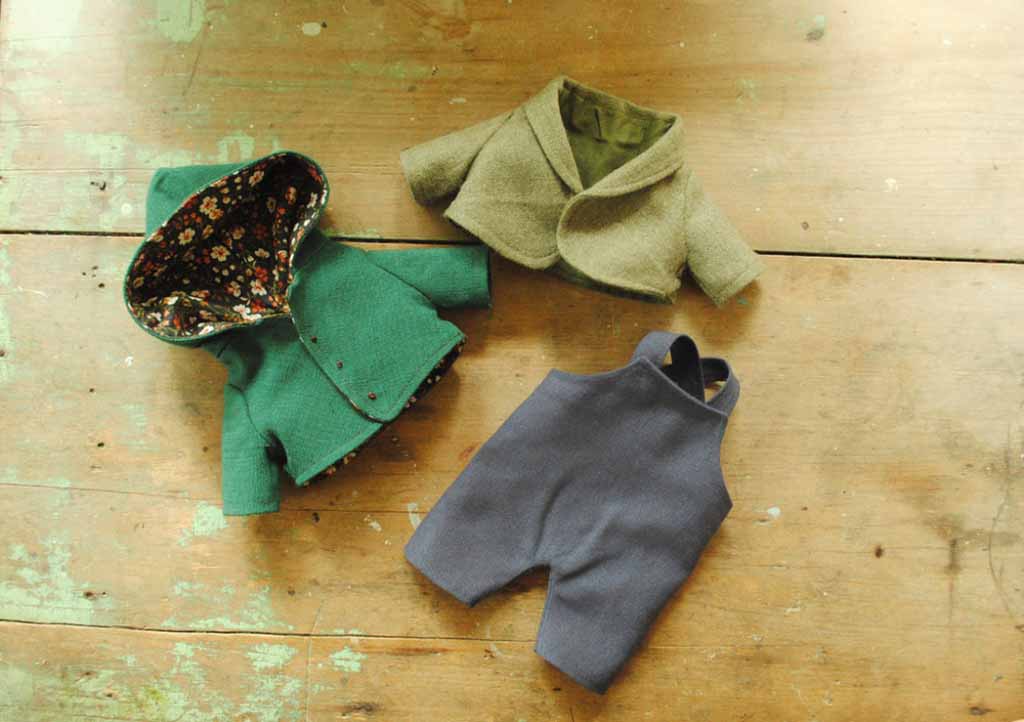
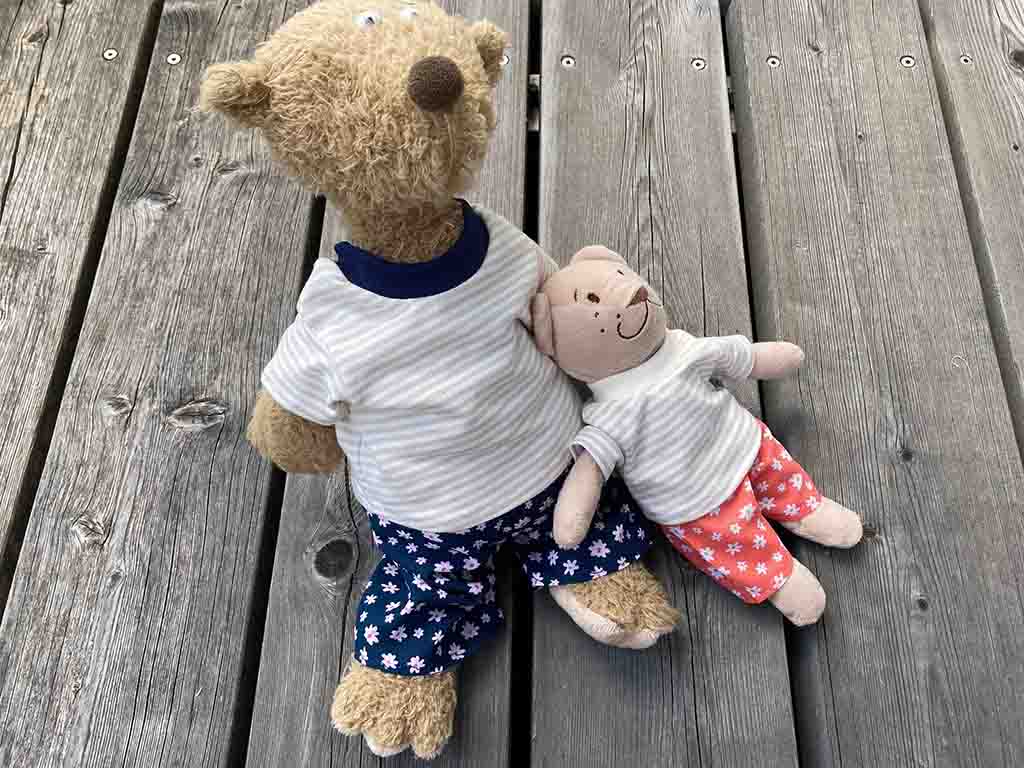
When you dress a stuffed animal, you are not only adding fabric—you are giving the plush a role, a story, and a style. Clothes can turn a simple toy into a character, a gift set, or even a small “fashion line” for your brand.
To make stuffed animal clothes, you need soft, easy-to-sew fabrics, a pattern that matches the plush body, clean miniature sewing techniques, safe closures, and good finishing and fitting checks. When these steps work together, outfits go on and off smoothly, look neat on the plush, and survive real play or display.
In this guide, I’ll share the approach we use in our factory at Kinwin, but explained in simple, clear English so you can apply it in a home studio, small workshop, or as you prepare for OEM/ODM production.
What materials and tools are required to make stuffed animal clothes?
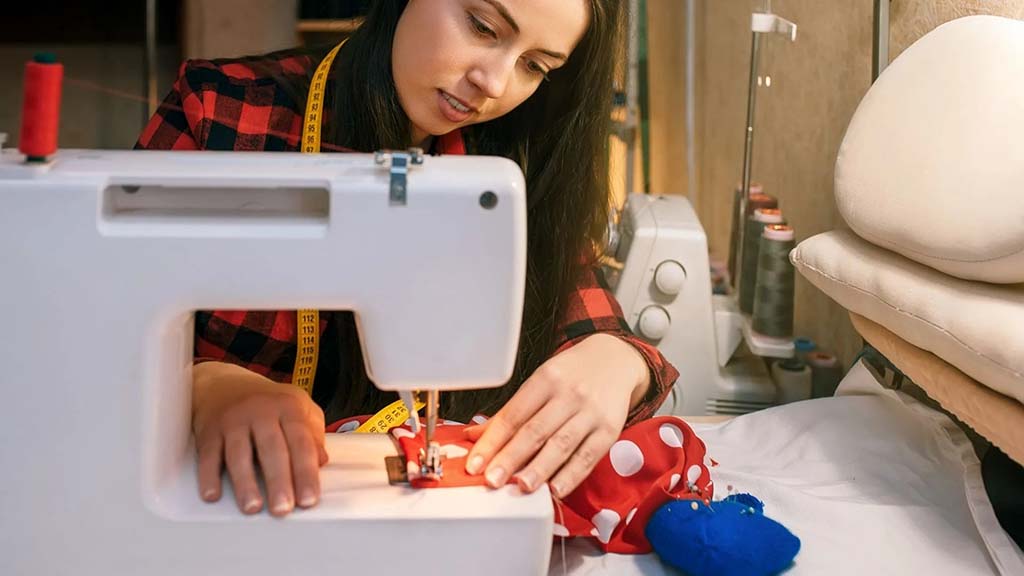
The best plush clothing starts with the right materials. Because garments are small, bulky fabrics and heavy trims quickly make outfits look rough and uncomfortable. Your goal is soft, flexible textiles that are easy to sew at miniature scale and safe for the end user.
Light to medium-weight woven cotton, cotton blends, soft knits, and fleece are usually the most practical choices. For structure you can add light interfacing or felt. For closures, choose options that are safe, simple, and easy to use, especially if children will dress the plush.
In practice, you need a small set of fabrics, trims, thread, and basic sewing tools—similar to human clothing, just scaled down and chosen with toy safety in mind.
Key materials and tools overview
| Category | Recommended Choices | Why They Work Well for Plush Clothing |
|---|---|---|
| Main fabrics | Cotton, cotton blends, light denim, soft knits, fleece | Soft, breathable, easy to sew and press at small scale |
| Lining/support | Thin cotton, light interfacing, felt | Adds shape to collars, waistbands, and jackets without bulk |
| Closures | Soft Velcro, plastic snaps, elastic, short ties | Safer and easier than tiny metal zippers or hooks |
| Trims | Ribbons, flat lace, small decorative buttons (well sewn) | Adds style and branding without too much weight |
| Thread | Polyester sewing thread | Strong, low-stretch, good for frequent dressing/undressing |
| Marking tools | Fabric chalk, water-erasable pen | Allows neat pattern transfer and adjustment |
| Cutting tools | Fabric scissors, small snips | Clean cuts on small pattern pieces |
| Sewing tools | Hand needles, pins/clips, sewing machine (optional) | For strong seams and precise assembly |
| Measuring tools | Measuring tape, ruler, pattern paper | For accurate plush body measurements and pattern drafting |
Once this toolkit is ready, you can focus on pattern and fit instead of fighting with the materials.
How do you design and draft patterns that fit plush proportions accurately?
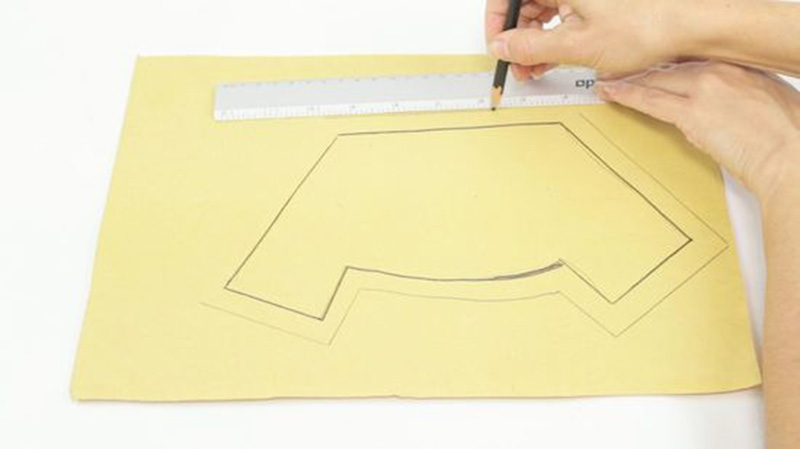
Each stuffed animal has its own body shape: some are round and chubby, some slim, some with very large heads. There is no universal size chart. To get a good fit, you need to measure the actual plush and convert those numbers into a simple pattern that respects its proportions.
The idea is similar to garment drafting for people, just much simpler: you build a basic “block” for the torso and then adapt this block into shirts, dresses, jackets, or overalls.
You start by measuring chest, body length, neck, and limb positions, then create a paper wrap around the plush body, flatten it, add ease and seam allowance, and test with a quick mock-up. This base pattern becomes your master template for many outfit styles.
Important measurements and what they control
| Measurement | How to Take It on the Plush | What It Controls in the Pattern |
|---|---|---|
| Chest / tummy | Around the widest part of torso | Garment width for tops, jackets, dresses |
| Body length | From neck base to bottom of torso | Length of tops and bodices |
| Neck (if needed) | Around neck base | Neckline size, collar and hood openings |
| Shoulder width | Across top where arms attach | Sleeve position and armhole shape |
| Arm length | From “shoulder” point to paw | Sleeve length |
| Arm circumference | Around the thickest part of arm | Sleeve width and cuff ease |
| Leg length | From hip/body bottom to paw | Pant or skirt length |
| Head circumference | Around largest part of head | Hoods, high-neck garments, pull-over openings |
Simple pattern drafting process
- Wrap and trace
- Wrap a strip of paper around the plush torso.
- Mark center front, center back, and side lines on the paper.
- Mark armhole position where the arms meet the body.
- Flatten and clean
- Cut the paper at the center back or side.
- Flatten it on the table—this becomes your basic body block.
- Add ease
- Add a little width so the garment can slide on and off.
- Add more ease for stiff fabrics, less ease for stretchy knits.
- Shape neck and armholes
- Draw neck curve at the top of center front and center back.
- Draw gentle armhole curves if you plan to add sleeves.
- Add seam allowance
- Add 5–7 mm around all edges.
- Test with scrap fabric
- Sew a quick sample top.
- Try it on the plush; adjust areas that are tight, twisting, or overly loose.
Pattern-fit considerations
| Plush Body Type | Pattern Focus |
|---|---|
| Round/chubby torso | Use simple A-line shapes; add more chest ease |
| Slim/long torso | Use straighter side seams; keep length balanced |
| Very large head | Plan larger openings or back closures |
| Short limbs | Shorten sleeves and pant legs; avoid tight cuffs |
Once your basic block fits well, it becomes the “mother pattern” you can modify for many outfits.
What sewing and assembly methods ensure clean, durable miniature garments?
Miniature garments make every mistake visible. Rough seams, thick corners, or twisted hems quickly ruin the look, even if the pattern is correct. The good news is that you can get a professional look by using a few simple sewing rules and keeping everything small: seam allowances, stitch length, and layers.
Use a short stitch length, small seam allowances, careful pressing or finger-pressing, and simple seam finishes to create clean, strong miniature garments that can be dressed and undressed many times.
Core sewing methods for stuffed animal clothes
| Technique | Where to Use It | Why It’s Useful at Small Scale |
|---|---|---|
| Straight stitch | Side seams, shoulder seams, sleeve seams | Basic strong construction for most garments |
| Backstitch (by hand) | Stress points, closures, tight corners | Stronger than running stitch in small areas |
| Topstitching | Necklines, hems, placket edges | Keeps edges flat and adds a finished, professional look |
| Zigzag/overcast stitch | Raw edges of woven fabrics | Reduces fraying and keeps seams tidy |
| Narrow hem | Sleeve and bottom hems | Avoids bulky edges on tiny garments |
| Simple facing/binding | Necklines and armholes (sleeveless styles) | Smooth, clean edges without heavy seams |
Practical sewing tips
- Set machine stitch length shorter than usual (around 2–2.5 mm).
- Trim seam allowances after sewing if they feel bulky, especially at curves and corners.
- Clip curves around necklines and armholes so they turn smoothly.
- Press seams gently with a small iron or finger-press them while warm.
- For tiny pieces, hand sewing with neat backstitch is often more controlled than machine sewing.
With these habits, your garments will look stable and neat, even in close-up photos.
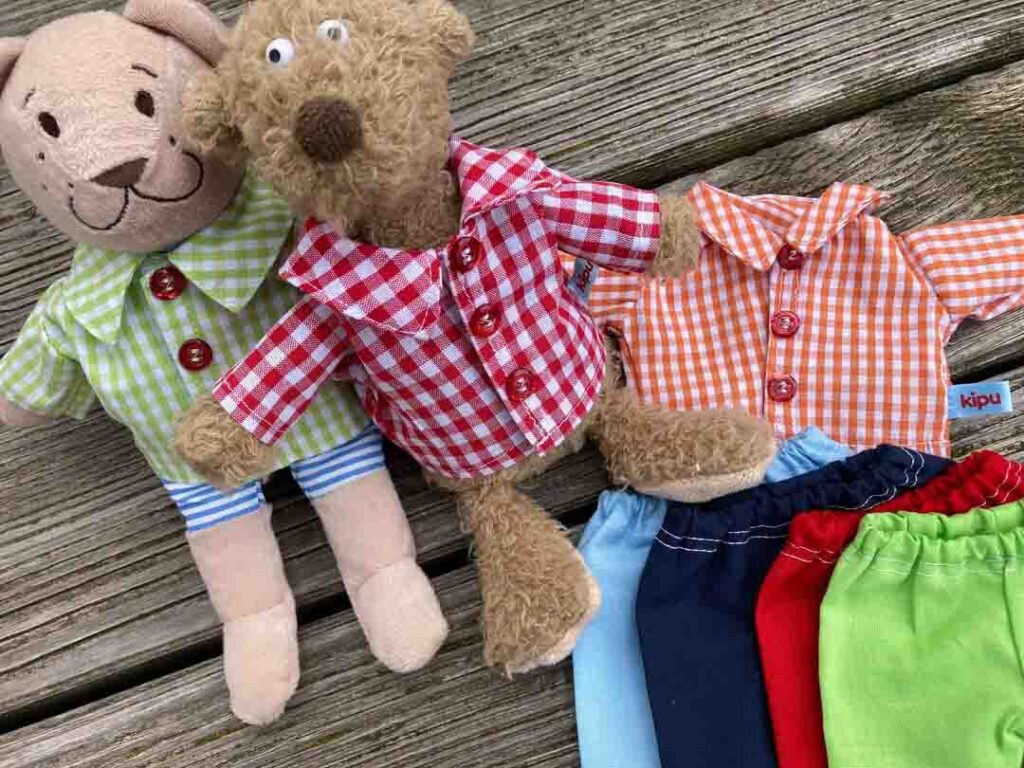
How do you attach closures, trims, and decorative details securely?
Closures and trims bring life and branding to stuffed animal clothes, but they are also a key safety point. Buttons, beads, or metal parts that are not secured can become hazards, especially for young children.
The safest approach is to use soft Velcro, plastic snaps, elastic, and well-stitched ribbons or labels, and to treat decorative buttons as firmly attached “embellishments,” not load-bearing fasteners.
You plan closures so that clothes are easy to open and close, but all parts are stitched through multiple layers where possible. Trims and details are sewn along their full length or anchored strongly at several points, so they cannot be easily pulled off.
Common closures and their use
| Closure Type | Best Locations | Safety & Usability Notes |
|---|---|---|
| Soft Velcro | Back opening of shirts, dresses, jackets | Very easy for kids; round corners to avoid scratching |
| Plastic snaps | Front plackets, shoulders, small jackets | More secure than metal; reinforce fabric around them |
| Elastic | Waistbands, cuffs, necklines | Helps clothes fit different plush sizes |
| Ties / ribbons | Decorative bows, waist ties | Keep short and stitch securely, not just knotted |
Trims and decorative details
- Ribbons and lace
- Sew along edges, not just at two ends.
- Avoid long dangling pieces for children’s toys.
- Buttons
- For younger age groups: either avoid, or use large flat buttons sewn through multiple times and mainly decorative.
- For older collectors: small buttons can be used, but still sewn very securely.
- Labels and logos
- Woven labels can be sewn into a seam or topstitched on.
- Embroidered logos on pockets, chest, or back add strong branding.
Secure attachment habits
| Detail Area | Good Practice |
|---|---|
| Velcro | Sew all around the edge with tight stitches |
| Snap areas | Use interfacing or extra fabric behind the snap |
| Decorative trims | Stitch along full length where possible |
| Buttons | Use strong thread, many passes, and secure knots |
Thinking like a toy safety inspector, not only like a designer, will protect your end users and your brand reputation.
How do you adjust patterns for different clothing styles and plush sizes?
Once you have a base pattern that fits one plush, you often want to create different styles (T-shirts, dresses, jackets, pants) or use it on similar plush in other sizes. Instead of redrafting from zero, you can scale and modify your existing patterns in a controlled way.
For new styles, you begin from the base block and change length, width, necklines, sleeves, and hem shapes. For different sizes, you either re-measure a new plush and adjust the block, or scale the pattern proportionally and then fine-tune with a quick test garment.
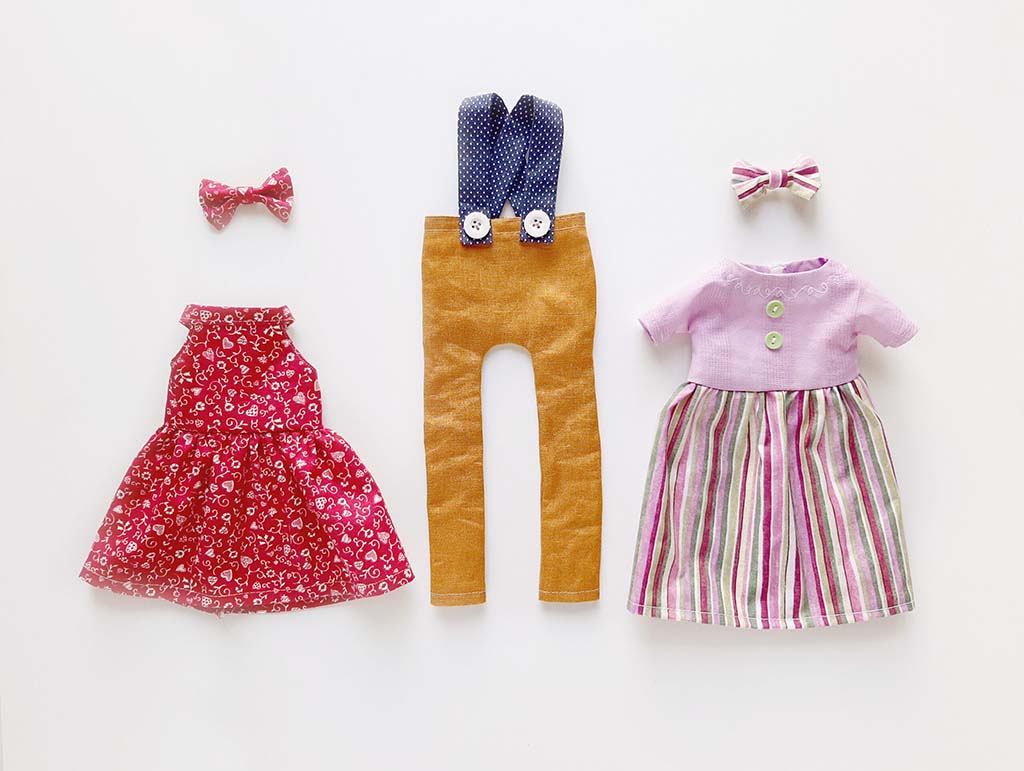
Turning a base block into different styles
| Style Type | Main Changes from Base Block | Notes |
|---|---|---|
| T-shirt/top | Add short sleeves, keep body length moderate | Use knit or add back opening for woven fabrics |
| Hoodie/sweater | Lengthen body, add hood or collar, add cuffs | Use fleece or knit; add more ease for layering |
| Dress | Extend and/or flare lower part; add skirt pieces | A-line or gathered skirt from the waist |
| Jacket/coat | Add front opening, overlap for closures, collar | Use small facings for front edges and neckline |
| Pants/shorts | Draft simple pant leg, add elastic waistband | Adjust leg length for shorts vs. full pants |
Adapting for different plush sizes
- Similar body shape, different height:
- Scale pattern by a percentage (for example 80% or 120%).
- Test and adjust key areas: neck, armholes, sleeve length.
- Different body shape:
- Re-measure chest, body length, and limb length.
- Adjust base block width and length according to new measurements.
- Check ease: sometimes very round plush need more ease even at similar chest circumference.
Size adjustment quick table
| Change Needed | Pattern Adjustment Strategy |
|---|---|
| Larger plush overall | Scale pattern up, then add extra length or width where needed |
| Smaller plush overall | Scale pattern down, then reduce seam allowance or ease |
| Only wider chest | Add width at side seams, keep lengths similar |
| Longer torso | Add length between shoulder and hem lines |
By treating patterns as flexible tools, you can build a small “wardrobe system” that grows with your plush range.
What finishing and fitting checks ensure professional-looking stuffed animal clothes?
Finishing is where your stuffed animal clothes move from “cute idea” to product-ready outfit. This step is about checking fit, appearance, and durability. A garment that looks nice flat on the table might twist, ride up, or strain when put on the plush.
You finish by trimming threads, pressing seams, testing closures, and dressing the plush several times. If the clothes go on smoothly, sit well on the body, and stay secure during handling, you are close to professional standard.
Finishing and fitting checklist
| Check Area | What to Look For | Possible Fixes |
|---|---|---|
| Threads & edges | No loose threads, no heavy fraying | Trim tails, overcast or zigzag raw edges |
| Seams | Straight, lying flat, no puckering | Press again, adjust tension on next garment |
| Closures | Open/close smoothly, no broken stitches | Reinforce closure areas with extra stitching |
| Fit on plush | Easy to dress; no straining at chest, armholes, waist | Add ease or widen openings in next pattern version |
| Lengths | Hem sits where you planned (not over eyes or paws) | Adjust pattern length for next run |
| Safety | No loose buttons, trims, or sharp edges | Tighten attachment or remove risky parts |
| Appearance | Symmetry left-right, clean neckline and hems | Adjust pattern and sewing sequence if needed |
Simple fitting routine
- Dress the plush slowly and note where you feel resistance.
- Move arms, legs, and head to see if seams strain.
- Look at the plush from front, side, and back.
- Undress and dress again to check ease and closure strength.
If your garments pass this routine and still look neat after a few cycles, you are close to the standard we expect from factory samples.
Conclusion
Making stuffed animal clothes is a small but powerful way to upgrade your plush line. With the right materials, accurate patterns, clean sewing, safe closures, and consistent fitting checks, your outfits stop looking like “fabric scraps” and start looking like true mini-garments that support play, gifting, and branding.
At Kinwin, we often develop plush toys and clothing sets together—from simple T-shirts and hoodies to seasonal dresses and uniforms for character mascots. If you want to build a dressed-plush range that is cute, safe, and ready for real markets, you’re very welcome to contact me at [email protected] or visit kinwintoys.com to explore how our factory can support your next project.