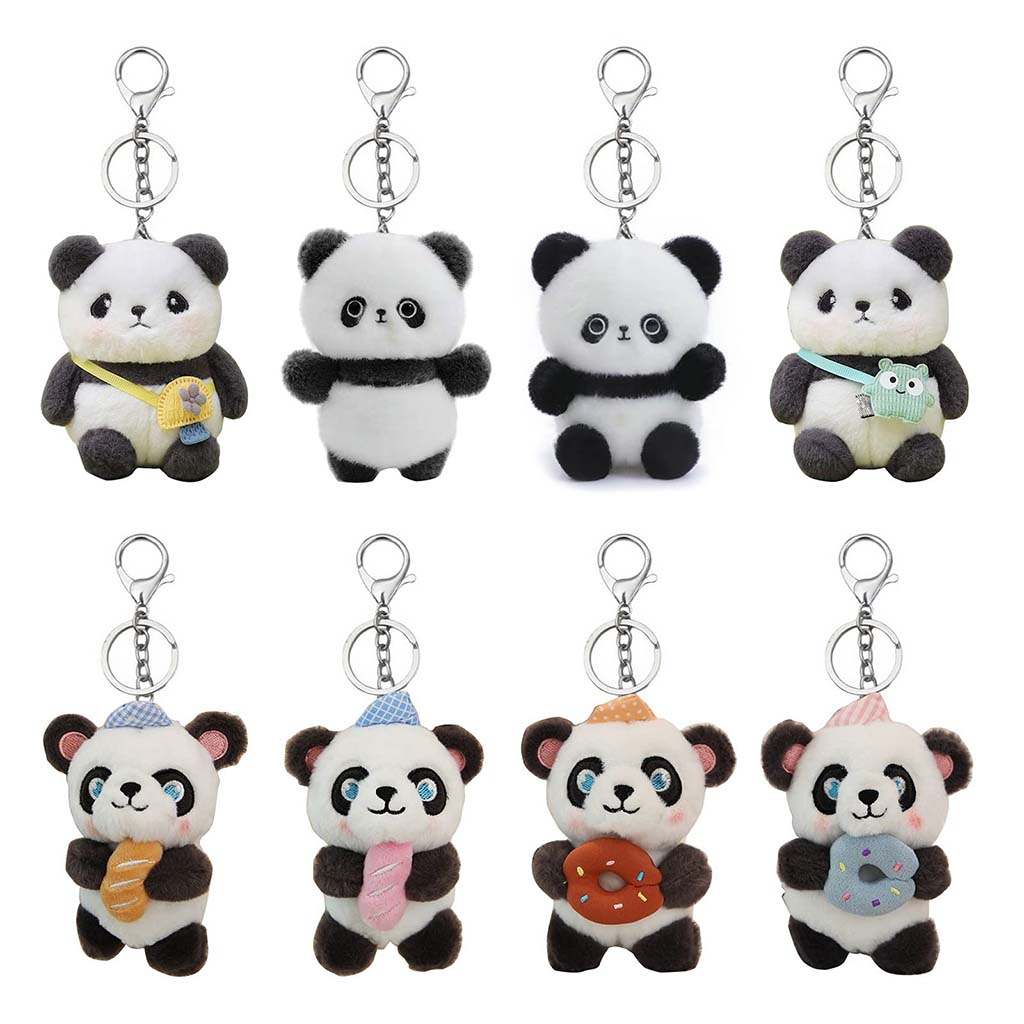
Plush keychains look small and simple, but they still follow the same logic as full-size plush toys: good materials, clear patterns, strong seams, and clean finishing. The difference is that everything happens in miniature, so planning and precision matter even more.
Plush keychains are made from soft fabrics like minky or short-pile plush, stuffed lightly with fiberfill, and attached to metal key rings or clips through strong fabric loops or cords. To make them last, you need tight sewing, secure hardware attachment, and careful quality checks, because these tiny plushies are pulled, swung, and used every day on bags, keys, and backpacks.
In this guide, I’ll walk you through how I would approach plush keychains from a manufacturer’s angle, but in a way that works for small studios and DIY makers too.
What materials and tools are needed to make plush keychains?
Before thinking about cute shapes, you need to make sure the materials fit small size and high stress. Keychain plushies get more friction than shelf plush: they rub against bags, keys, zippers, and door locks. Fabrics must be strong, seams must be tight, and hardware must be reliable.
For keychains, I prefer short-pile plush or minky with a medium weight. Very long fur hides details and looks messy at small scale. Solid polyester fiberfill works well as stuffing, and you only need small amounts per piece. For hardware, choose key rings, lobster clasps, or ball chains with consistent quality.
In practice, you need soft but strong fabric (minky, short-pile plush, or fleece), polyester fiberfill, polyester thread, basic sewing tools, and reliable keychain hardware plus ribbon or webbing for loops. Good marking tools and a stuffing stick also help you manage the tiny size of each plush.
Recommended materials and tools
| Category | Items | Why They Help |
|---|---|---|
| Outer fabric | Short-pile plush, minky, or fleece | Soft feel, clear shape, easy to sew small curves |
| Lining/support | Felt or stiff fabric for tiny parts (ears, tags) | Keeps small details from collapsing |
| Stuffing | Polyester fiberfill | Light, washable, easy to control in small spaces |
| Thread | Strong polyester sewing thread | Holds seams against daily pulling and friction |
| Details | Embroidery thread, tiny felt pieces for eyes/mouth | Safe, durable surface features |
| Hardware | Key rings, lobster clasps, swivel hooks, ball chains | Makes the plush usable as a keychain |
| Loop materials | Grosgrain ribbon, strong webbing, fabric tabs, cord | Connects plush body to metal hardware |
| Tools | Scissors, snips, hand needles, sewing machine (optional) | Clean cutting and strong stitching |
| Marking & shaping | Fabric pen/chalk, ruler, paper, stuffing stick | Accurate patterns and controlled stuffing |
When sourcing for larger production, we also check that hardware and fabrics are nickel-safe, colorfast, and consistent across batches. Even for small runs, it is smart to buy hardware from trusted suppliers rather than random mixed packs.
How do you design and draft small-scale patterns for keychain plushies?
Keychain plush needs to be cute and readable in a very small space. This means simple silhouettes and limited detail. Designs that look great at 30–40 cm can become messy at 8–10 cm. You need to reduce complexity and focus on clear shapes and strong outlines.
First, choose your finished size. For most keychains, a height of 7–10 cm (around 3–4 inches) works well. Then decide on a style: flat chibi shape, small chubby animal, mini mascot with big head, or a simplified logo character.
To draft patterns, sketch your design at full keychain size, simplify curves and remove tiny parts, then convert the drawing into flat pattern pieces with seam allowance. Always test the pattern with scrap fabric before cutting your final plush fabric, because small changes in scale can distort proportions quickly.
Steps for small-scale pattern design
- Decide finished size and style
- Example: 8 cm tall chubby cat, or 7 cm circular mascot.
- Smaller than this becomes difficult for beginners.
- Sketch front and side at real size
- Draw on paper at the exact size you want the finished plush.
- Use thick lines and simple shapes; avoid very sharp points.
- Simplify details
- Turn small fingers into simple paws.
- Avoid very thin tails; keep them slightly thicker than you think necessary.
- Combine small facial features into bolder shapes.
- Break design into pattern pieces
- Front body and back body (for simple flat style).
- Or front, back, and a small gusset if you want a more 3D shape.
- Separate ears or small fins if needed.
- Add seam allowance
- Usually 3–5 mm for keychains.
- Mark notches for alignment (for ears, side panels, or gussets).
- Make a quick mock-up
- Use plain cotton or cheap fleece.
- Sew fast, stuff lightly, and check if the shape looks right.
Pattern design overview
| Step | Goal | What to Watch Out For |
|---|---|---|
| Size selection | Keep plush between 7–10 cm | Too big feels bulky, too small looks messy |
| Shape simplification | Clear outline and simple silhouette | Remove small points and fragile details |
| Piece planning | Minimum number of pieces for clean shape | Many seams can crowd tiny surfaces |
| Seam allowance | Small but consistent margins | Large allowance can cause bulk and distortion |
| Prototype testing | Catch shape problems early | Adjust pattern before cutting plush fabric |
For B2B work, we often create one strong base shape and then change colors, facial expressions, and minor features to build a whole keychain series from a single master pattern.
What sewing and assembly methods ensure durability at miniature sizes?
Because keychain plushies are small, seams are short, curves are tight, and seam allowance is narrow. This can make sewing more tricky. At the same time, they face heavy daily stress: twisting on key rings, rubbing against keys, and being pulled by zippers. So durability matters even more.
You can sew keychain plush by machine or by hand; both work well if you use the right stitches. Focus on short stitch length, strong backstitching, and double stitching on stress areas. Avoid leaving large openings; keep gaps small and close them securely with ladder stitch after stuffing.
To build durability, sew small pieces in a clear order, use tight stitches with short stitch length, and reinforce joints like the loop area and top seam. Always tuck and sew the loop into a seam, rather than just tacking it on the surface, so the force from the key ring spreads through the whole plush body.
Suggested assembly sequence
- Prepare small details
- Sew or embroider faces on the front panels while they are flat.
- Attach small appliqués or patches now.
- Prepare loop tab
- Fold ribbon or fabric into a loop.
- Stitch ends together to form a strong tab.
- Sew ears or small parts
- Sew right sides together, turn, and topstitch if needed.
- Sew main body
- Place front and back right sides together.
- Insert loop tab at the top seam, pointing inward.
- Sew around, leaving a small opening for stuffing.
- Turn and inspect
- Turn right side out through the opening.
- Check that the loop sits straight and is caught deeply in the seam.
Sewing methods and tips
| Technique | Where to Use It | Why It Matters |
|---|---|---|
| Short machine stitch | Perimeter of body, around small curves | Reduces gaps and makes seams stronger |
| Backstitch (hand) | Around loop area, at openings | Extra-strength stitching in key stress zones |
| Ladder (invisible) stitch | Closing stuffing opening | Clean finish with hidden seam |
| Double stitching | Top seam where loop is inserted | Keeps loop from tearing out under pulling |
| Clipping corners/curves | Around tight shapes | Helps plush turn smoothly without bulk |
Because pieces are small, work slowly. It is better to sew one neat seam than to rush and rip out stitches later.
How are stuffing and shaping managed for compact plush keychain forms?
Stuffing a 30 cm plush is forgiving; stuffing a 7 cm keychain is not. Too much fiberfill and the plush becomes a hard ball; too little and it looks empty or wrinkled. You also have less space to correct lumps, so the way you add stuffing matters.
For keychains, you usually want medium firmness: solid enough to keep shape in a bag, but still soft to squeeze. Limbs, if any, can be lightly stuffed or even left flat to avoid stiffness.
To manage stuffing in compact forms, use very small tufts of fiberfill, push them gently into corners with a stick, and build up fullness layer by layer. Stop before the fabric over-stretches, and check from all angles that the shape looks smooth and symmetrical. Then close the opening with ladder stitch, pulling the seam snug so stuffing stays inside.
Stuffing strategy for tiny plush
- Pre-tear small tufts
- Do not use big chunks.
- Prepare a small pile of tufts on your table.
- Fill narrow areas first
- If the design has ears, small corners, or tips, gently push fiberfill in with a stick.
- Avoid forcing too much; you only need a little.
- Build the main volume
- Add fiberfill to the center of the plush.
- Press and roll the plush in your hands to spread stuffing evenly.
- Check firmness and balance
- Pinch the plush: it should compress slightly and bounce back.
- Check that left and right sides look similar.
- Close the opening carefully
- Keep the last stuffing slightly below the seam line so the opening closes flat.
- Use ladder stitch to keep the seam invisible.
Stuffing level overview
| Area | Recommended Firmness | Reason |
|---|---|---|
| Main body | Medium | Holds shape in a pocket or bag |
| Small ears | Light | Keeps them soft and not bulky |
| Tiny limbs | Light to medium | Avoid stiffness at very small scale |
| Edges & corners | Smooth, lightly filled | Prevent sharp corners or hollow tips |
If you plan to use the keychain as a bag charm rather than a key bundle, you can keep stuffing slightly softer for a more “squishy” feel.
How do you securely attach hardware, loops, and keychain accessories?
The connection between plush and metal is the most stressed point in the whole product. If this fails, the user loses the plush or the keys. This link must be more than cosmetic; it must be engineered.
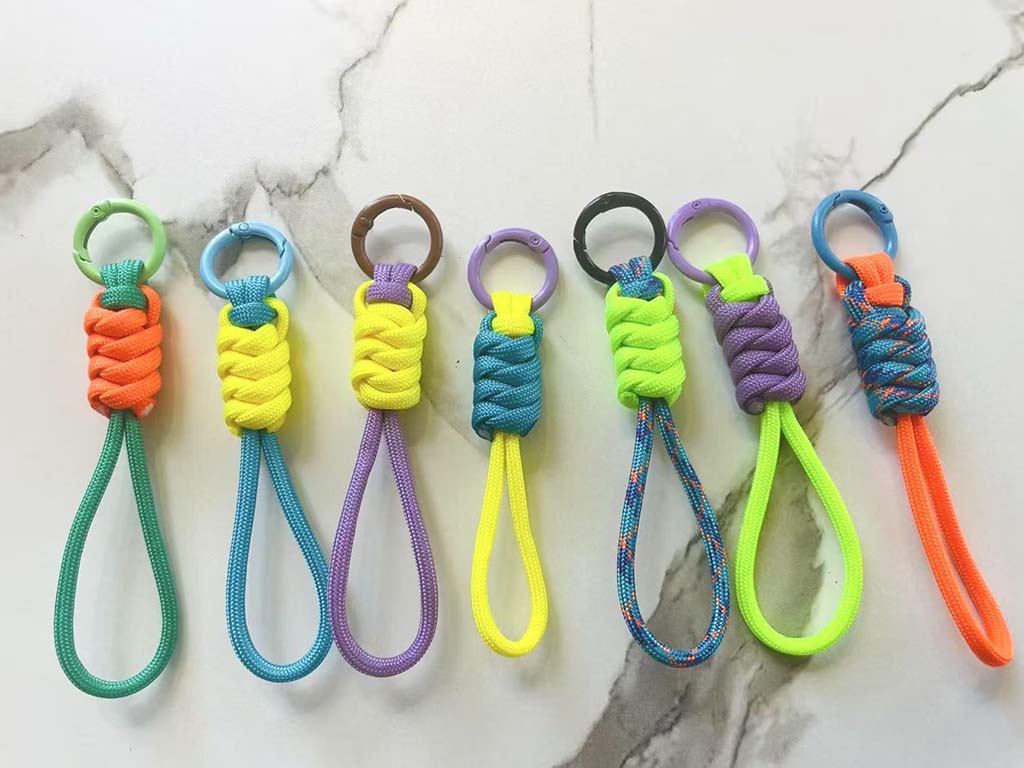
The safest method is to sew a loop (fabric tab, ribbon, or webbing) into the top seam of the plush, not just tack it onto the surface. The loop then passes through a key ring, lobster clasp, or ball chain. For heavier key sets, webbing or sturdy grosgrain ribbon is better than thin cord.
To attach hardware securely, insert the loop deeply into a seam, sew across it at least twice with strong stitches, and then connect metal hardware through the loop using split rings or sturdy clips. Avoid glue-only connections and thin, weak decorative cords that can snap under daily use.
Loop and hardware options
| Loop Type | Best Use Case | Notes |
|---|---|---|
| Grosgrain ribbon | General keychains and bag charms | Strong, flat, easy to sew into seams |
| Woven webbing | Heavier key sets | Very durable, slightly thicker |
| Fabric tab | Fully matching plush fabric | More work to sew, but very cohesive look |
| Thin cord | Lightweight decorative charms | Not ideal for heavy keys |
| Hardware Type | Pros | Considerations |
|---|---|---|
| Split key ring | Very secure, standard for keys | Slightly harder to attach and remove |
| Lobster clasp | Easy to clip to bags and zippers | Good for bag charms rather than key bundles |
| Ball chain | Lightweight, adjustable length | Best for light charms, not heavy key rings |
| Swivel hook | Nice for preventing twisting | Often paired with a ribbon or webbing loop |
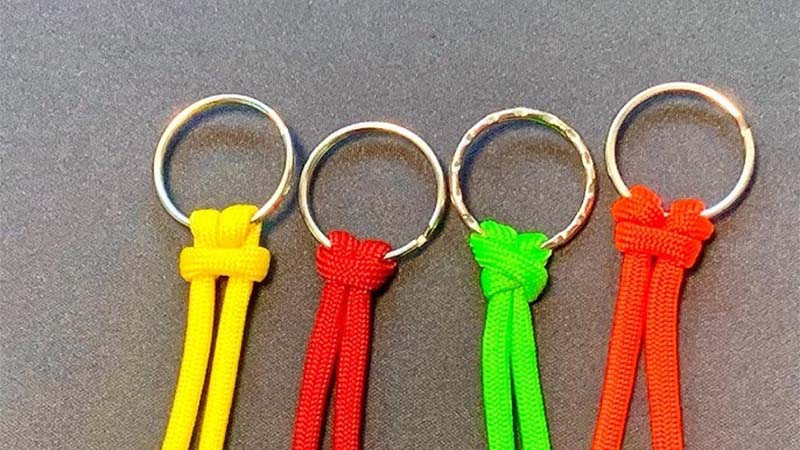
Secure attachment steps
- Prepare loop
- Fold ribbon or fabric, stitch ends together.
- Optionally, stitch across the folded area for extra strength.
- Insert into seam
- Place loop between front and back body pieces at the top.
- Ends of the loop must extend inside at least 1–1.5 cm.
- Sew and reinforce
- Sew the top seam once.
- Sew a second line of stitching over the loop area.
- Attach hardware
- After turning and stuffing, thread the loop through a split ring or clasp.
- Close the ring fully and check it does not open with light force.
Test by pulling the keychain several times. If anything feels loose, fix it before you use or sell the piece.
What finishing and quality checks ensure a clean, long-lasting plush keychain?
Finishing is what separates a “home craft” from a professional-looking keychain plush. At small size, every loose thread, crooked eye, or untidy seam is more visible. A simple quality routine helps you catch and correct these details.
You can follow a lighter version of the checks we use in the factory: look at seams, stuffing, symmetry, hardware, and surface. This makes your keychains more durable and also more attractive for customers or gift recipients.
For finishing, trim all thread tails, clean the surface with a lint roller, and reshape the plush with your hands. Then check seam strength, stuffing balance, facial alignment, and hardware security. Only when the keychain passes these checks should you consider it a finished, long-lasting product.
Quick quality checklist for plush keychains
| Check Area | What to Look For | Fix If Needed |
|---|---|---|
| Seams | No gaps, no skipped stitches, no fraying | Reseam or reinforce with backstitch |
| Loop attachment | Firm, no movement when pulled | Add extra stitching or replace loop |
| Hardware | Key ring or clasp fully closed and secure | Use pliers to tighten or replace hardware |
| Symmetry | Front and back shapes match, face centered | Adjust stuffing or refine pattern next time |
| Stuffing | No hard lumps, no hollow spots | Add or remove fiberfill and massage |
| Surface | No loose fibers, pen marks, or glue residue | Trim, brush, or lightly clean with damp cloth |
If you plan to sell your keychains, also consider:
- Consistency across a batch (same size and expression).
- Simple, neat packaging that keeps the plush clean.
- Clear usage notes (for example: not suitable for children under 3 if hardware is small).
Conclusion
Plush keychains may be tiny, but they still need the same careful thinking as full-size plush toys: smart material choices, simple but well-drafted patterns, strong seams, controlled stuffing, secure hardware, and tidy finishing. When you respect these steps, your keychain plushies will not only look cute in photos but also survive real daily use on bags and keys.
At Kinwin, we apply this same logic on an industrial scale for OEM and ODM clients—developing mascot keychains, character mini-plush, and branded bag charms for global markets. If you are ready to move from handmade or small-batch keychains to factory-level production with full safety and quality support, you’re very welcome to contact me at [email protected] or visit kinwintoys.com to explore how our team can help.