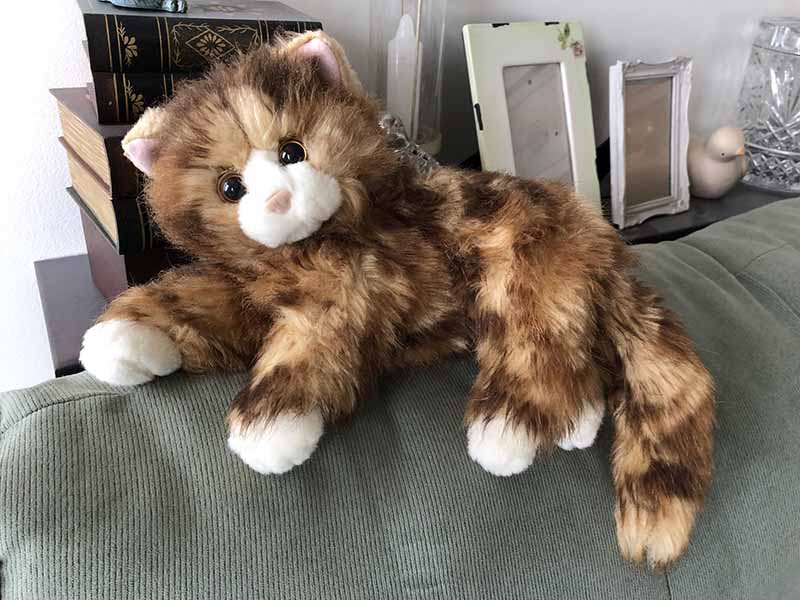
When a buyer picks up a cat plush and smiles, they are really testing many things at once: softness, shape, balance, and the tiny details of the face. As a manufacturer, I know that a “simple” stuffed animal cat is actually the result of many careful decisions.
To make a stuffed animal cat, you need soft, safe fabrics, quality stuffing, and a clear pattern that captures a cat’s head, body, limbs, and tail. Clean sewing, secure facial details, and balanced stuffing help the plush sit or stand well, survive washing and play, and still look cute on the shelf.
In this guide, I’ll share how I think about building a cat plush step by step—from materials and patterns to finishing checks—so you can use the same logic in your studio, workshop, or brand.
What materials and tools are essential for making a stuffed animal cat?

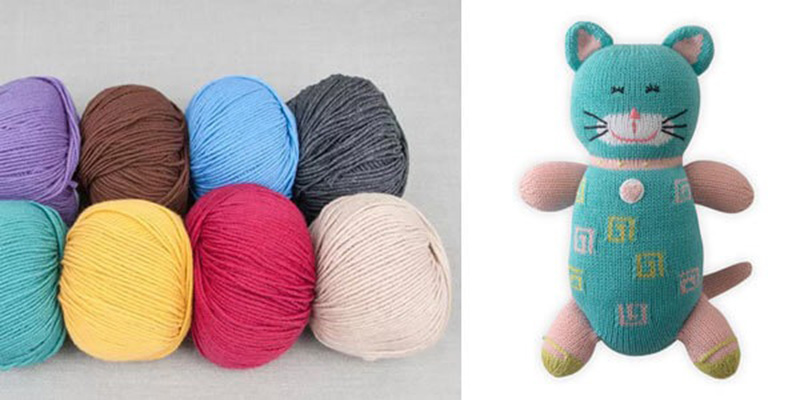
Before thinking about cute faces or ear angle, you need a solid material base. The right materials make sewing smoother, keep seams strong, and give your cat plush a good handfeel. Poor materials create flat shapes, rough touch, and fast damage.
For most projects, I suggest polyester plush or minky for the outer fabric and polyester fiberfill for stuffing. These are the most common choices in export factories because they are soft, stable, and easier to pass safety tests. You can add felt or contrast fabrics for muzzles, paw pads, and ear linings.
You also need basic sewing tools that help you cut, sew, and shape with control.
Core materials and tools
| Category | Recommended Choices | Why They Help You |
|---|---|---|
| Outer fabric | Minky, short-pile plush, fleece (polyester) | Soft, durable, easy to sew around curves |
| Contrast fabric | Felt, cotton, or plush in other colors | For muzzle, belly patch, ear lining, paw pads |
| Stuffing | Polyester fiberfill | Light, washable, good rebound |
| Thread | Polyester sewing thread | Strong, low stretch, colorfast |
| Facial details | Embroidery thread, small felt pieces | Safe, long-lasting details without hard parts |
| Marking tools | Fabric chalk, water-erasable pen | Lets you transfer patterns and face positions |
| Cutting tools | Fabric scissors, small snips | Clean edges and neat trimming |
| Sewing tools | Hand needles, pins or clips, sewing machine (optional) | For strong seams and faster assembly |
| Shaping tools | Stuffing stick, ruler, pattern paper | For balanced stuffing and accurate pattern work |
Once these are in place, you can focus on design and quality rather than fighting with the materials.
How do you design patterns that capture realistic or stylized feline shapes?
A successful cat plush has a clear “cat” silhouette, even if you draw it in a very cute or stylized way. That feeling comes from proportion: head size, ear shape, body curve, leg length, and tail position.
First decide your style:
- Realistic-ish: more natural body length, slimmer legs, smaller eyes.
- Stylized / kawaii: large head, round body, short limbs, big eyes.
- Minimal / modern: simple shapes, neutral colors, clean face.
Then design patterns to match that style, not fight it.
Pattern planning steps
- Choose finished size
- A good starting point is 20–30 cm (8–12 inches) in height.
- Larger sizes give you more space for clean seams.
- Sketch front and side views
- Front: head width, ear position, body width, leg spacing, tail position.
- side: curve from head to back to tail, tummy shape, chest, and hip.
- Break the cat into basic shapes
- Head: circle or oval.
- Body: pear or bean shape.
- Legs: soft tubes or bent L-shapes.
- Tail: curved tube.
- Convert shapes into pattern pieces
Typical set:- Head front and head back (plus a gusset for round heads).
- Body front and body back.
- Front legs (two mirrored pieces per leg or one fold piece).
- Back legs.
- Tail (two mirrored pieces).
- Ears (outer and inner).
- Optional muzzle and belly patch.
- Add seam allowance
- Add 5–7 mm around each piece.
- Mark notches where ears will sit, and where head joins the body.
- Test a prototype
- Use scrap fabric (cheap fleece or cotton).
- Sew quickly, stuff lightly, and judge the pose and balance.
Pattern decisions that change the style
| Design Choice | Realistic Direction | Stylized Direction |
|---|---|---|
| Head size | Slightly larger than real cat | Very large, almost half of total height |
| Eyes | Medium, more almond-shaped | Big, round or oval, closer together |
| Body | Longer and lower, more natural spine curve | Round or bean-shaped, shorter length |
| Legs | Slimmer and longer | Shorter, chubbier limbs |
| Tail | Medium thickness, smooth curve | Thicker, very curved or upright |
Once your test cat looks “right” from a distance, you can refine small pattern lines and move to final fabrics.
What sewing and assembly methods form the head, body, limbs, and tail cleanly?
A strong pattern can still fail if sewing and assembly are messy. Clean assembly makes curves smooth, joints strong, and the whole cat feel solid. It also helps when you later scale up to small-batch or factory production.
Work in a clear, repeatable order: small parts first, then head and body, then final assembly.
Suggested assembly order
- Sew ears
- Place outer and inner ear pieces right sides together.
- Sew around sides, leave base open, then turn right side out.
- Sew legs and tail
- Sew leg pieces right sides together, leave top open.
- Sew tail pieces, leave base open.
- Turn everything right side out; do not stuff yet or only lightly.
- Build the head
- Add any face-base pieces (like a muzzle patch) on the flat head front.
- Place ears at the top of the head, pointing inward between panels.
- Sew head front and head back (and gusset if used) right sides together.
- Leave an opening at the neck or bottom for stuffing.
- Build the body
- Stitch belly patch on body front if you have one.
- Insert front legs into side seams if you prefer integrated legs.
- Sew body front and back panels together, leaving a stuffing opening.
- Attach head to body
- With right sides together, sew around the neck.
- Use double stitching for strength.
- Turn the cat right side out through the body opening.
- Attach back legs and tail
- Tail can be sewn into the back seam or ladder-stitched after stuffing.
- Back legs can also be seam-in or hand-sewn onto the body.
Methods and tips for clean construction
| Technique | Use Case | Benefit |
|---|---|---|
| Straight machine stitch | Main seams on head, body, legs, tail | Strong and neat |
| Backstitch (hand) | Neck join, limb attachment, tail base | Very strong in small, curved areas |
| Ladder stitch | Closing final openings after stuffing | Invisible seam, professional finish |
| Double stitching | Neck, shoulders, hip seams | Extra security where children may pull or hug hard |
| Clipping curves | Around cheeks, spine, and hip curves | Avoids bulky seams and gives smooth outer shape |
By keeping your order the same each time, you create a simple “assembly line” even in a home studio.
How do you add facial details, ears, and markings with precision and safety?
Face, ears, and markings give your cat its personality and brand style. They also have the highest safety risk if not planned well. Small plastic parts, loose beads, or weak stitching can become hazards for young children.
For most brands and baby/child markets, embroidered or felt facial details are the safest option. Safety eyes can work for older age groups, but they must be tested and properly fixed.
Planning and placing the face
- Mark guidelines
- Draw a faint vertical center line on the head front.
- Mark a horizontal line where you want the eyes.
- Test the look
- Use small paper or felt circles to test eye position.
- Adjust spacing and height until the expression feels right.
- Add permanent features
- Eyes: embroidery or felt, stitched around all edges.
- Nose: small triangle or heart, embroidered or felt.
- Mouth: simple “Y” or “W” shape stitched under the nose.
- Whiskers: several short straight stitches on each side.
Safe, precise detail methods
| Detail Type | Safe Method | Notes |
|---|---|---|
| Eyes | Embroidered or felt with tight stitching | Best for baby and toddler products |
| Nose & mouth | Embroidery with strong thread | No hard parts; smooth and durable |
| Markings | Appliqué patches, contrast fabric pieces | Stitch fully around to avoid lifting edges |
| Ears | Sew into head seam or attach with strong stitching | Avoid glue-only attachment |
| Stripes/spots | Flat appliqué or direct embroidery | Keep shapes simple and clean |
Ears and markings
- Ears can stand upright, lean slightly, or flop, depending on style.
- You can add inner ear color with felt or contrast plush.
- For markings (like tabby stripes or spots), place them on flat panels before sewing the head and body together. This gives you better control and cleaner lines.
From a safety view, always ask yourself: Can this detail be pulled off by a child? If there is any doubt, add more stitches or change the material.
How is stuffing applied to achieve balanced softness and stable structure?
Stuffing is often the most underestimated step, but it has a big effect on how the cat plush feels, stands, and photographs. Good stuffing is about balance, not simply “more” or “less.”
For most cat plush designs, you want:
- A medium-firm head to protect the face and keep a round shape.
- A medium body that is soft to hug but not floppy.
- Limbs that are slightly softer so they can pose naturally.
- A tail that feels stable but still flexible.
Step-by-step stuffing strategy
- Stuff the limbs and tail first
- Use small tufts of fiberfill; avoid big clumps.
- Make paws a little firmer, upper legs softer.
- Stuff the tail to hold its curve but not stand completely rigid.
- Stuff the head
- Begin in deeper areas (cheeks, behind ears) and build your way toward the center.
- Add extra fiberfill behind the eye and nose area so the face stays smooth.
- Test by pressing your thumb into the head: it should give a bit and spring back.
- Stuff the body
- Add stuffing in layers from bottom to top.
- Shape the chest and tummy so they look full, not angular.
- Check the cat in a sitting or standing pose as you go.
- Balance test
- Place the cat on a flat surface.
- If it tips forward, add stuffing toward the back or base of the tail.
- If it leans back, fill the chest or front legs a bit more.
Recommended firmness by area
| Area | Firmness Level | Purpose |
|---|---|---|
| Head | Medium-firm | Keeps face shape and supports ears |
| Body | Medium | Comfortable hug with stable silhouette |
| Front legs | Light to medium | Natural drape and gentle posing |
| Back legs | Medium | Help cat sit or stand securely |
| Tail | Light to medium | Keeps shape without feeling stiff |
Once you are happy with the weight and balance, close openings using ladder stitch and gently smooth the seams into the fur.
What finishing and quality checks ensure a professional, long-lasting cat plush?
Finishing is where your stuffed animal cat moves from “nice handmade project” to professional-level product. This step is about polishing, safety, and consistency.
A simple, repeatable quality checklist helps you catch small problems before they reach customers.
Finishing steps
- Close all openings neatly
- Use ladder stitch so the seam almost disappears.
- Hide knots inside the plush.
- Reinforce stress points
- Neck seam, leg joins, and tail attachment may need extra backstitches.
- Trim and clean
- Cut all loose threads.
- Use a lint roller or tape to remove fibers and fuzz.
- Groom and shape
- Gently smooth fur with your hands or a soft brush.
- Adjust ears, tail, and limbs to their best positions.
Quality-check checklist
| Check Area | What to Look For | What to Do If There’s a Problem |
|---|---|---|
| Seams | No gaps, popped stitches, or stretched areas | Reseam or reinforce with hand backstitch |
| Symmetry | Eyes, ears, legs, and tail balanced left-right | Adjust stuffing or adjust pattern next batch |
| Stuffing | No hard lumps or empty corners | Add or remove filling, massage to blend |
| Features | Face details, ears, tail firmly attached | Add more stitching or change method |
| Stability | Cat sits or stands as intended | Rebalance body and leg stuffing |
| Surface | No pen marks, glue stains, or long loose fibers | Spot-clean gently and trim any long fibers |
If your cat plush passes all these checks, it will look and feel close to a factory sample: soft, safe, consistent, and ready for real use.
Conclusion
A good cat plush is soft, safe, durable, and visually balanced, while also giving your brand room for character, color, and storytelling. At Kinwin, we help global buyers turn cat designs—realistic, minimalist, or kawaii—into stable, test-ready plush products that work in real markets, not just in drawings.
If you’re planning a stuffed animal cat line and want support with pattern design, materials, safety, and mass production, you’re very welcome to contact me at [email protected] or visit kinwintoys.com to explore how our factory can support your success.