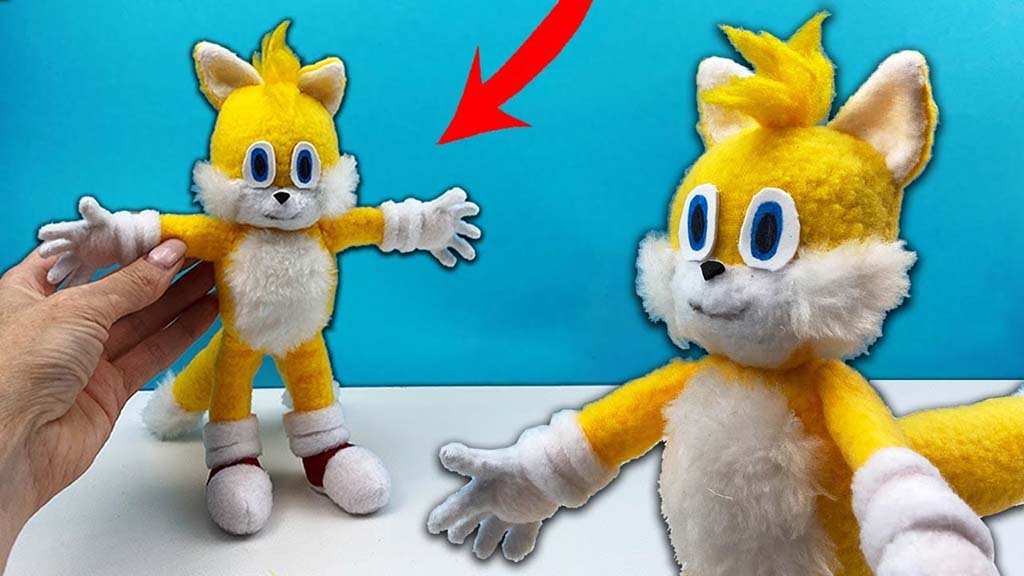
Many fans dream of holding their own Sonic plush—something that feels fast, energetic, and full of personality, just like the character on screen. Turning Sonic into fabric is possible at home, as long as you plan each step carefully.
To make a Sonic-inspired plush for personal, non-commercial use, you need blue, white, tan, and red fabrics, polyester fiberfill, strong thread, and a clear pattern that respects Sonic’s head shape, spikes, gloves, and shoes. Clean sewing, accurate color blocking, and careful stuffing help your plush look stable, recognizable, and ready for display or hugging.
In this guide, I’ll walk you through the process using the same logic I use in factory development—explained in simple steps so a small studio or hobby crafter can follow it.
Important: Sonic and related characters are intellectual property of their owners. This guide is for fan-made, personal use only, not for commercial production or sales without official permission.
What materials and tools are required to make a Sonic plush?
Before drawing any patterns, you need the right materials. Sonic’s design depends on strong color blocks and clean edges, so fabric choice is very important. You want fabrics that are soft, bright, and easy to sew around sharp shapes like spikes and shoes.
For most fan-made Sonic plush projects, short-pile plush or minky works best for the body, head, and spikes. They give a smooth, modern look and still show seams and details clearly. Polyester fiberfill is ideal for stuffing because it is light, washable, and easy to control.
In practice, you will need blue, tan, white, and red plush or fleece, polyester fiberfill, polyester thread in matching colors, basic sewing tools, and some felt or embroidery thread for facial details. A sewing machine is helpful but not required for small projects.
Suggested material list
| Area / Part | Recommended Material | Notes |
|---|---|---|
| Blue body & head | Blue short-pile plush or minky | Main Sonic color |
| Face, belly, arms | Tan or light-beige plush/fleece | Muzzle, inner ears, tummy |
| Gloves & socks | White plush or fleece | Simple, short-pile for clean look |
| Shoes | Red plush/fleece with white/yellow accents | Use felt for stripes and buckle details |
| Stuffing | Polyester fiberfill | Standard toy stuffing |
| Details (eyes, mouth) | Embroidery thread, white/black/green felt | Safer than glued plastic pieces |
| Stabilizer | Felt for shoe base and spike reinforcement | Helps keep shapes crisp |
Basic tools
- Fabric scissors and small thread snips
- Hand sewing needles
- Sewing machine (very helpful for long seams)
- Pins or sewing clips
- Fabric chalk or erasable pen
- Ruler and paper for pattern drafting
- Stuffing stick (a chopstick or rounded stick works well)
Once these are ready, you can focus on design instead of hunting for supplies mid-project.
How do you design patterns that capture Sonic’s proportions and signature shapes?

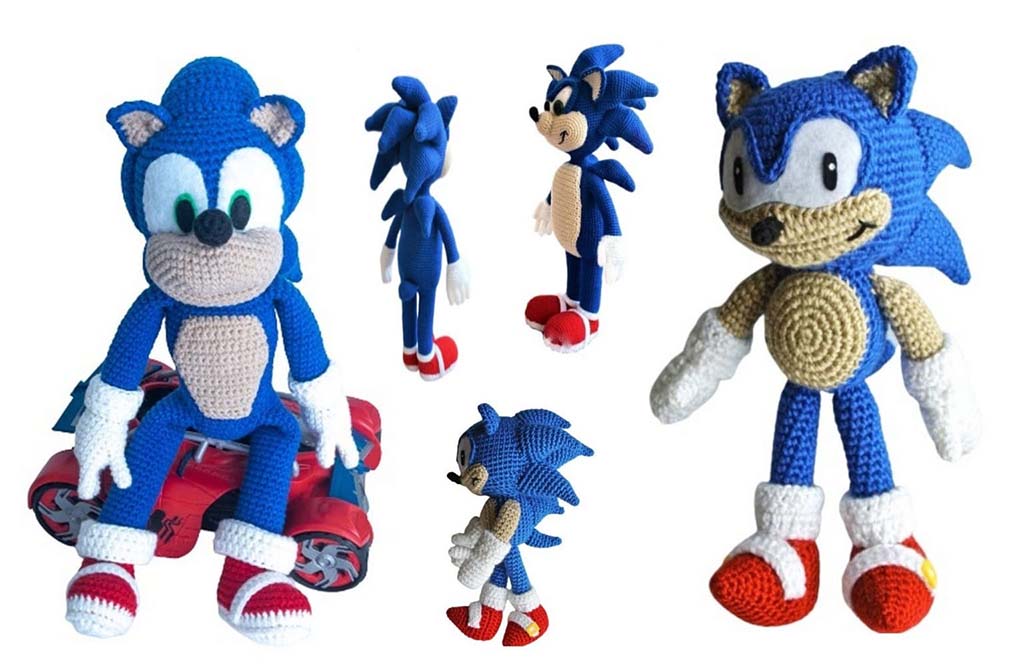
A Sonic plush looks “right” when the proportions feel close to the character: large head, clear spikes, thin limbs, big shoes, and strong color blocking. If these are wrong, even nice sewing will not fix the overall look.
Start with a simple pose: standing or slightly leaning forward. Trying to copy a very dynamic action pose makes pattern drafting much harder. Decide if your Sonic will be more chibi (bigger head, shorter body) or closer to classic proportions.
To design accurate patterns, sketch Sonic from the front and side at your desired plush size, then break the drawing into simple shapes—head, spikes, muzzle, body, arms, legs, and shoes. Convert those shapes into flat pattern pieces with seam allowance, and test with a quick fabric mock-up before cutting your final plush fabric.
Key proportional points
- Head: big and rounded, wider than the torso.
- Spikes: three main back spikes plus small head quills in many versions. For sewing, you can simplify them into fewer, smoother pieces.
- Eyes: large, unified eye shape with a clear muzzle below.
- Arms and legs: slim but not too thin (you still need space for seams and stuffing).
- Shoes: oversized compared to legs; this gives Sonic his iconic silhouette.
Pattern planning steps
- Decide size
- Beginner-friendly size: 25–35 cm (10–14 inches) tall.
- Sketch front and side views
- Mark head width, body height, arm length, and shoe size.
- Keep lines simple and rounded.
- Break into sections
- Head with separate muzzle and eye area.
- Body and belly patch.
- Arms and gloves.
- Legs and socks.
- Shoes (top piece, side piece, sole).
- Spikes (upper head spikes and back spikes).
- Draft paper patterns
- Add 5–7 mm seam allowance around all pieces.
- Mark notches for centered points and spike placement.
- Test a prototype
- Use cheap fabric to sew a quick sample.
- Check silhouette and spike position; adjust pattern if needed.
Pattern design overview
| Step | Goal | Common Adjustments |
|---|---|---|
| Initial sketch | Capture Sonic’s overall silhouette | Head size, spike length, shoe size |
| Piece planning | Decide how many panels you really need | Simplify too many small panels into bigger ones |
| Prototype | See if proportions look right in 3D | Fix wide heads, short legs, or tiny shoes |
| Final pattern | Clean shapes with clear seam allowance | Mark match points for spikes and muzzle |
This early design work saves a lot of time later and gives your Sonic plush a strong character feel even before you add details.
What sewing and assembly techniques build Sonic’s body, head, and limbs accurately?
Once you have patterns, good sewing and assembly turn flat pieces into a recognizable Sonic shape. The main challenge is managing many different color blocks and small parts while keeping seams strong and neat.
Work in a clear order: small components like spikes, muzzle, and shoes first; then head; then body; then arms and legs. Leave openings in places that are easy to close later, such as the back of the body or inner leg.
Use straight stitches with a short stitch length for main seams, reinforce high-stress areas (neck, arms, shoes), and clip curves before turning. Assemble head and spikes first, then attach the head to the body and finally add limbs and shoes. This sequence helps keep Sonic’s proportions and structure under control.
Suggested assembly order
- Prepare spikes
- Sew spike pieces right sides together, turn, and lightly stuff if needed.
- You can keep them soft or add felt inside for a sharper look.
- Prepare muzzle and belly patch
- Sew muzzle pieces if they are 3D; leave an opening for stuffing.
- Cut belly patch from tan fabric; edges can be appliquéd onto body front.
- Sew shoes and socks
- Assemble shoe tops and side panels.
- Attach soles cut from felt or stiff fabric.
- Add white and yellow accents as appliqué.
- Sew arms and legs
- Sew fabric pieces right sides together, leave openings at shoulder/hip.
- Attach glove and sock sections as separate color blocks.
- Assemble head
- Add facial details to the flat head front first (eyes, muzzle, mouth).
- Insert ears and top spikes into head seam.
- Sew head front and back together, leaving a neck or lower opening.
- Assemble body
- Attach belly patch to front panel.
- Insert arms into side seams if they are not attached later.
- Sew front and back panels together, leaving an opening for stuffing.
- Attach head to body
- Sew neck seam with double stitching.
- Turn entire plush right side out for stuffing and final assembly.
Helpful sewing techniques
| Technique | Where to Use It | Benefit |
|---|---|---|
| Short machine stitch | Main seams on head, body, limbs | Strong seams with minimal gaps |
| Backstitch (hand) | Neck area, spike bases, shoes | Extra reinforcement for stress points |
| Ladder stitch | Closing final openings | Clean, nearly invisible finish |
| Topstitching | Shoe edges, glove cuffs, belly patch | Adds definition and strength to visible edges |
| Clipping curves | Around head, muzzle, and spikes | Smooth outer curves without bulk |
Move slowly around tight corners, especially on the spikes and shoes, so you do not distort the shape.
How do you add facial details, spikes, gloves, and shoes with precision?
Sonic’s identity lives in his face, spikes, and shoes. If these areas are off, people will feel something is wrong even if they do not know why. Work on these features carefully, preferably while panels are still flat.
For safety and durability, use embroidery or felt appliqué for eyes and mouth. Avoid gluing on small plastic pieces, especially if children will handle the plush.
To add precise details, mark center lines on the head front, position eyes and muzzle symmetrically, and sew or embroider them before assembling the head. Attach spikes between head seams and down the back in planned positions, and build gloves and shoes with clear color blocks and topstitching so Sonic’s silhouette stays sharp and recognizable.
Facial details
- Mark guidelines
- Draw a vertical center line and a horizontal eye line on the head front.
- Sketch the unified eye shape lightly with fabric pen.
- Eyes
- Use white fabric or felt for the main eye area.
- Add green and black circles for iris and pupil.
- Stitch around edges with small tight stitches.
- Muzzle and mouth
- Attach tan muzzle panel under the eye area.
- Add nose with black felt or embroidery.
- Stitch mouth with dark thread in a simple curve.
Spikes and ears
- Position top spikes on the back of the head; pin and check from the front before final sewing.
- Place back spikes on the body, center-aligned; you can sew them into the back seam or applique them on top.
- Ears can be simple triangles with tan inner panels; insert them into the head seam at a slight angle.
Gloves and shoes
- Gloves:
- Use white fabric; keep finger shapes simple or suggest them with stitching.
- Add a slight cuff line with topstitching.
- Shoes:
- Sew red shoe body with a white stripe across.
- Attach a yellow buckle or stripe using felt.
- Use a firm sole (felt or similar) to keep the shoe flat and stable.
Detail precision checklist
| Area | Key Question | Possible Adjustment |
|---|---|---|
| Eyes | Are they level and symmetrical? | Reposition pattern or adjust embroidery |
| Muzzle | Is it centered and not tilted? | Re-pin and resew if needed |
| Spikes | Do they align smoothly down head/back? | Move spike positions or change length slightly |
| Gloves | Do they look balanced on both arms? | Adjust stuffing or seam alignment |
| Shoes | Are shoes the same size and angle? | Check pattern and stuffing amount |
Take your time here. Even small corrections in these areas make the Sonic plush look much more professional.
How is stuffing applied to achieve balanced softness and stable structure?
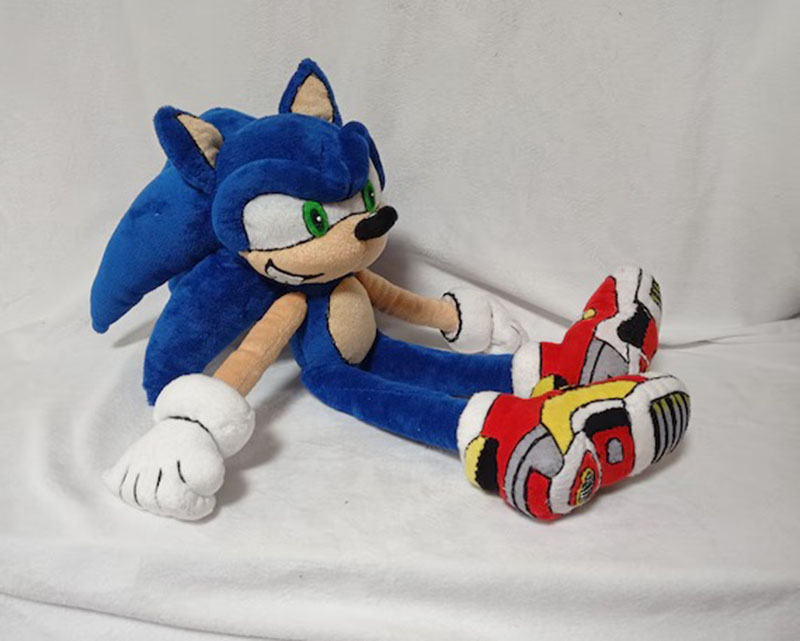
Stuffing determines how Sonic feels and how he stands or sits. If you overstuff, he looks stiff and distorted; if you understuff, he collapses and cannot show his shape. Sonic also has thin limbs and a large head, so weight distribution matters.
You want a medium-firm head and shoes, a medium body, and arms and legs that are firm enough to support their shape but still flexible.
Start stuffing from smaller parts like shoes and hands, then move to legs, arms, head, and finally body. Use small tufts of fiberfill to avoid lumps, and adjust stuffing so Sonic can sit or stand without tipping. Keep the head slightly firmer than the body to protect the face shape and spikes.
Stuffing by zone
| Area | Recommended Firmness | Reason |
|---|---|---|
| Head | Medium-firm | Keeps face smooth, supports spikes |
| Body | Medium | Soft enough to hug, but keeps Sonic upright |
| Arms | Light-medium | Allows gentle posing without bending too much |
| Legs | Medium | Helps support weight with shoes |
| Shoes | Medium-firm | Stable base, maintains shoe silhouette |
| Spikes | Light to medium | Enough to hold shape but not heavy |
Stuffing process
- Shoes and legs
- Stuff shoes first so they are solid bases.
- Fill legs evenly so both sides feel similar.
- Arms and gloves
- Add a little extra fiberfill in gloves so they look round and clean.
- Keep upper arms slightly softer.
- Head and spikes
- Begin by stuffing around spikes and ears from inside.
- Fill behind the face to keep the muzzle and eyes flat and smooth.
- Body
- Stuff from bottom to top, checking balance as you go.
- Adjust until Sonic can stand or sit with minimal support.
- Final balance check
- Place Sonic on a flat surface.
- If he leans forward, add a bit more stuffing in the back or adjust shoes.
- If he leans back, redistribute stuffing in chest and legs.
Only after you are happy with shape and stability should you close the final seams with ladder stitch.
What finishing and quality checks ensure a polished, character-accurate Sonic plush?
The last phase turns your Sonic plush from “good attempt” to clean, display-ready character. Finishing is about both looks and safety: no loose threads, no weak seams, and no parts that can be pulled off easily.
A simple quality checklist, similar to what we use in the factory, helps you catch small issues before you consider the plush finished.
To finish your Sonic plush, close all remaining openings with ladder stitch, reinforce high-stress seams (neck, limbs, shoes, spikes), trim thread tails, and gently groom the surface. Then check symmetry, stuffing balance, feature alignment, and spike position. If Sonic looks steady, expressive, and clean from all angles, your fan-made plush is ready.
Finishing checklist
| Check Area | What to Look For | How to Fix It |
|---|---|---|
| Seams | No gaps, popped stitches, or fraying | Reseam or reinforce with backstitch |
| Neck & joints | Head and limbs firmly attached | Add extra stitching inside seam allowance |
| Spikes | Secure bases, no loose points | Sew again at base, reinforce from inside |
| Shoes | Same size and angle, firm structure | Adjust stuffing or add extra stitches |
| Face | Eyes, nose, and mouth aligned and even | Slightly adjust stuffing or redo small parts |
| Surface | No chalk marks, loose fibers, or visible knots | Clean with lint roller, trim threads |
| Stability | Sonic can stand/sit as intended | Balance stuffing, flatten soles if needed |
For gifts or display, you can also add:
- A small tag with your name or date.
- A light brush or steam (very carefully) to smooth any creases.
Remember again: if you ever want to sell Sonic-themed plush, you would need official licensing and full safety testing. For personal use and fan gifting, your main focus is clean construction and safe, sewn details.
Conclusion
Making a Sonic-inspired plush at home is a detailed but very rewarding project. With the right materials, clear patterns, strong sewing, accurate details, and thoughtful stuffing, you can transform flat fabric into a soft character that feels close to the Sonic you already know from games and media.
At Kinwin, we apply the same structured process for licensed and original character plush—moving from sketch to pattern, sample, safety tests, and mass production for global brands. If you ever develop your own original characters and want to turn them into retail-ready plush lines with full OEM/ODM support, you’re very welcome to contact me at [email protected] or visit kinwintoys.com to explore how our factory can help.