Making your own plushy turns a sketch or idea into something you can actually hold and hug. It also gives you full control over size, color, and style. With the right steps, a homemade plushy can look close to factory quality.
When you make a plushy in a structured way—choosing suitable fabrics and tools, drafting clear patterns, using strong stitches, filling with balanced stuffing, and adding secure facial details—you end up with a toy that feels soft, looks clean, and lasts longer. In this guide, I’ll walk you through the same core logic we use in a plush factory, but in simple steps you can follow at home or in a small studio.
By the end, you’ll see how to move from idea to polished plushy, and you’ll know what to check so your design is ready for daily hugs, not just for photos.
What materials and tools are essential for making a plushy?
Before drawing patterns or turning on your sewing machine, you need a basic kit. If materials are wrong, the plushy can feel rough, lose shape, or fall apart at the seams. When your tools and fabrics are right, sewing becomes smoother and the final plush looks more professional.
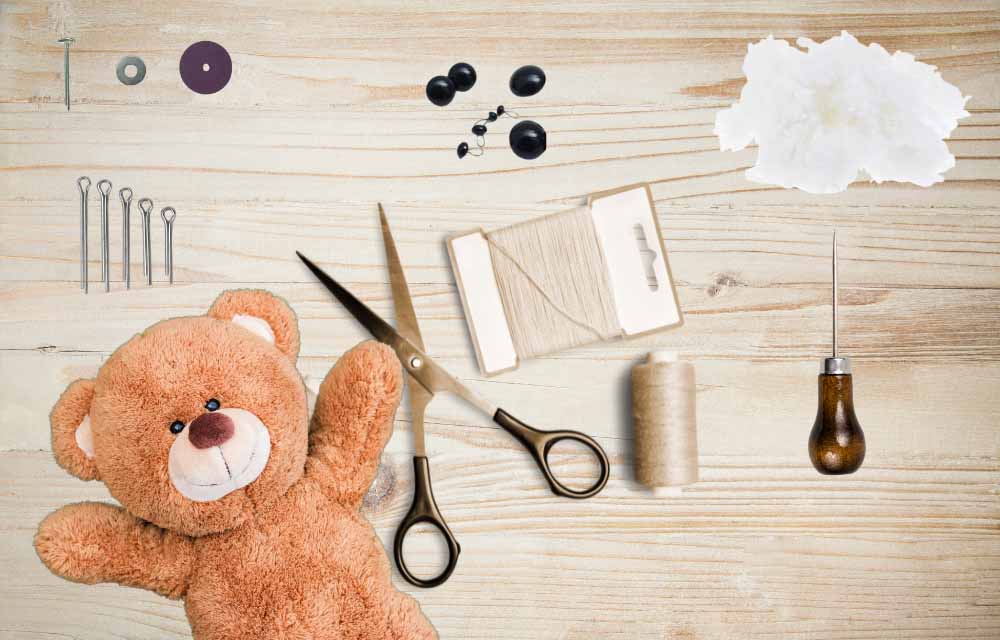
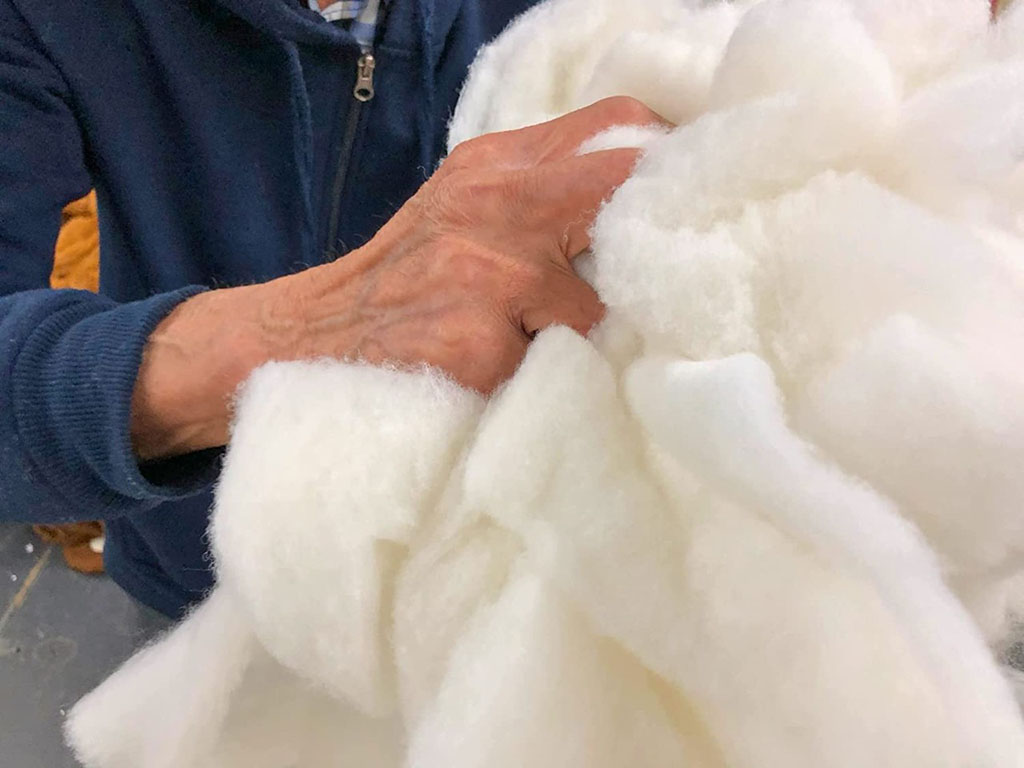
To make a plushy, you usually need a soft outer fabric (such as minky, velboa, or fleece), polyester fiberfill for stuffing, strong polyester thread, and either a sewing machine or hand-sewing needles. Add fabric scissors, pins or clips, marking tools, and a stuffing stick. With this small but complete kit, you can handle most beginner and intermediate plushy projects.
Core materials and why they matter
Choosing the outer fabric
For most plushies, I recommend:
- Minky / micro plush – very soft, slightly stretchy, great for cute characters.
- Short-pile plush / velboa – durable and smooth; good for clean shapes.
- Fleece – easy to sew, forgiving, and budget-friendly.
Avoid very long fur for your first projects; it is harder to cut, sew, and align.
Selecting stuffing and thread
- Polyester fiberfill is standard. It is light, washable, and easy to adjust in small tufts.
- Polyester sewing thread is stronger and more durable than basic cotton thread.
Use good-quality thread. Weak thread breaks when you tighten seams, especially around curves and small parts.
Basic plushy-making toolkit
| Category | Items You Need | Why They Help |
|---|---|---|
| Fabrics | Minky, velboa, or fleece | Soft surface, easy to sew, good for beginners |
| Filling | Polyester fiberfill | Creates soft volume and shape |
| Thread | Strong polyester thread | Holds seams under stress and stuffing |
| Sewing tools | Sewing machine or hand needles | Machine saves time; hand sewing works for details |
| Cutting tools | Fabric scissors, small snips | Clean edges and neat trimming |
| Marking tools | Fabric chalk, erasable pen | Trace patterns and match points accurately |
| Holding tools | Pins or clips | Keep layers aligned while sewing |
| Stuffing tools | Chopstick, blunt stick, or stuffing tool | Push stuffing into small areas like ears and paws |
Once your materials and tools are ready, you can move on to design and pattern work with less stress and fewer surprises.
How do you design and draft patterns for accurate plushy shaping?
A plushy’s shape comes from its pattern, not just from stuffing. Even with beautiful fabric, a weak pattern will give you strange proportions, twisted limbs, or a head that will not sit right. A clear, planned pattern is the backbone of any successful plush.
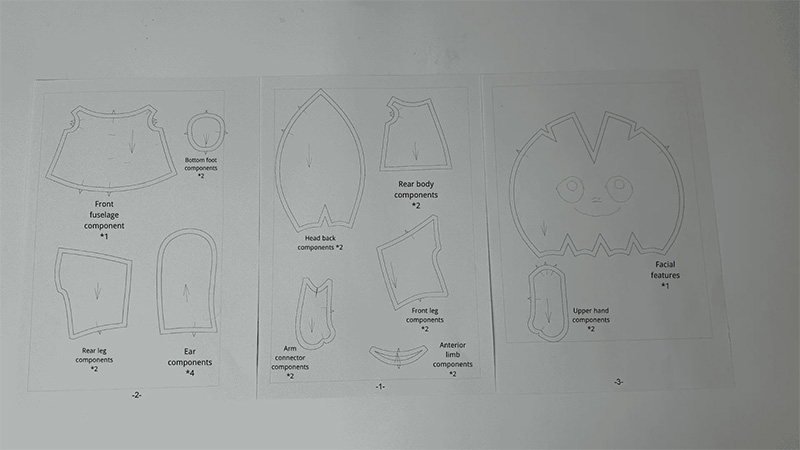
To design and draft patterns, start with a simple sketch of your plushy, then break the body into basic shapes (head, body, arms, legs, ears). Draw each shape as flat pattern pieces on paper, keeping symmetry and seam allowances in mind. Use a test version (often called a “mock-up” or muslin) to check shape and make adjustments before cutting expensive fabric.
Steps for designing an effective plushy pattern
1. Define your plushy concept
- Decide the style: realistic, chibi, or very simplified.
- Choose the size (for example 20–25 cm tall).
- Pick a pose: standing, sitting, or lying.
2. Sketch front and side views
Draw your plushy in at least two views. This helps you see:
- Head-to-body ratio.
- Limb thickness and length.
- Ear, tail, and accessory placement.
3. Break into pattern pieces
Common basic pieces:
- Head panels (front, sides, possibly gusset).
- Body (front and back or several panels).
- Arms and legs (front/back or single piece folded).
- Ears, tail, and any extra details.
Add seam allowance (usually 5–7 mm) around each piece.
Pattern planning overview
| Task | What You Do | Result |
|---|---|---|
| Concept & style | Choose size, pose, and character type | Clear goal for your pattern |
| Reference sketches | Draw front and side views | Visual guide to proportions and key features |
| Piece breakdown | Divide plush into head, body, limbs, etc. | List of pattern pieces you must draft |
| Pattern drawing | Draw shapes with seam allowance | Paper pieces ready to cut from test fabric |
| Mock-up testing | Sew a test plush from cheap fabric | Catch issues in shape before using final fabric |
Spend time here. Every hour you invest in good pattern work saves several hours of fixing problems later.
What sewing and assembly techniques ensure durability and clean seams?

Once patterns are ready, sewing and assembly will decide how strong and neat your plushy looks. If seams are crooked or weak, stuffing will show through and the toy may tear quickly. With simple, repeatable techniques, you can get much closer to factory-level finish even as a home maker.
For durable and clean seams, use a straight stitch with moderate length, keep seam allowance consistent, and sew smoothly around curves without pulling the fabric too hard. For high-stress areas, reinforce with backstitching or a second seam. Plan a clear assembly order: usually sew facial features first on flat pieces, then join panels, add limbs, and finally close the opening with an invisible hand stitch.
Smart assembly order
- Prepare small pieces
- Sew and turn ears, tail, small details.
- Add facial features
- Embroider or attach eyes, nose, and mouth on flat head panels.
- Sew head
- Join head pieces, leaving an opening for turning and stuffing (if needed).
- Sew body
- Join body panels; attach limbs if they are sewn in seams.
- Join head and body
- Machine sew if possible, or hand sew with strong stitches.
- Stuff and close
- Stuff in stages and close the final opening by hand.
Useful seams and stitches
| Technique | Where to Use It | Benefit |
|---|---|---|
| Straight machine stitch | Main body seams, limbs, ears | Clean and strong foundation seam |
| Backstitch (hand) | High-stress areas, closing gaps internally | Very strong, flexible hand-sewn seam |
| Ladder (invisible) stitch | Final closing opening on body or head | Almost invisible closure, professional appearance |
| Zigzag or overcast | Edge finishing on fraying fabrics | Reduces fraying, adds seam durability |
If you keep your seam allowance and stitch length consistent, your plushy will look cleaner and be easier to assemble accurately.
How is stuffing applied to achieve balanced softness and structure?
Stuffing is not just “fill until full.” The way you place stuffing affects softness, balance, and final shape. Too much stuffing makes the plushy stiff and distorted; too little makes it floppy and hollow. Good stuffing feels even, supports the pattern, and lets the plushy stand, sit, or pose the way you planned.
To apply stuffing well, work in small tufts, start from far corners (like paws and ears), and slowly fill toward the opening. Use a tool to push stuffing into narrow areas. Compare both sides for symmetry and adjust before closing the final seam. It’s often better to stop a little before “rock hard”—you want a mix of structure and hug-friendly softness.
Step-by-step stuffing approach
1. Plan firmness by area
- Head: medium-firm to hold facial shape.
- Body: medium, with enough softness to hug.
- Limbs and tail: slightly lighter, so they move naturally.
2. Work in layers
- Start by filling small parts (ears, paws, tail).
- Add stuffing to the body in layers: bottom, middle, top.
- Press the outer surface with your hands to check for lumps.
3. Check balance
- Set the plushy down: does it stand or sit as planned?
- If it leans, add or adjust stuffing on the lighter side.
Stuffing zones and targets
| Plushy Part | Suggested Stuffing Level | Notes for Better Results |
|---|---|---|
| Head | Medium to firm | Supports eyes and facial curves |
| Body | Medium, slightly softer than head | Keeps plush huggable while holding structure |
| Arms & legs | Light to medium | Allows natural movement and easier posing |
| Tail | Light to medium (depending on design) | Heavier if tail helps with balance |
| Ears | Light, just enough to shape | Too much stuffing makes ears stiff or distorted |
Take your time in this step. Sometimes small changes in stuffing volume make a big difference in how “alive” the plushy feels.
How are facial details and accessories securely added to a plushy?
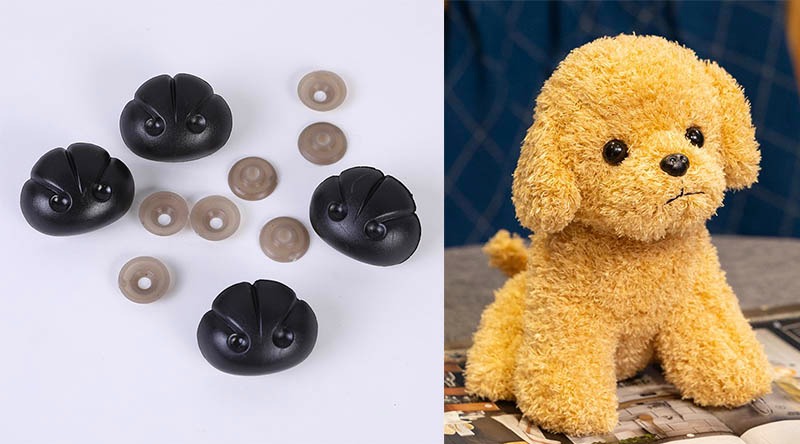
Face and accessories give your plushy personality—and can also introduce safety risks if they are not attached properly. Loose eyes, buttons, or charms can fall off and become choking hazards for small children or pets. At the same time, unbalanced facial features can make the character look “off.”
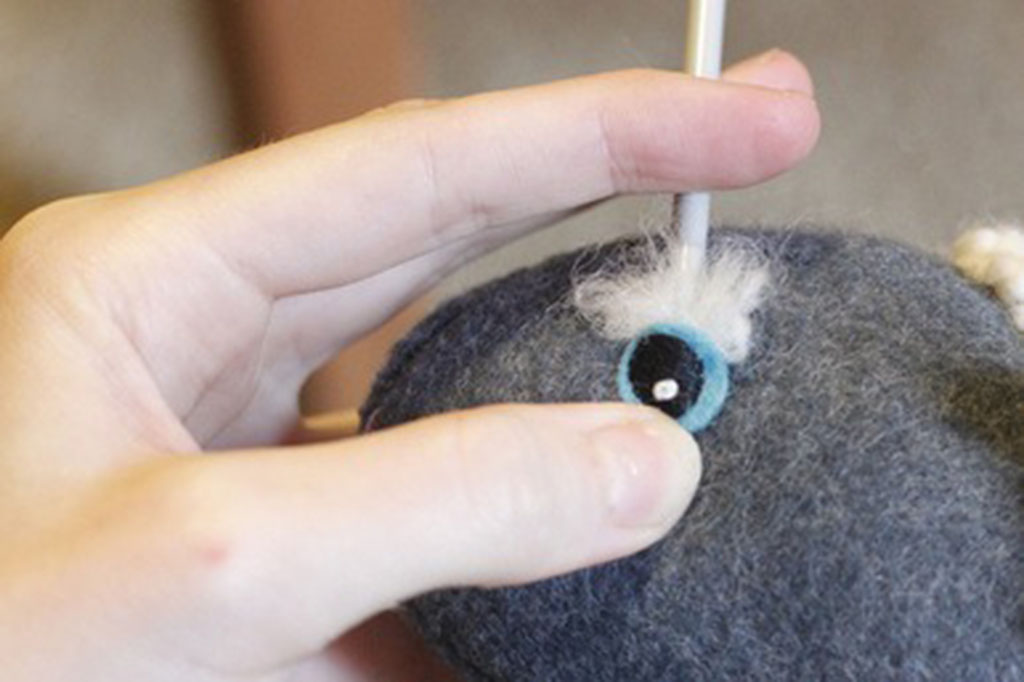
For secure and attractive faces, I recommend using embroidery or felt appliqué instead of loose buttons for eyes and noses. Place and stitch facial elements while the fabric is still flat, following measured guidelines from your pattern. For accessories (like scarves, clothing, or small props), sew them down in key points or make them removable only if the toy is intended for older users and clearly labeled.
Planning facial layout
- Lightly mark eye and nose positions on the flat fabric.
- Check symmetry by folding the piece in half.
- Test different expressions with paper cutouts before stitching.
Secure attachment methods
| Feature / Accessory | Best Attachment Method | When to Use It |
|---|---|---|
| Eyes & mouth | Embroidery (by hand or machine) | Safest and most durable for children’s plushies |
| Small nose | Embroidered or felt piece sewn all around | Avoid plastic noses for young children’s toys |
| Cheeks / patches | Felt or fabric appliqué sewn around edges | Adds color and depth without loose parts |
| Scarves / bows | Stitched at key points so they don’t slip | Good for toys aimed at younger age groups |
| Removable clothing | Elastic or Velcro + strong seams | Better for older kids and collectors |
Tips for a balanced face
- Keep eyes on the same horizontal line and same distance from the center.
- Adjust mouth curve slightly up for a friendlier look.
- Use thread colors that match or gently contrast the fabric.
When you plan facial details carefully, your plushy feels more professional and more “on-model” with your sketch.
What quality checks ensure a polished, professional-looking finished plushy?
After the last stitch, it’s tempting to say “done” and move on. But a small quality check at the end can turn a “home-made” look into something close to factory sample level. You want to catch loose threads, uneven stuffing, or small shape issues before you show the plushy to customers, friends, or your child.
Quality checks focus on symmetry, seam strength, surface neatness, and overall expression. Gently test the plushy as if you were a user: pull limbs, hug the body, look at it from every angle, and ask yourself if anything feels weak or visually off. Fixing small problems now saves you from disappointment later.
Simple QC checklist
1. Visual inspection
- Are the left and right sides of the face and body symmetrical?
- Are seams straight and smooth without puckering?
- Are there any stains, marks, or visible pen lines?
2. Structural check
- Gently pull arms, legs, and ears—do seams hold?
- Press around the neck, base of limbs, and tail.
- Check stuffing: any obvious hollows or hard lumps?
3. Safety and finishing
- Trim all loose threads close to the surface.
- Make sure no pins are left inside (double-check!).
- If the plush is for a child, confirm there are no loose parts.
Quality checkpoints overview
| Check Area | What to Look For | Action If Something Is Wrong |
|---|---|---|
| Symmetry | Matching sides of face, limbs, and ears | Adjust stuffing or remake small parts if needed |
| Seams | No gaps, skipped stitches, or fraying | Reseam weak areas with strong stitches |
| Stuffing | Even feel, correct firmness by area | Add or remove small amounts and massage to smooth |
| Surface finish | No marks, long threads, or fabric defects | Clean if possible, or replace damaged pieces |
| Safety | No sharp objects or detachable small pieces | Reinforce, replace parts, or change design choices |
If you plan to make many plushies, keep notes on issues you see often. These notes will improve your next pattern and sewing order so each new plushy looks and performs better.
Conclusion
A good plushy is soft, balanced, and full of character while also being safe, well-stitched, and ready for real daily use. When you choose thoughtful materials, draft clear patterns, sew with care, stuff for structure, and finish with clean details and checks, your handmade plushy can feel close to a professional sample. At Kinwin, we help global buyers turn plush concepts into production-ready designs and factory-scale orders. If you want support moving from handmade ideas to OEM or ODM manufacturing, you’re very welcome to contact me at [email protected] or visit kinwintoys.com to see how our plush team can help your brand grow.