Skip to content
 When people ask me “how to make a plush toy?”, they often imagine only one step: sewing two pieces of fabric and adding stuffing. In a real factory, the process is much deeper. Every decision—from fabric and stuffing to stitching and safety tests—changes how the plush feels in your customer’s hands.
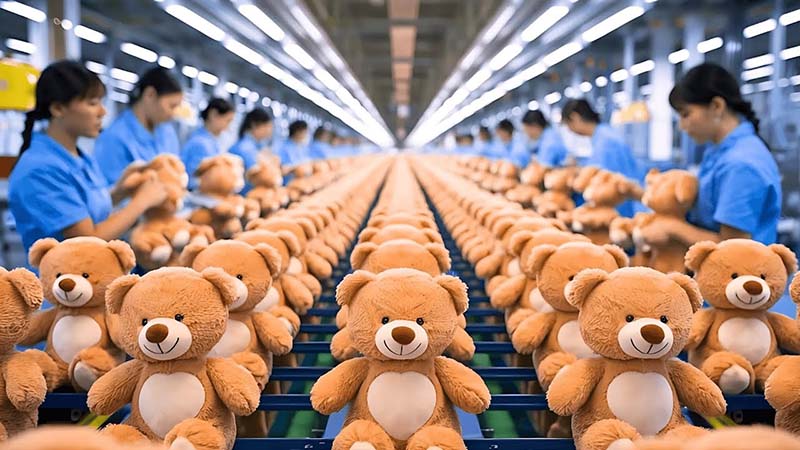
I’m Amanda from Kinwin in China. My factory makes plush toys and soft dolls for brands, retailers, e-commerce sellers, and promotional projects around the world. In this guide, I’ll walk you through the full journey: what materials you need, how patterns and prototypes are built, how sewing and stuffing really work, how to add details, and how manufacturers protect safety and quality in mass production.
What materials and tools are needed to make a plush toy?
Whether you sew at home or run a production line, you work with the same building blocks:
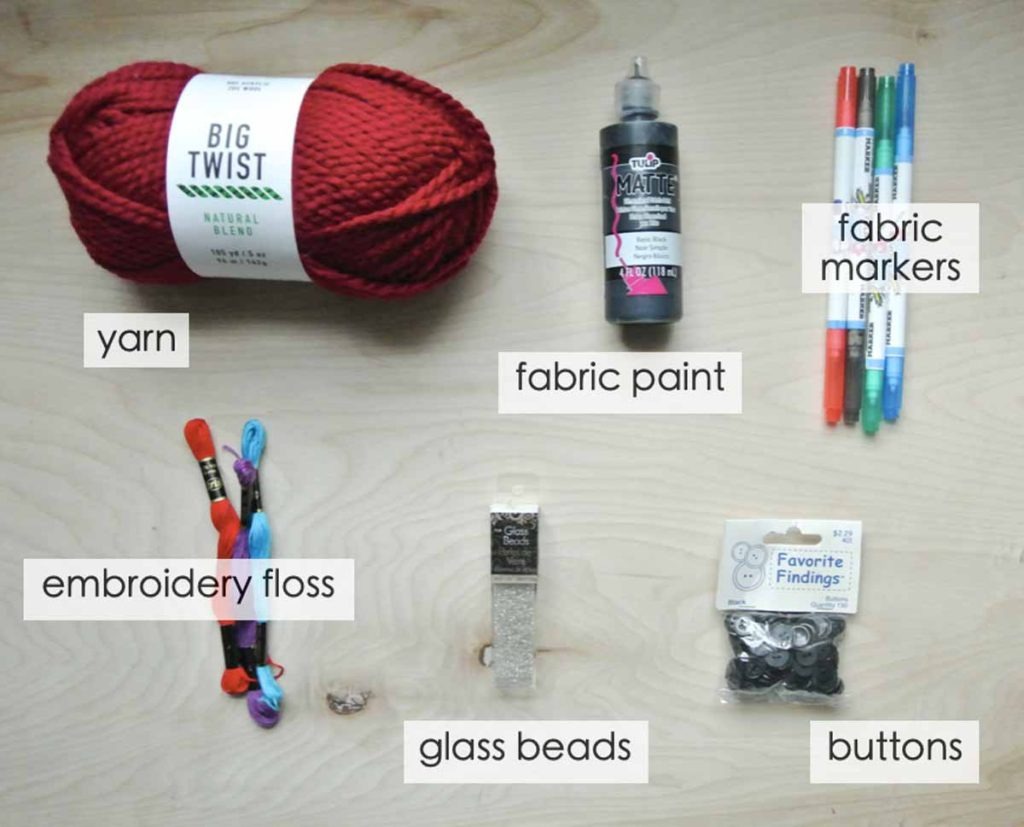
Core materials
- Outer fabric – minky, short plush, velboa, fleece, or cotton
- Stuffing – polyester fiberfill (PP cotton) or other fillings
- Thread – strong polyester thread for seams and topstitching
- Details – embroidery thread, felt, labels, sometimes safety eyes or noses
- Hidden parts – lining, inner pouches for pellets, interfacing for structure
Basic tools
- Fabric scissors or rotary cutter
- Pins or clips
- Fabric marker or chalk
- Paper for patterns
- Sewing machine (plus hand needles for small areas)
- Stuffing stick or chopstick for corners
- Measuring tape and ruler
For factories, we add: cutting tables, die-cut molds, industrial sewing machines, embroidery machines, pattern software, and inspection tools.
Key materials for making a plush toy
| Component | Typical options | What it affects |
|---|---|---|
| Outer fabric | Minky, short plush, velboa, fleece, cotton | Touch, look, softness, detail clarity |
| Stuffing | Polyester fiberfill, pellets, foam pieces | Volume, weight, squeeze feel |
| Thread | Polyester sewing thread | Seam strength and durability |
| Facial details | Embroidery thread, felt, safety eyes (if used) | Expression, safety, character style |
| Inner structure | Lining, interlining, inner pellet bags | Shape stability and balance |
If you are just starting, one soft minky or short plush, polyester stuffing, and good thread are enough to build a reliable first plush. As your design grows, you can add more structure and detail.
How do designers create accurate patterns and prototypes?
Before any fabric is cut, we need a clear pattern. The pattern is the flat map that creates the 3D shape of your plush.
Step 1: Concept sketch
Designers begin with:
- A front view sketch
- A side view and sometimes a back view
- Notes on size, style, and target age
For brands, this also includes logo placement, colors, and any IP rules.
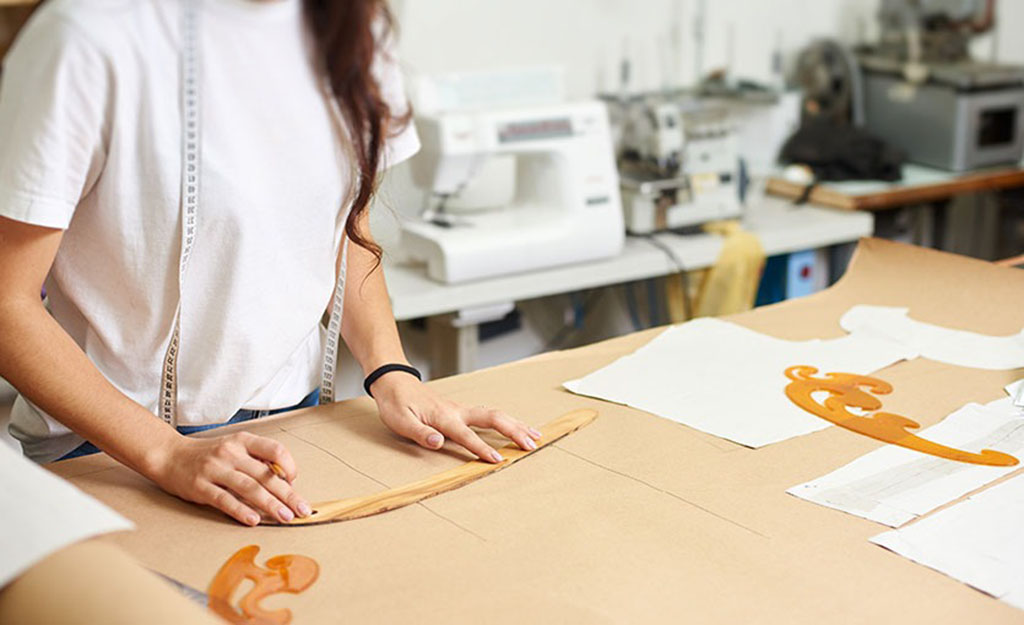
Step 2: Turn sketch into pattern pieces
We break the body into simple shapes:
- Head (often several panels)
- Body (front and back, sometimes side gussets)
- Arms, legs, ears, tail, accessories
Each piece must include:
- Seam allowance (the extra fabric used for stitching)
- Notches or marks that show where parts match up
- Grain lines so fabric stretches in the right direction
In factories, we often use digital pattern software to build and grade patterns. At a small scale, designers cut and adjust paper patterns by hand.
Step 3: First prototype sample
We then:
- Cut fabric using the pattern.
- Sew a test plush (without full finishing).
- Check the shape: head size, body proportions, limb position.
- Adjust pattern pieces where needed (for example, bigger belly, smaller ears).
- Repeat until the plush looks right from all angles.
For brands, this sample stage often includes several rounds of approvals, because tiny changes—eye distance, nose size, ear angle—can change the whole character.
Pattern development stages
| Stage | What happens | Goal |
|---|---|---|
| Concept sketch | Draw front/side/back, decide style and size | Clear target look |
| Pattern drafting | Create flat pieces with seam allowance and marks | Accurate 2D base for cutting |
| First prototype | Sew a test plush from pattern | Check general shape and proportions |
| Revisions | Adjust pattern, repeat prototype | Refine look and balance |
| Final pattern set | Lock pattern and prepare for bulk cutting | Stable base for mass production |
Without a good pattern, no amount of expensive fabric or stuffing can fix the plush. Shape always starts here.
What are the essential sewing and assembly steps in production?
Once the pattern is ready, we turn flat fabric into a 3D toy. The steps at home and in a factory are similar, but scale and speed are different.
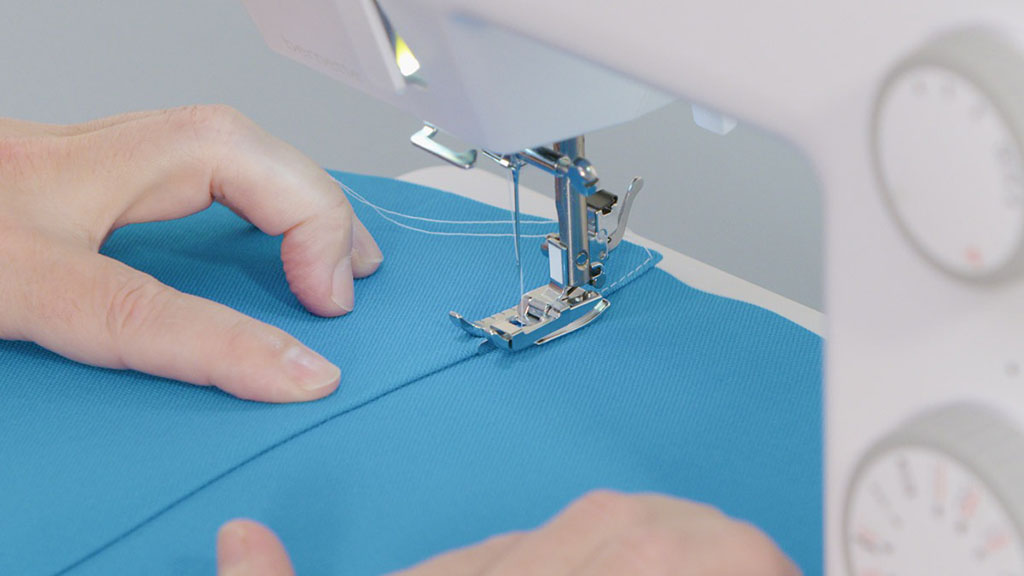
Basic sewing flow
- Cut fabric
- Place pattern on fabric (by hand or with a cutting lay in a factory).
- Cut all pieces: front, back, ears, limbs, tails, etc.
- Prepare small parts
- Sew ears, tails, horns, or small details first.
- Turn them right side out and topstitch if needed.
- Add facial features
- Embroider or applique eyes, nose, mouth on the face piece before assembly.
- This keeps the back of the stitching hidden inside the head.
- Sew main body and head
- Sew head pieces together, leaving a stuffing opening.
- Sew body panels together, also leaving an opening.
- Attach ears and other parts into seams at this stage.
- Attach limbs
- Limbs can be sewn into seams (fixed) or attached later (jointed style).
- For mass production, we often fix limbs for safety and speed.
- Turn right side out
- Turn all sewn parts through the openings.
- Check seams and points for holes or skipped stitches.
- Stuffing and closing
- Fill each part with stuffing at the planned density.
- Close openings with ladder stitch by hand or machine stitch where hidden.
In factories, this is broken into operations. One worker may sew only ears, another may sew bodies, another may close openings. This keeps quality and speed more stable.
Sewing and assembly steps
| Step | Home sewing view | Factory view |
|---|---|---|
| Cutting | Cut pieces one by one | Layered cutting with patterns or cutting dies |
| Small parts | Sew and turn ears, tails, accessories | Dedicated operation for each part |
| Face detailing | Use home machine or hand embroidery | Computerized embroidery on face panels |
| Body and head | Sew seams following notches | Standardized sewing flows for each seam sequence |
| Stuffing | Manual stuffing, feel by hand | Stuffing machines + manual adjustment |
| Closing openings | Hand-sewn ladder stitch | Hand closing line with QC check |
Even for handmade plush, following a clear sequence makes your work cleaner and more repeatable.
How is stuffing density adjusted for ideal softness and shape?
Stuffing is not “fill until full.” Good plush toys use different densities in different zones so the toy looks alive, not like a hard ball or a flat pillow.
General density rules
- Head – usually firmer, so the face stays in shape and eyes sit correctly.
- Body – medium density: soft for hugging, but not saggy.
- Arms and legs – medium to light, depending on whether you want floppy limbs or firm ones.
- Bottom or feet – sometimes firmer or filled with pellets to help the plush sit.
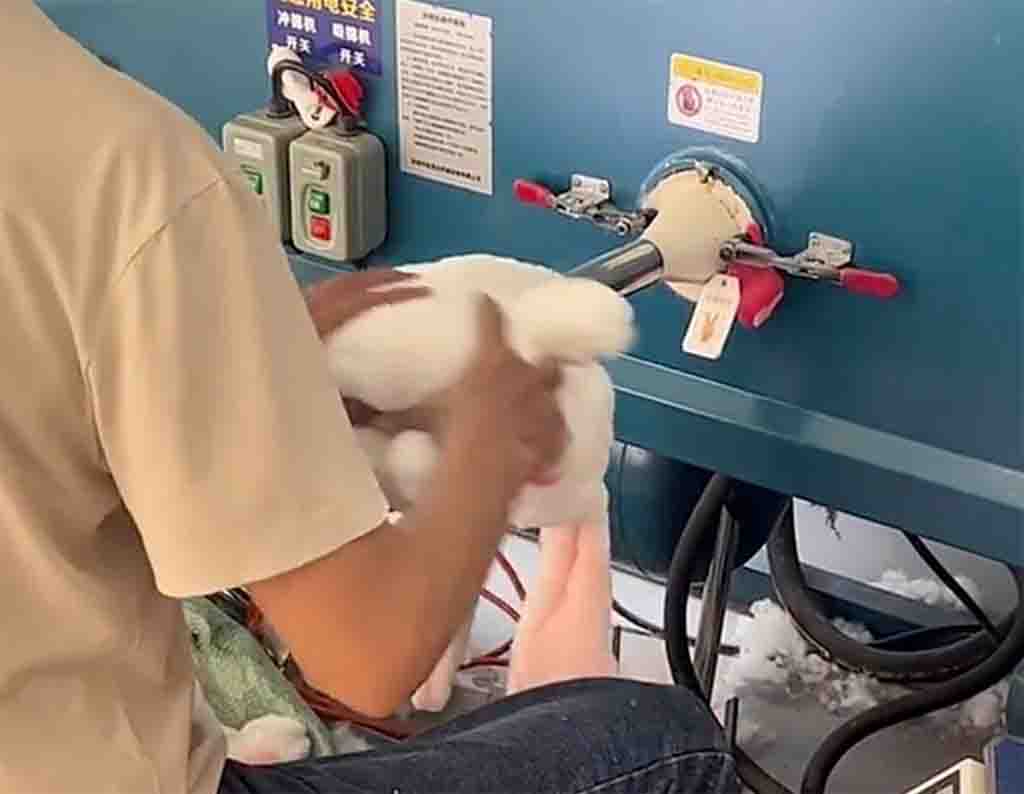
How we adjust density
- We fill in layers, not all at once.
- We use a stuffing stick to push fiber into corners (ears, snout, paws).
- We check the plush from all sides before closing.
In mass production, we also define a target weight for stuffing. Each size of plush has a stuffing weight range that fits our desired feel.
Stuffing density planning
| Area of plush | Typical density | Reason |
|---|---|---|
| Head | Firm to medium-firm | Keeps face shape and expression |
| Body | Medium | Good hugging feel and stable overall shape |
| Arms / legs | Light to medium | Choice between floppy or structured limbs |
| Bottom / feet | Medium to firm or pellets | Helps plush sit or stand, adds balance |
If a plush feels “wrong,” it is often a stuffing issue, not a pattern issue. Slight changes in density and distribution can fix a tired-looking toy.
How do embroidery and detailing enhance character design?
Details turn a generic plush into a recognizable character. The face is the most important part.
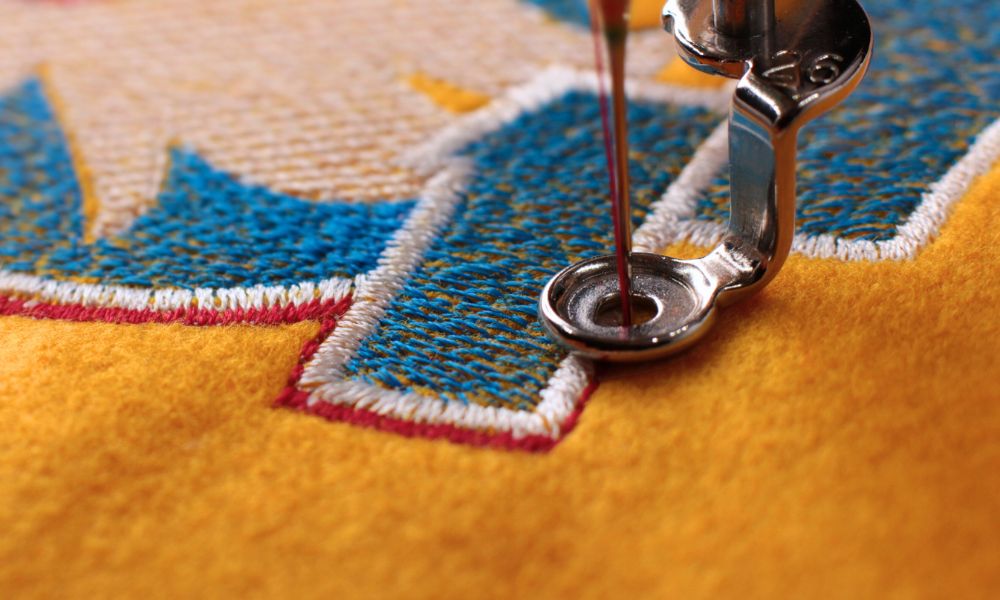
Embroidery
- Used for eyes, noses, mouths, and small symbols.
- Safe for children because there are no hard parts to detach.
- Allows many styles: cute, serious, sleepy, angry, simple, or complex.
Factories use computerized embroidery machines. Designers create a digital embroidery file that defines:
- Stitch types (satin, fill, running)
- Colors and order
- Layering and density
Appliqué and patches
- Pieces of fabric sewn onto the surface to build shapes (cheeks, belly, patches).
- Add texture contrast and more “handmade” feel.
Printing
- Screen print or digital print for patterns, logos, or gradient effects.
- Often used on clothes, accessories, or special areas of the plush.
Accessories and trims
- Bows, scarves, hats, clothes, bags, and tags.
- Must always be checked for age suitability and safety (no small parts for baby toys).
Detail techniques and their roles
| Technique | Use case | Effect on design |
|---|---|---|
| Embroidery | Faces, logos, small icons | Clean, safe, long-lasting details |
| Appliqué | Cheeks, bellies, markings, patches | Texture and color contrast, layered look |
| Printing | Patterns, gradients, branding elements | Complex images and smooth color transitions |
| Trims & clothes | Bows, outfits, removable accessories | Extra character and storytelling |
When we build a new plush for a brand, we often spend as much time on the face layout as on the whole body pattern. A few millimeters difference in eye placement can change the emotion completely.
How do manufacturers ensure safety and quality in mass production?
In real production, “how to make a plush toy” is also “how to make a safe plush toy every time.” This is especially important when you sell in USA, Europe, Japan, South Korea, and the Middle East.
Safety focus
Manufacturers work under toy safety standards such as:
- Mechanical and physical safety (pull tests, seam strength)
- Flammability performance of fabrics
- Chemical safety of dyes, coatings, and plastics
To support this, we:
- Use toy-grade fabrics and stuffing from trusted suppliers.
- Avoid loose parts for younger age grades.
- Use embroidery instead of hard eyes for baby items.
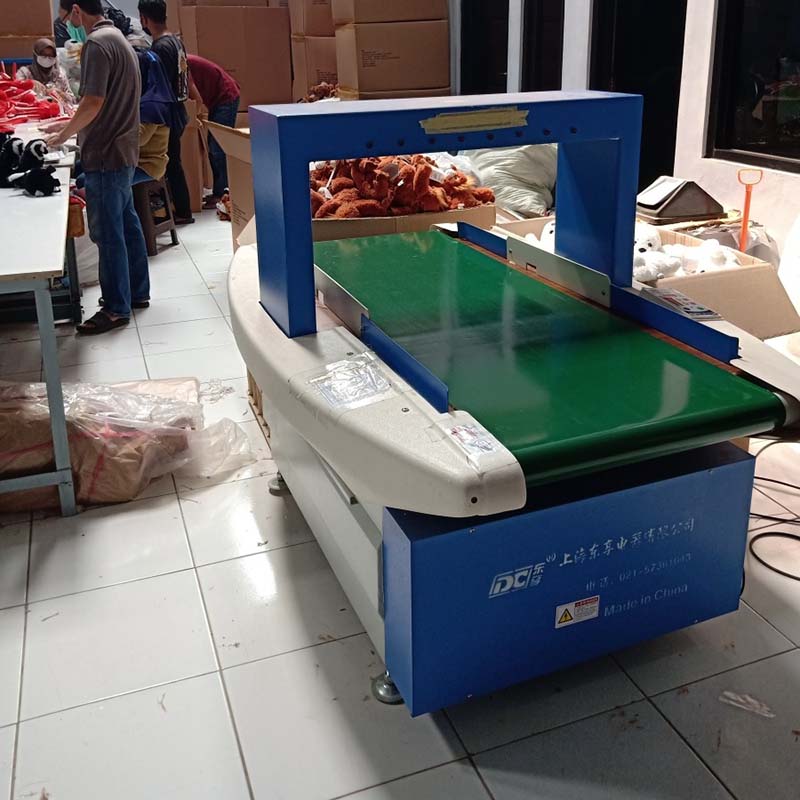
- Keep needles and metal parts under strict control (broken needle policies, metal detectors where needed).
Quality control steps
Real QC is not just one inspection at the end. It runs through the process:
- Incoming material check – fabric, stuffing, and trims checked for basic quality and color.
- Pre-production sample approval – one “golden sample” is fixed as the reference.
- Inline inspection – supervisors check sewing, stuffing, and finishing during production.
- Final inspection – random sample checks for size, weight, seams, face alignment, dirt, and defects.
- Testing – third-party labs test materials and finished toys when needed.
Typical safety & quality actions in plush manufacturing
| Stage | What we do | Why it matters |
|---|---|---|
| Material sourcing | Choose toy-grade fabrics, fiberfill, trims | Base safety and durability |
| Pattern & sample | Solve shape, seams, and eye/trim placement | Remove design-based risks early |
| Production controls | Needle and tool control, trained operators | Reduce defects and physical hazards |
| Inline QC | Check seams, stuffing, details during sewing | Catch problems before they multiply |
| Final inspection | Measure, compare, test seams, check cleanliness | Ensure consistency with approved sample |
| Lab testing | Test for chemical, physical, flammability rules | Legal compliance and brand protection |
From my side as a manufacturer, a “good plush toy” is not only cute. It is repeatable, safe, and clean across thousands of pieces, not only one perfect sample.
Conclusion
Making a plush toy is a complete system: you choose materials, build patterns, sew and assemble with clear steps, adjust stuffing density, add safe details, and control safety and quality from first sample to final shipment.
When you understand this process, you can talk with your factory in clear, simple terms: which fabrics you want, what kind of softness you expect, how you want the face to feel, and what markets you plan to sell into. This is how a rough idea on paper becomes a plush toy that children love and adults trust.
At Kinwin, my team and I support buyers through this full journey—from concept sketches and sample development to mass production under CE and ASTM standards. If you are planning a new plush toy line, or you want to improve the quality and feel of your current products, you’re welcome to contact me at [email protected] or visit kinwintoys.com. We can turn your plush idea into a clear, safe, and repeatable manufacturing plan.