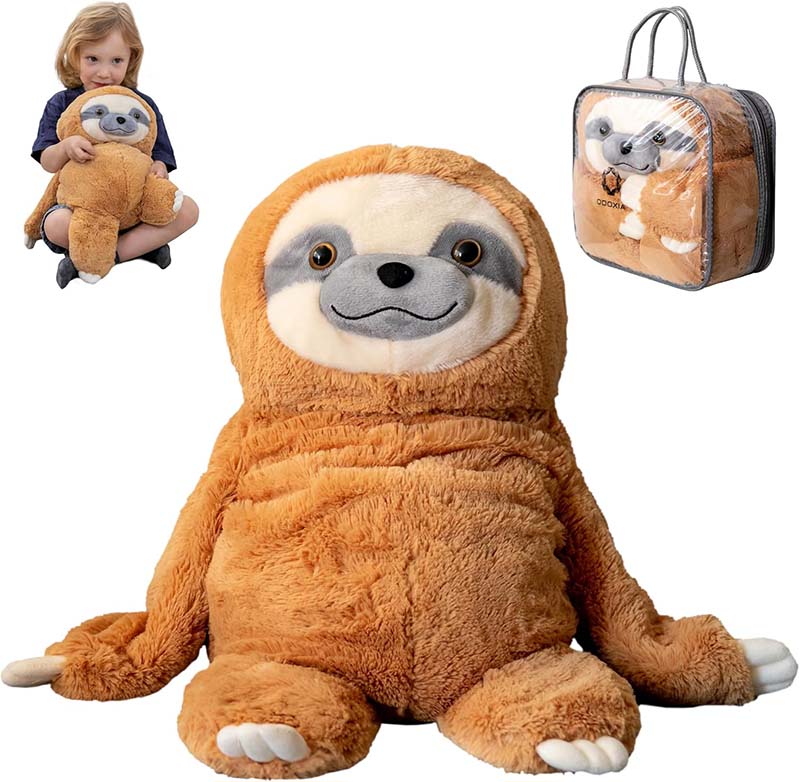
I’m Amanda from Kinwin in China. Every week, buyers send me sketches, mood boards, or even kids’ doodles and ask the same question:
“How do we turn this idea into a real plush toy that is safe, soft, and ready for global retail?”
Making a plush looks simple on the surface, but behind a cute face there is a very structured process: choosing materials, building patterns, cutting and sewing, controlling stuffing density, securing eyes and trims, and then passing many safety and quality checks before shipment.
In this guide, I’ll walk you through how we make a plush in a factory setting, step by step. Even if you plan to start small, thinking like a manufacturer will help you design better products, avoid safety issues, and communicate clearly with your suppliers.
What materials and tools are required to make a plush toy?
Before a single stitch is sewn, we must decide what the plush is made of and which tools are needed to build it. Good inputs make good plush. Poor inputs create problems later: pilling, color fading, flat shapes, or even safety fails.
For most modern plush toys, we start from four core material groups:
- Outer fabric – this is what people see and touch. It defines the first impression: soft, fuzzy, smooth, or velvety.
- Stuffing – this fills the body and controls the hug feel and shape.
- Details and trims – eyes, noses, embroidery thread, appliqué fabric, clothing, labels, and hangtags.
- Hidden technical materials – interlining, foam, pouches for pellets, thread, and sometimes zippers or Velcro for special designs.
As a buyer, you will always make trade-offs between softness, durability, washability, safety, and cost. For example, long faux fur looks amazing, but it sheds more and is harder to wash than short minky. Very squishy stuffing feels nice but may not hold shape on the shelf if the design is tall.
On the tool side, the core difference between home crafting and factory production is scale and control. At home, you can use paper patterns, basic scissors, and a home sewing machine. In a factory, we add fabric spreading tables, industrial cutting tools, pattern software, and different sewing machines for different jobs (lockstitch, overlock, bartack).
Key materials and tools for making a plush
| Category | Item | Why it matters | Notes from a factory view |
|---|---|---|---|
| Outer fabrics | Minky, velboa, fleece, short/long plush, faux fur, cotton knit | Controls softness, look, and durability | Choose short, dense pile for baby and high-wash SKUs |
| Stuffing | Polyester fiberfill (PP cotton), rPET fiberfill, pellets/beads (for weight), foam pieces | Controls bounce, hug feel, posture | Use pellets in sealed pouches for 3+ only; fiberfill is core material |
| Detail materials | Embroidery thread, felt or plush appliqués, safety eyes/noses, fabric for clothes/accessories | Gives character expression and style | For under-3, avoid hard parts—use embroidery instead |
| Technical materials | Interlining, foam sheets, knit lining, pouches for pellets, Velcro, zippers (where allowed) | Helps ears stand, muzzles keep shape, weight stay in place | All hidden parts must also be safe and well fixed |
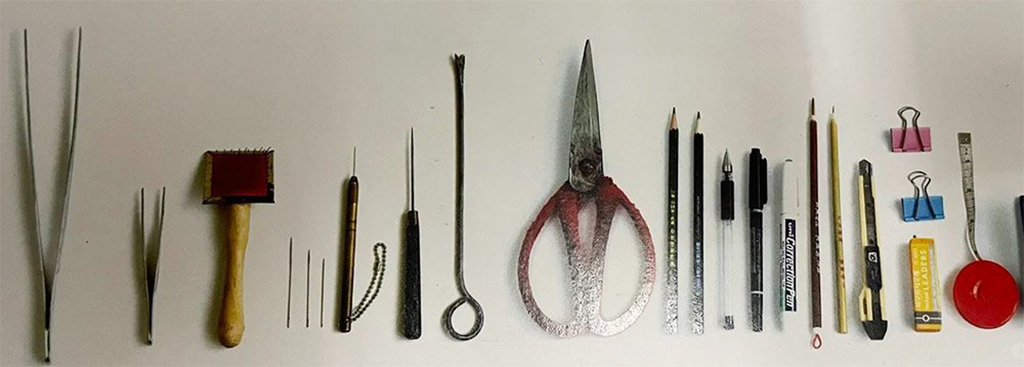
| Sewing consumables | Polyester sewing thread, hand-sewing needles, pins, chalk or markers | Joins the plush together | Use good thread to avoid seam failures |
| Cutting tools | Fabric scissors, rotary cutter, die-cutting tools, cutting machine | Shapes pieces accurately | Clean and sharp tools reduce fabric distortion |
| Machines | Industrial sewing machines, overlockers, bartack machines, embroidery machines | Provide fast and consistent stitching and details | Different machines for different tasks keeps quality stable |
| Checking tools | Scales, rulers, pattern rulers, metal detectors, QC checklists | Control weight, size, safety | Needed for serious production and export |
When these materials and tools are chosen carefully at the start, the rest of the process becomes smoother. As a buyer, it is useful to ask your manufacturer for fabric swatches, stuffing samples, and basic spec sheets before you lock the final design.
How do designers develop accurate plush patterns and templates?
A plush toy is 3D, but we build it from 2D fabric pieces. The job of the pattern is to decide how those 2D shapes will curve together into the final form. Good patterns give your plush a natural, friendly look from every angle: front, side, and three-quarter view. Poor patterns create flat heads, strange cheeks, or toys that cannot sit or stand well.
The process usually starts with artwork: a hand drawing, digital illustration, or reference photos. From there, the pattern designer decides:
- Head shape – round, oval, or stylized
- Body volume – slim, chubby, or very squishy
- Proportions – head-to-body ratio, limb length, ear size
- Pose – standing, sitting, laying, long pillow style, etc.
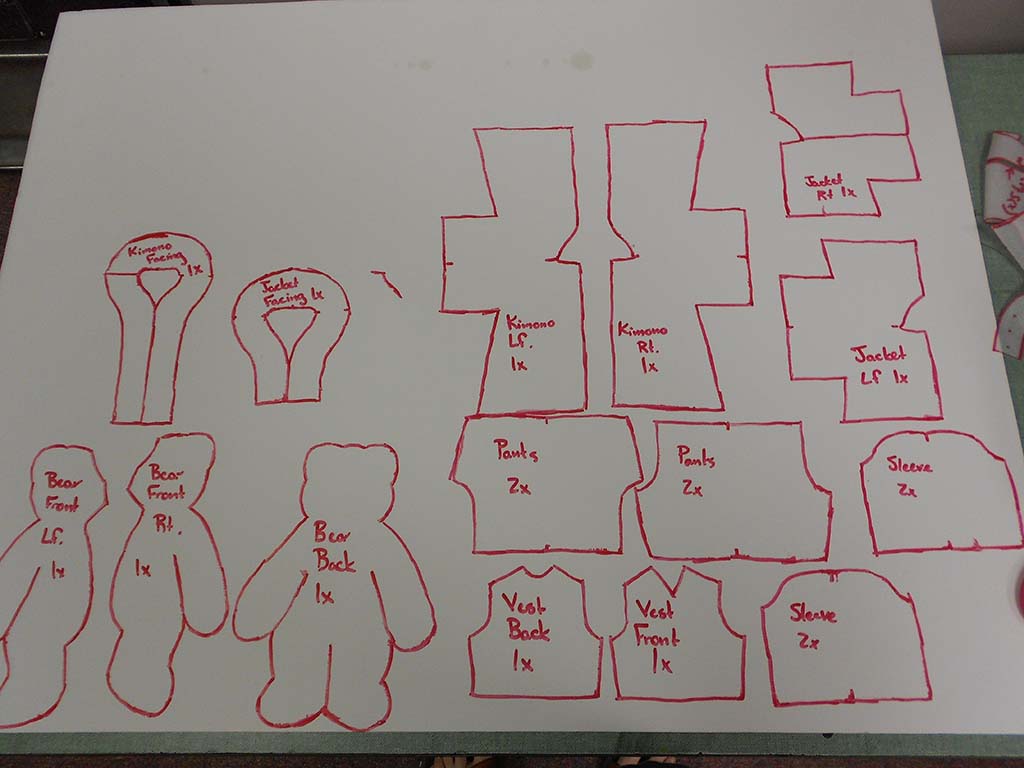
We then translate this into pattern pieces: front and back of the head, side panels, body front and back, arms, legs, ears, tail, and any special parts like muzzles or wings. Each piece includes seam allowance, notches for alignment, and sometimes grain direction arrows (to guide fabric direction).
At Kinwin, my pattern team often builds a first pattern, sews a sample in plain fabric, checks the shape, marks changes, and only then switches to the final plush fabric. This saves fabric and time, and avoids repeating cutting on expensive material.
Pattern and template development overview
| Step | What we do | Why it matters | Your role as buyer |
|---|---|---|---|
| 1. Study artwork | Analyze front, side, and back views; mark key proportions | Ensures we capture the “personality” of the design | Provide clear artwork and notes on key traits |
| 2. Decide pose & size | Choose sitting/standing/lying, confirm final height | Affects balance, stuffing, and packaging | Confirm target size and usage (bed, desk, keychain) |
| 3. Draft 2D pieces | Build head, body, limb, and detail patterns with seam allowance | Converts design into sewable shapes | You can review rough shapes via photos or PDFs |
| 4. Make 1st muslin sample | Sew in cheap fabric or leftover plush to test form | Saves cost while checking structure and proportion | Give honest feedback: too thin, too fat, head too big, etc. |
| 5. Adjust & refine | Add darts, gussets, adjust curves, fix imbalance | Improves the plush’s silhouette and posture | Approve changes and provide comments quickly |
| 6. Final pattern & grading | Confirm final pattern; scale to other sizes if needed | Allows consistent production across sizes | Decide how many sizes you need in the range |
When you see a plush that looks “just right,” it is almost always because the pattern maker spent time on these details. As a buyer, you help this process by giving clear feedback in millimeters or simple comments (“eyes 3 mm closer,” “body 1 cm shorter,” “ears a bit longer”).
What are the essential steps in cutting, stitching, and assembling parts?

Once the pattern is ready and fabric is approved, we move into cutting and sewing. This is where the plush really begins to look like a toy. Even the best design can fail if cutting and sewing are not controlled.
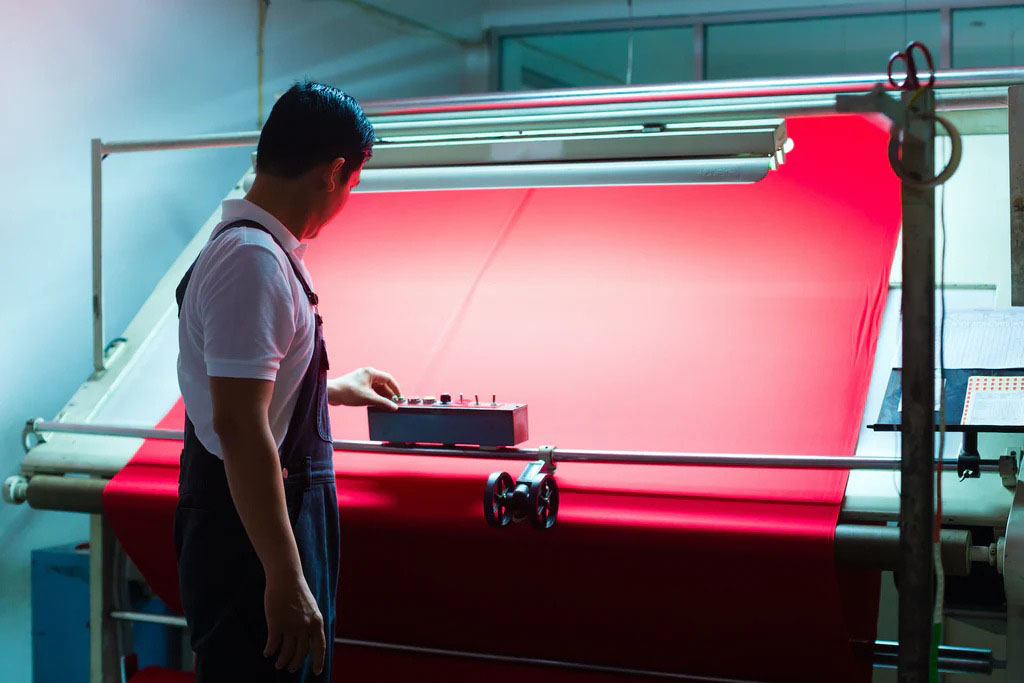
Cutting
Fabric is laid out on a table, usually in layers. In factories, we use markers (arrangements of pattern pieces) to reduce waste. We pay attention to:
- Pile direction – all pieces must face the same way, or the plush will look patchy.
- Fabric stretch – we balance stretch directions to avoid distortion.
- Matching – for printed fabrics, we try to align patterns where needed.
Pieces are then cut by hand, by electric knife, or by die-cutting tools, depending on volume and complexity.
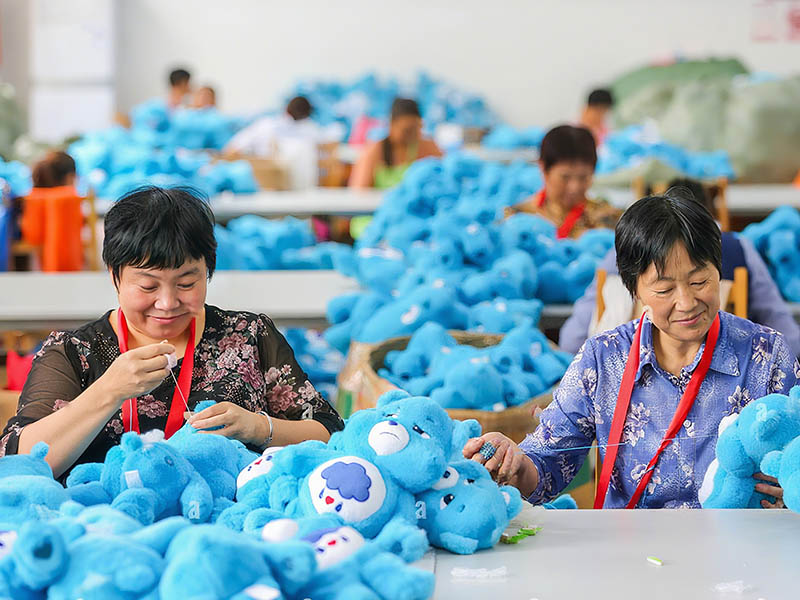
Stitching and assembling
Sewing starts with smaller components and moves toward larger assemblies:
- Sew ears, tails, and small details, then turn them right-side out.
- Attach ears and other parts to head panels if needed.
- Sew head pieces together, leaving an opening for stuffing.
- Sew body panels together, inserting arms or tails when the design requires.
- Close limbs and other separate parts.
We control stitch length (usually around 2.5–3.0 mm for plush) to balance softness and seam strength. At stress points (base of arms, neck, tail), we add bartack stitches or double stitching. We also keep seam allowances consistent so curves look smooth.
Before stuffing, we turn the plush right-side out and check:
- Are seams clean and even?
- Are corners and tips (ears, tails) fully turned out?
- Are we missing any key parts?
Only then does the toy go to the stuffing station.
Cutting, stitching, and assembly flow
| Stage | Key actions | Quality focus | Common issues if ignored |
|---|---|---|---|
| Cutting | Lay fabric, align pile, cut pattern shapes | Consistent shape and direction | Patchy color, mismatched sides, high waste |
| Small-part prep | Sew and turn ears, tails, muzzles | Clean tips and edges | Blunt ears, uneven shapes, weak seams |
| Head assembly | Join head panels, insert ears, shape cheeks | Symmetry, correct expression area | Crooked faces, uneven head shapes |
| Body assembly | Sew body, attach arms/legs/tail as needed | Balanced body, correct arm position | Twisted limbs, off-balance sitting |
| Limb finishing | Sew and turn arms/legs | Smooth lines, correct length | One limb longer, twisted seams |
| Pre-stuff check | Inspect all seams, openings, and parts | Ensure ready for stuffing and QC | Hidden seam breaks, missing attachments |
As a buyer, you don’t have to manage each stitch, but you should ask your factory how they sequence sewing and what their in-line QC looks like. A professional supplier will be able to explain this clearly.
How is stuffing density adjusted for softness and realistic form?
Stuffing is the “soul” of a plush. The same pattern can feel cheap or premium depending on how stuffing is managed. In factories, we do not just “fill until it looks full.” We treat stuffing as a controlled parameter.
There are three key ideas:
- Density by zone – head, body, arms, legs, and base often need different densities.
- Total weight – each size has a target gram weight for stuffing.
- Material mix – pure fiberfill, or fiberfill plus pellets/foam, depending on design.
Zone density
- Head: Usually more stuffed to keep the face crisp and stable.
- Body: Medium density to keep hugging comfort and some squish.
- Limbs: Slightly lighter so they can move naturally and feel relaxed.
- Base / bottom: Sometimes a bit firmer, or with pellet pouches, to help sitting.
Material choices
Most plush toys use polyester fiberfill (also called PP cotton). For eco-lines, we may use rPET fiberfill (recycled polyester) with similar performance. For some plush, we add pellets in small sealed pouches to add weight in the base or belly. These pouches are double sealed and stitched into the body, and are usually not allowed for under-3 age groups.
We test stuffing settings by:
- Hugging and pressing the plush in different directions.
- Checking if the plush sits or stands without collapsing.
- Comparing weight and feel across several units to ensure consistency.
Stuffing density and form control
| Zone / Feature | Typical stuffing approach | Why it helps | Buyer decisions |
|---|---|---|---|
| Head | Medium–firm fiberfill | Holds face shape, keeps eyes and nose in position | Decide how “sharp” vs “soft” you want the face |
| Body | Medium density | Good hug feel, not too stiff | Choose more squishy for bedtime; firmer for display |
| Limbs | Light–medium | Relaxed, natural drape and movement | Decide if limbs should dangle or stay upright |
| Base / bottom | Firm fiberfill or pellet pouch + fiberfill | Helps plush sit stable on shelf or bed | For 3+ only if using pellets; babies usually no pellets |
| Total weight | Controlled by grams per size | Keeps feel consistent across batches | You can ask for “heavier” or “lighter” feel per market |
If your brand identity is about comfort and hugging, you might choose softer density and more squish. If your plush is more decorative or display-focused, you might choose firmer stuffing so it holds shape in photos and on store shelves.
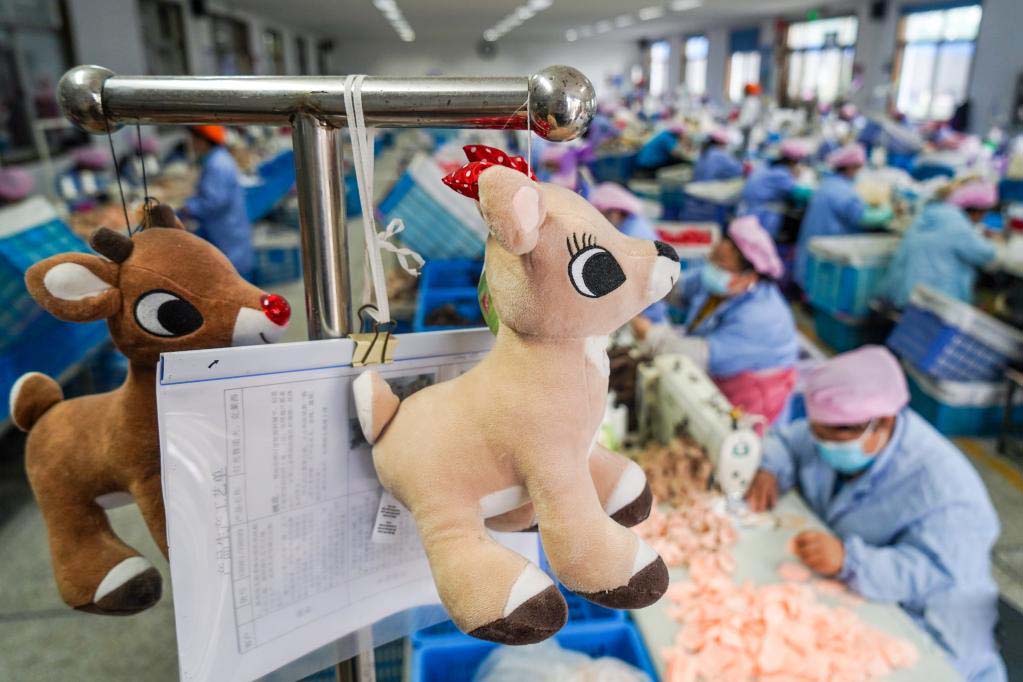
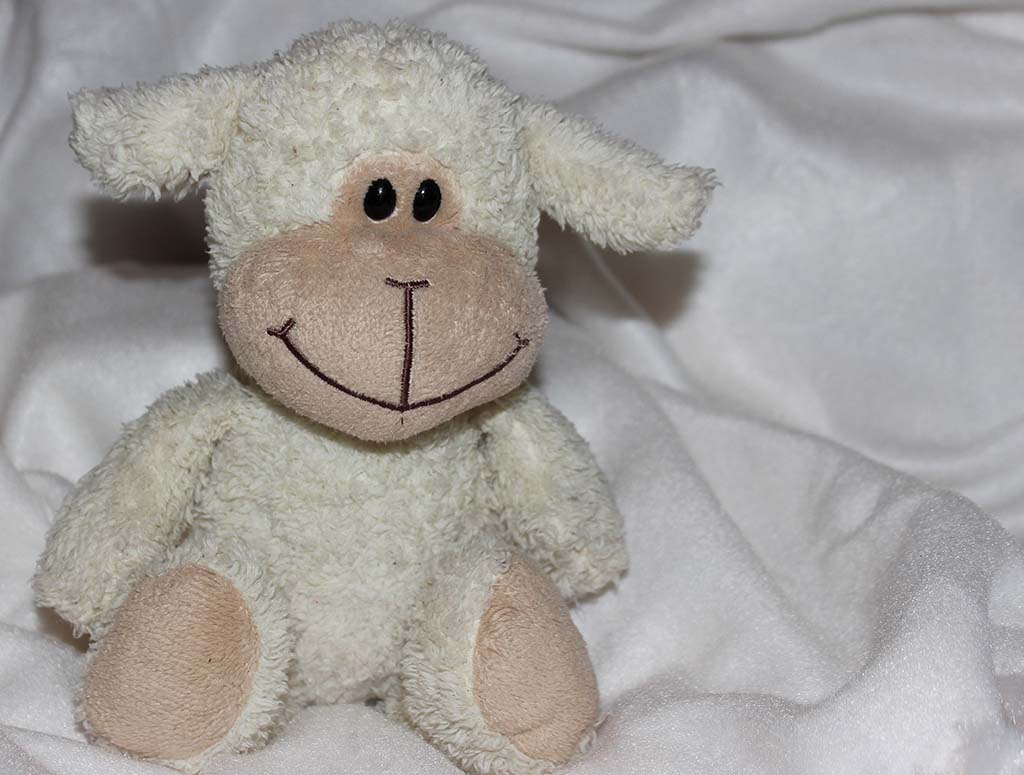
How are eyes, embroidery, and trims securely added to the plush?
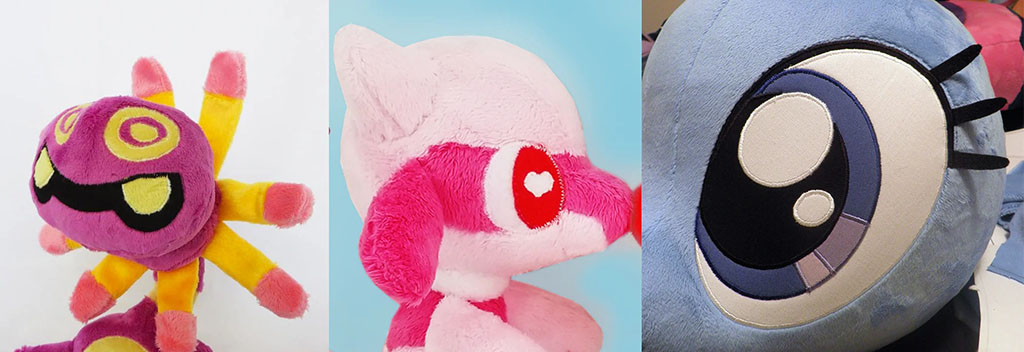
Eyes, noses, mouths, and trims are what give a plush its personality. They must look good, stay in the right place, and be safe for the intended age group.
Eyes and noses
There are two main approaches:
- Embroidered eyes/noses – safest for baby and under-3 toys. All details are stitched directly onto fabric.
- Plastic safety eyes/noses – used for older age groups, with locking washers inside the head.
For baby and toddler products, I always recommend full embroidery. For plush intended for older kids or collectors, safety eyes can add a special shine and depth, but they must pass pull tests and be properly installed.
Embroidery and appliqué
We use computerized embroidery machines to stitch faces, logos, and other details. Embroidery adds texture and durability. For larger areas (like belly patches or markings), we can use appliqué: cut pieces of fabric stitched on top of the base. This creates layered effects and color contrasts.
Before mass production, we always:
- Test embroidery on the actual fabric with the correct pile.
- Adjust density so stitches do not sink into the plush too much.
- Check the back of embroidery to ensure no large knots or loose threads that could snag.
Trims and clothing
Clothing (T-shirts, scarves, dresses, hats), labels, and accessories give extra value and branding space. Each piece must be sewn securely so children cannot easily remove it and create small-parts hazards (unless the item is clearly for higher age grades).
Hangtags, woven labels, and care labels carry important information: brand name, safety marks, fiber content, and care instructions.
Eyes, embroidery, and trims – safety and design checklist
| Component | Best practice | Safety / quality focus | Buyer choices |
|---|---|---|---|
| Eyes & noses (baby) | Full embroidery, no loose parts | No small parts for under-3; smooth surface | Choose style that fits brand; simple often works best |
| Eyes & noses (3+ and collectors) | Safety eyes/noses with locking washers; correct shaft length | Must pass pull tests; no cracks or sharp edges | Decide shine level, shape, and color |
| Embroidery | Use toy-grade thread; test on final fabric | Avoid dense areas that make fabric stiff | Decide which details are embroidered vs printed |
| Appliqué patches | Firm stitching around edge; clean cutting | No lifting corners or loose threads | Good for belly markings and logo areas |
| Clothing & trims | Secure stitching; avoid tiny buttons on low age grades | Small parts rules; choking risk | For high age grading, can add more complex outfits |
| Labels & hangtags | Clearly sewn or attached; readable info | Legal compliance and brand identity | Add logo, website, care icons, safety marks |
When these details are planned together with the pattern and fabrics, your plush will look consistent across the whole collection and feel professional, not random.
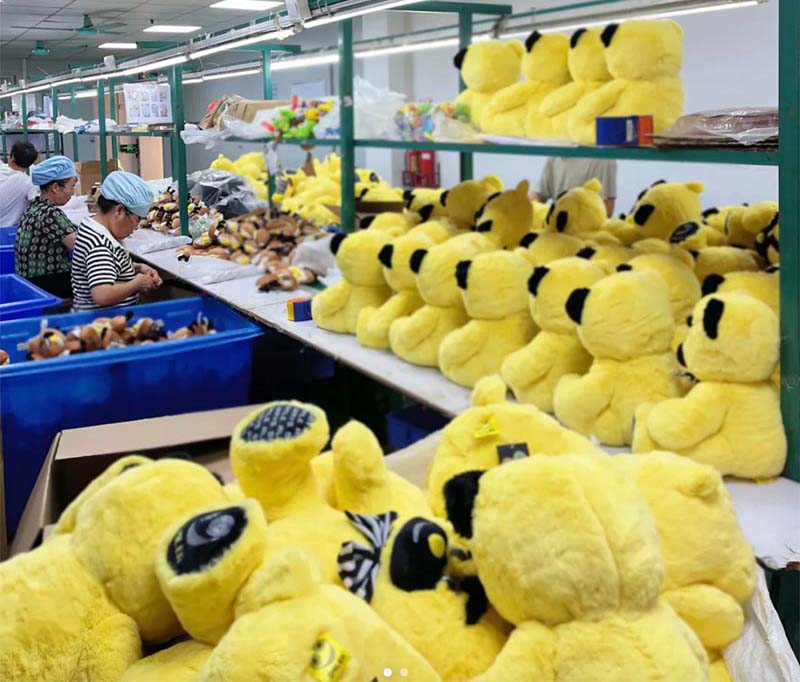
How do manufacturers perform safety and quality checks before shipment?
No matter how cute the plush looks, it must also be safe and consistent. For export markets like the EU and USA, toys must pass strict standards such as EN 71, ASTM F963, and CPSIA. For serious buyers, quality and safety are not optional; they are requirements.
Safety checks
Typical safety and compliance tests include:
- Mechanical tests – seam strength, small parts, tension on eyes and decorations.
- Flammability tests – how fast the material burns or self-extinguishes in a controlled test.
- Chemical tests – checking for heavy metals, banned azo dyes, phthalates, and other restricted substances.
- Label checks – age grading, warning statements, and tracking labels.
These tests are usually done by third-party labs (like SGS, Intertek, TÜV) on golden samples that match bulk production materials and construction.
In-factory quality control
Inside the factory, we also have our own QC steps:
- Incoming material inspection – we check fabric, stuffing, and trims when they arrive.
- Inline QC – inspectors check semi-finished pieces on the sewing line.
- Stuffing QC – we confirm weight and feel of samples from each batch.
- Final inspection – we use AQL sampling standards to check finished goods before packing.
- Needle detection – every plush passes through a metal detector to make sure no broken needles remain inside.
We also check carton packing: are plush packed in a way that avoids crushing? Are labels correct on the carton? Is the carton strength enough for export shipping?
Safety and quality control overview
| Stage | What is checked | Why it matters | What you can ask your factory |
|---|---|---|---|
| Incoming materials | Fabric color/hand-feel, thickness, defects; stuffing cleanliness; trims | Avoid surprises and defects in bulk | Request material specs and initial photos/videos |
| Inline sewing QC | Seams, pattern match, placement of parts (ears, eyes, limbs) | Catch errors early before stuffing | Ask how often inline QC is done and what checklist is used |
| Stuffing & shape QC | Weight, balance, density by zone; posture (sitting/standing) | Keeps feel and look consistent | Ask for weight ranges and sample photos from production |
| Final QC (AQL) | Overall appearance, labels, hangtags, loose threads, stains | Ensures finished goods match golden sample | Ask which AQL standard and level they follow |
| Needle detection | Hidden metal fragments | Essential for toy safety and retailer acceptance | Confirm they use a calibrated needle detector for all cartons |
| Lab testing | Mechanical, chemical, flammability tests as needed | Legal compliance in target markets | Request test reports before shipping and per SKU/material set |
As a buyer, you do not need to run these tests yourself, but you should always ask for reports and QC photos, and choose suppliers who treat safety and quality as serious work, not marketing words.
Conclusion
A good plush toy is safe, soft, durable, and appealing while also offering branding opportunities. At Kinwin, we help global buyers turn sketches and ideas into production-ready plush toys by handling materials, patterns, stuffing, detailing, safety testing, and shipping as one clear process. Contact us at [email protected] or visit kinwintoys.com to discuss your next project and explore how our factory can support your success.