When someone hugs a cat plush and smiles, they are really reacting to many quiet decisions: fabric softness, pattern design, balanced stuffing, and clean details. As a manufacturer, I see every cat stuffed animal as a mix of engineering and emotion.
To make a cat stuffed animal, you need soft plush or fleece fabric, safe polyester stuffing, strong stitching, and a clear pattern that captures feline proportions. By planning the head, body, legs, tail, and face step by step, you can create a cat plush that feels soft, looks cute, and stays durable in real everyday use.
In this guide, I’ll walk through the process the same way we think in the factory—but explained in simple language so home makers, small studios, and growing brands can follow it easily.
What materials and tools are needed to make a cat stuffed animal?
Before you draw patterns or think about ear shapes, you need the right material base. Poor materials make sewing harder, seams weaker, and the cat less comfortable to hug. Good materials support softness, safety, and clean shapes.
For most cat plush projects, I recommend polyester plush or minky for the outer fabric and polyester fiberfill for stuffing. These are stable, washable, and widely used in toys that must pass safety tests. You can add felt or contrasting fabrics for details such as muzzle, belly, or paw pads.
You also need basic sewing tools and some extra items to keep details clean and secure.
Recommended materials and tools
| Category | Items You Need | Why They Matter |
|---|---|---|
| Outer fabric | Minky, short-pile plush, or fleece (polyester) | Controls softness, look, and ease of sewing |
| Contrast fabrics | Felt, cotton, or plush in other colors | For muzzles, belly patches, ear linings, paw pads |
| Stuffing | Polyester fiberfill | Light, washable, holds volume well |
| Thread | Polyester sewing thread, matching colors | Strong, low-stretch, blends into fabric |
| Facial details | Embroidery thread, small felt pieces | Safe, durable eyes, nose, and mouth |
| Marking tools | Fabric chalk, water-erasable pen | Helps transfer pattern lines clearly |
| Cutting tools | Fabric scissors, small snips | Clean edges and precise trimming |
| Sewing tools | Hand needles, pins/clips, sewing machine (optional) | For strong seams and efficient assembly |
| Shaping tools | Stuffing stick, ruler, pattern paper | For accurate shaping and even stuffing |
Once these are ready and on your table, you can move confidently into pattern design and sewing without stopping to search for missing items.
How do you design patterns that reflect accurate feline proportions?
Even if your cat plush is stylized, the proportions still need to “read” as feline: a recognizable head shape, clear ears, a gentle body curve, and a tail that suits the pose. You don’t need perfect anatomy, but you do need consistent, intentional proportions.
Start by choosing a simple pose. For a first project, a sitting or standing cat is much easier than a lying or twisted pose. Decide if your style is realistic, kawaii, or somewhere in between.
To design patterns that reflect feline proportions, sketch the cat from the front and side at your planned size, simplify the body into shapes (head, body, legs, tail), and convert those shapes into flat pattern pieces with seam allowance. Always test the pattern with a quick prototype before cutting your final plush fabric.
Practical pattern planning steps
- Decide the finished size
- Beginner-friendly height: 20–30 cm (8–12 inches).
- Larger sizes are more forgiving; very tiny cats are harder.
- Sketch front and side views
- Front: head width, ear placement, body width, leg spacing, tail position.
- Side: curve of back, chest, and tummy; head angle; tail shape.
- Block out simple shapes
- Head: circle or oval, slightly wider than the neck.
- Body: pear shape or rounded rectangle.
- Legs: simple tubes or L-shapes.
- Tail: curved tube, slightly thicker than you think (for stuffing).
- Break into pattern pieces
Typical set for a simple cat:- Head front and head back (plus a top gusset for a smoother dome).
- Body front and body back.
- Arms / front legs (two mirrored pieces per leg or one folded).
- Back legs (similar structure to arms).
- Tail (two mirrored pieces).
- Ears (outer and inner pieces).
- Optional: muzzle, belly patch, paw pads.
- Add seam allowance
- Add 5–7 mm all around each pattern piece.
- Mark notches where ears meet head and where legs attach to body.
- Sew a quick prototype
- Use cheap cotton or fleece.
- Stuff lightly and see if the cat looks balanced from all sides.
Pattern design checklist
| Question | Why It Matters |
|---|---|
| Is the head large enough to feel “cat-like”? | Too-small heads can look off-balance |
| Do the ears sit in a natural position? | Ears set too low or too far back look strange |
| Does the body match your pose (sitting/standing)? | Wrong body curve can ruin the silhouette |
| Are legs and tail thick enough for seams and stuffing? | Very thin pieces are hard to sew and stuff |
Once you are happy with the test shape, you can move to final fabric confident that the structure works.
How do sewing and assembly techniques shape the cat’s body and features?
Patterns are the blueprint; sewing and assembly give the cat its real 3D form. Good techniques make curves smooth, joints strong, and left-right sides symmetrical. A clean assembly order also saves time and avoids confusion.
For a cat stuffed animal, it is easiest to sew and prepare small parts first (ears, tail, legs), then construct the head and body, then join everything together. You can use a sewing machine for long seams and hand stitches for detailed areas and final openings.
Suggested assembly order
- Ears
- Place outer and inner ear pieces right sides together.
- Sew around the sides, leave the base open.
- Turn right side out and press or finger-shape.
- Legs and tail
- Sew leg pieces right sides together, leaving the top open.
- Sew tail pieces, leaving base open.
- Turn right side out; you’ll stuff them later.
- Head
- Add facial base pieces (e.g., muzzle) on the flat head front.
- Insert ears into the top of the head seam if they are seam-set.
- Sew head front to head back (and gusset if used), leaving an opening at the neck or bottom.
- Body
- Attach belly patch to the body front if your design has one.
- Sew body front and back together, leaving an opening (bottom or side) for stuffing and for attaching legs if needed.
- Join head and body
- Match neck points, right sides together.
- Sew carefully around the neck, using double stitching for strength.
- Turn the cat right side out through the body opening.
- Attach legs and tail
- You can attach legs either as separate pieces sewn into body seams or hand-sewn onto the body after stuffing.
- Tail can be inserted into a back seam or ladder-stitched on later.
Helpful stitches and techniques
| Technique | Use Case | Benefit |
|---|---|---|
| Straight machine stitch | Main seams on head, body, legs, tail | Strong, neat, and efficient |
| Backstitch (hand) | Neck seam, leg joins, tail base | Very strong in small curved areas |
| Ladder (invisible) stitch | Final closing openings after stuffing | Clean finish; seam almost disappears |
| Double stitching | High-stress zones (neck, base of legs) | Extra durability for play and hugging |
| Clipping curves | Cheeks, head top, hip curves | Smooth outer curves without bulk |
Take your time around the cheeks, head top, and hip areas; these visible curves give your cat its character.
How are facial details, ears, and tail constructed and attached?
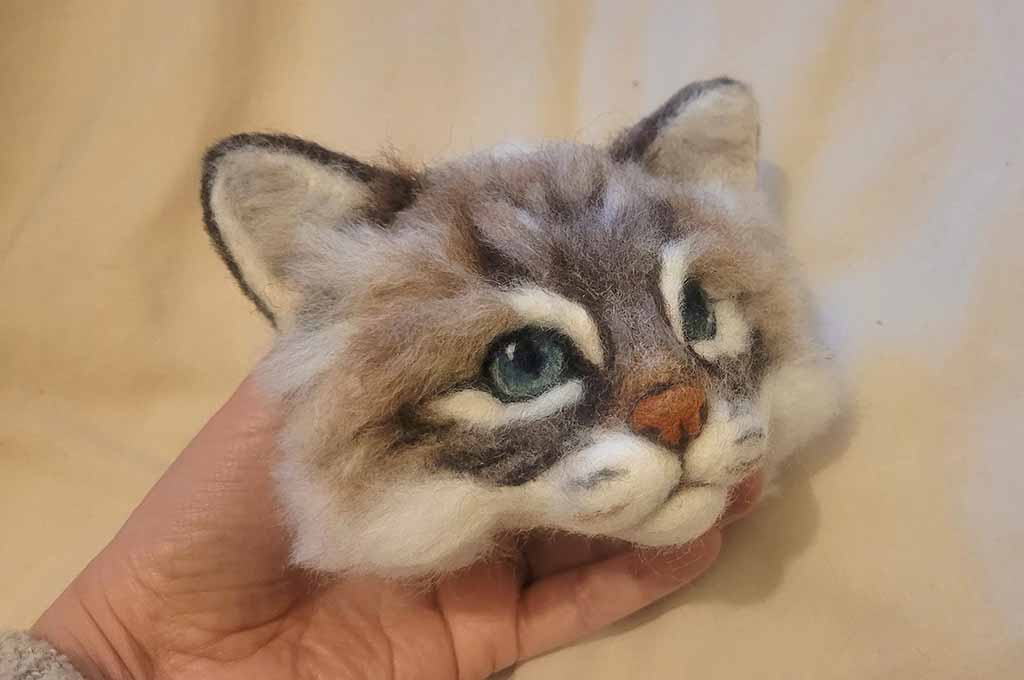
Face, ears, and tail turn a basic animal shape into a cat with real personality. At the same time, these parts must be safe and secure. Well-planned construction prevents ears from flopping in the wrong way or tails from tearing off.
Facial details
For safety and durability, I recommend embroidered or sewn-on felt details rather than glued parts. Safety eyes are common in some markets, but they must be chosen and installed carefully and are not suitable for all age groups.
- Mark facial guidelines
- Draw a vertical center line and a horizontal eye line on the head front.
- Lightly mark where eyes, nose, and mouth should go.
- Eyes
- Option 1: embroidered eyes using satin stitch or backstitch outlines.
- Option 2: felt eye pieces stitched around all edges.
- Nose and mouth
- Triangle or heart-shaped felt nose, stitched in place.
- Simple “Y” or “W” mouth embroidered below the nose.
- Whiskers and extra expressions
- Short straight stitches for whiskers.
- Small eyebrow stitches can change the mood a lot.
Ears
Ears signal “cat” very clearly. You can choose upright ears, slightly tilted ears, or floppy ears depending on style.
- Construction:
- Outer piece in main fur color, inner piece in pink or lighter tone.
- Sew outer and inner pieces right sides together, turn, and press.
- Optionally add a thin layer of felt inside to keep ears sharper.
- Attachment methods:
- Sew into the head seam at the top for a clean integrated look.
- Or hand-stitch onto the head after stuffing (good for flexible ear positions).
Tail
The tail helps with character and balance. You can keep it straight, curved, or slightly bent.
- Construction:
- Two tail pieces sewn right sides together, turned, and stuffed.
- Keep tail width wide enough for easy sewing and stuffing.
- Attachment:
- Insert into a back seam and stitch securely from inside.
- Or ladder-stitch onto the back after stuffing the body, with extra backstitches at the join for strength.
Feature construction checklist
| Feature | Key Questions |
|---|---|
| Face | Are eyes evenly spaced? Is the nose centered? |
| Ears | Are ears symmetrical or intentionally uneven? |
| Tail | Is the tail angle natural for the pose? |
| Security | Are all parts firmly stitched with no loose edges? |
If the face looks balanced from a distance and the ears and tail feel solid when you gently pull them, you are on the right track.
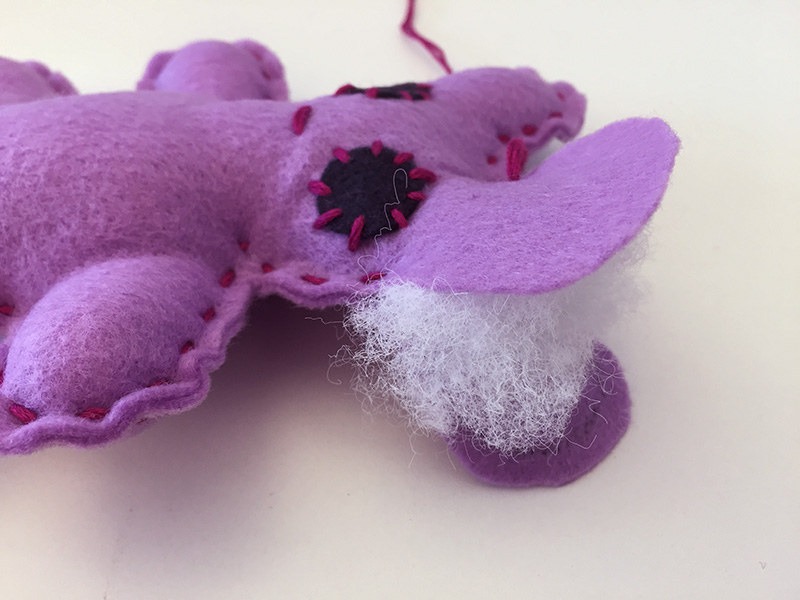
How is stuffing applied to achieve balanced softness and realistic form?

Stuffing transforms your cat from a flat shell into a soft, 3D friend. It affects how the plush feels, how it sits or stands, and whether shapes look natural or lumpy. Stuffing is not just “fill until it feels full”; it’s about controlling density in different areas.
For a cat stuffed animal, you usually want:
- A medium-firm head to protect facial structure.
- A medium body that is soft for hugging but not floppy.
- Limbs that are slightly softer so they can pose gently.
- A tail that is firm enough to keep its shape but not stiff.
Step-by-step stuffing approach
- Stuff legs and tail first
- Use small tufts of fiberfill, push gently into the ends.
- Make paws a little firmer so they look round and defined.
- Keep upper legs softer so they can move naturally.
- Stuff the head
- Begin with the outer areas (ears, cheeks) and work inward.
- Add extra stuffing behind the face so eyes and nose area stay smooth.
- Aim for medium-firm: head should compress slightly but spring back.
- Stuff the body
- Add stuffing in layers from bottom to top.
- Shape the chest and tummy so they feel full without hard lumps.
- Test the cat in a sitting or standing position as you go.
- Balance and adjust
- Place the cat on a flat surface.
- If it leans forward, add a bit more stuffing toward the back or tail base.
- If it leans backward, adjust stuffing in chest and front legs.
Recommended firmness by area
| Area | Firmness Level | Reason |
|---|---|---|
| Head | Medium-firm | Keeps facial details smooth and stable |
| Body | Medium | Comfortable hug, but holds overall shape |
| Front legs | Light to medium | Natural drape when sitting or standing |
| Back legs | Medium | Supports pose and stability |
| Tail | Light to medium | Maintains curve without feeling rigid |
Once you are satisfied with the softness and balance, close the openings with ladder stitch, pulling gently so the seams lie flat against the fur.
What finishing and quality checks ensure a polished, durable cat plush?
Finishing is the step that makes your cat stuffed animal look and feel like a professional product, not just a rough prototype. This is where you check neatness, symmetry, and durability.
A simple quality routine—very similar to what we use in our factory—helps you catch errors before the plush reaches a customer or child.
Finishing steps
- Close all stuffing openings
- Use ladder stitch for an invisible seam.
- Hide knots inside the body or head.
- Reinforce stress points
- Add extra stitches at neck, base of legs, and tail join if needed.
- Trim threads and clean surface
- Cut all thread tails close to the fabric.
- Use a lint roller or tape to remove loose fibers.
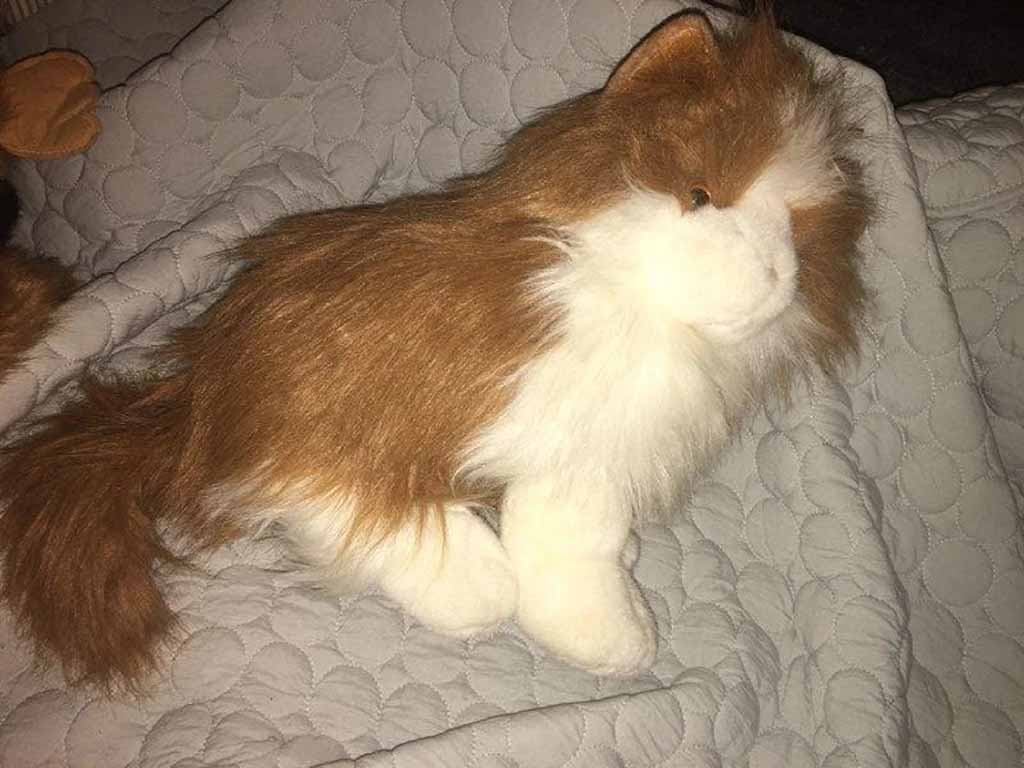
- Groom the cat
- Gently brush fur if you used longer plush.
- Shape ears and tail with your hands.
Quick quality-check checklist
| Check Area | What to Look For | Fix If Needed |
|---|---|---|
| Seams | No gaps, popped stitches, or visible holes | Reseam or reinforce with backstitch |
| Symmetry | Eyes, ears, legs and tail align left to right | Adjust stuffing or refine patterns next batch |
| Stuffing | No hard lumps or hollow spots | Add/remove filling and massage gently |
| Features | Face details, ears, tail firmly attached | Add extra stitches at joins if anything feels loose |
| Stability | Cat sits or stands as intended | Change stuffing distribution, especially in legs |
| Surface | No pen marks, glue stains, or long loose fibers | Clean carefully, trim any problem areas |
When your cat passes all these checks, it will feel much closer to a store-ready plush—soft, cute, and trustworthy in daily use.
Conclusion
Making a cat stuffed animal is not just sewing a cute shape; it’s a complete process: choosing safe, soft materials, designing balanced patterns, sewing strong seams, placing expressive but secure face details, stuffing with intention, and finishing with a careful eye. When each step supports the next, you get a cat plush that people actually want to hold, keep, and gift.
At Kinwin, we apply this same logic to OEM and ODM cat plush projects for global brands—from baby-safe kittens to stylish décor cats and character mascots. If you’d like to turn your cat designs into stable, factory-produced toys with full safety support, you’re very welcome to contact me at [email protected] or visit kinwintoys.com to explore how our team can help.