Skip to content
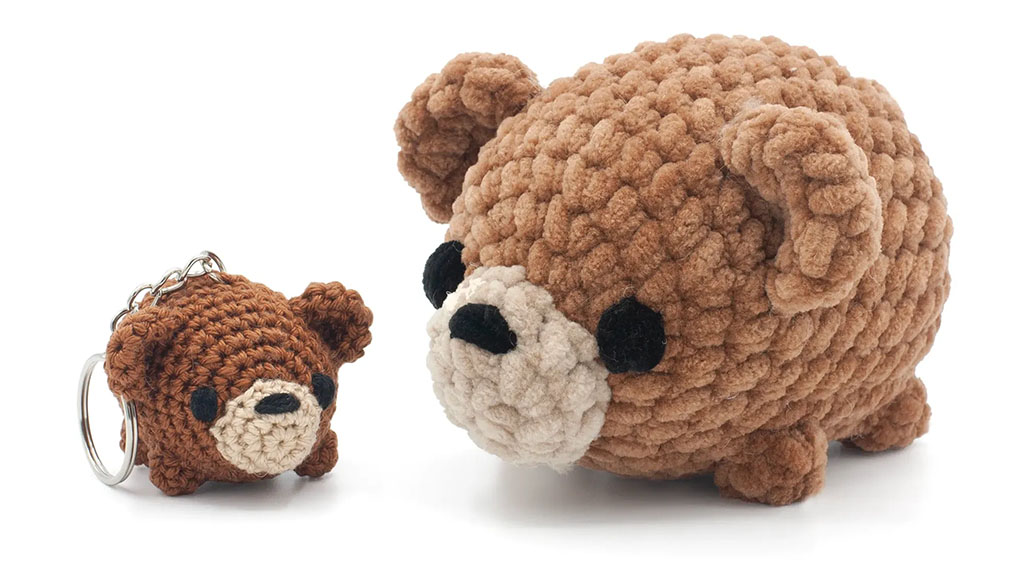
 Embroidered eyes are one of the safest and most expressive ways to finish a plush toy. They remove the choking risks of plastic safety eyes, give you full control over style, and allow you to match a brand’s character design with high precision.
As a plush toy manufacturer in China, I see every day how good (or bad) eye embroidery affects the final product. Clean, symmetrical eyes make a toy look “alive”, while messy eyes can ruin an otherwise perfect design. In this guide, I’ll walk you through the tools, techniques, and production methods we use so you can understand how to embroider eyes on plush toys from both a DIY and a factory perspective.
What tools and materials are required for embroidering plush toy eyes?
Before you start stitching, you need the right tools and materials. This is true for home crafters and for factories like ours. The quality of your tools has a direct impact on the final finish, safety, and durability.
For hand embroidery, we usually use sharp, medium-length embroidery needles, strong polyester or cotton embroidery thread, and a small embroidery hoop where possible. On high-pile plush fabrics (like minky), we sometimes add water-soluble stabilizer on the surface to keep the pile from swallowing the stitches. On the back, a thin stabilizer helps hold the stitches in place and prevents distortion.
For machine embroidery, we rely on embroidery machines, digitized eye designs, proper backing materials, and clearly marked placement guides. In a factory, having consistent materials and thread brands across lines keeps colors and sheen uniform from batch to batch.
Here is a simple overview of the main tools and materials and why they matter:
| Tool / Material | Purpose / Use | Notes for Safer, Better Eyes |
|---|---|---|
| Embroidery needles | To stitch details precisely | Choose size to match fabric thickness & thread |
| Embroidery thread (poly or cotton) | To create the eye shape, outline, and highlights | Polyester is strong and colorfast; cotton gives a matte look |
| Plush fabric (minky, fleece, velboa, etc.) | Base material of the plush toy | Shorter pile makes small eyes easier; longer pile needs more prep |
| Stabilizer (backing) | To support the fabric and hold stitches firmly | Important for soft plush to prevent puckering |
| Water-soluble stabilizer (topping) | To keep pile lying flat during embroidery | Especially useful on high-pile fabrics |
| Embroidery hoop (for hand work) | To keep the area tight and smooth | Use gently on plush so you don’t leave marks |
| Marking tools (fabric pen, chalk) | To mark eye position and guidelines | Make sure markings are removable |
| Scissors & snips | To trim thread ends cleanly | Small, sharp tips help avoid cutting fabric |
| Digitized design file (for machines) | To control stitch order, density, and path | Essential for consistent eyes in mass production |
When you’re choosing a manufacturer, you don’t need to know every technical detail. But it helps to ask basic questions like: What thread do you use for eyes? Do you use stabilizers? Is your embroidery done by machine or by hand? Good answers here usually match good results on the final toy.
How do you prepare the fabric surface for secure eye embroidery?
Preparation is the “secret” step most people overlook. On plush fabric, especially soft and stretchy types, a bit of extra preparation makes the difference between crisp, stable eyes and wobbly shapes that move after the first wash.
The first step is positioning. We usually mark the rough eye position on a pattern piece before the plush toy is sewn. That way, we can embroider on flat fabric instead of on a stuffed, curved surface. For hand work on finished plush, we lightly mark the eye centers with a washable fabric pen, using rulers or templates to keep spacing even.
Next is stabilizing. Because plush is soft, the needle can pull fibers around and create puckers. To avoid this, we place a thin stabilizer on the back side of the fabric, in the area where the eye will sit. For very fuzzy fabrics, we also add a water-soluble topping on the front to temporarily hold down the pile.
Finally, we tension and test. For hand embroidery, we use a hoop carefully, tightening just enough to smooth the surface without over-stretching. For machine embroidery, we hoop the fabric and stabilizer together and run a test on a scrap piece of the same material before stitching on production pieces.
Here is a step-by-step view of proper preparation:
| Step | Action on the Plush Fabric Surface | Why It Matters for Eye Quality and Safety |
|---|---|---|
| 1. Position planning | Mark the eye placement relative to nose, mouth, and head shape | Keeps facial features balanced and natural |
| 2. Marking points | Use a light fabric pen or template to mark centers and outlines | Prevents uneven or crooked eyes |
| 3. Backing stabilizer | Attach stabilizer to the back of the eye area | Reduces stretching and puckering during stitching |
| 4. Surface topping | Lay water-soluble topping on high-pile fabrics | Keeps hairs from poking through and blurring the design |
| 5. Hooping / tensioning | Gently tighten the work area (hoop or frame) | Provides a flat surface for precise stitching |
| 6. Test stitching | Try the design on scrap plush fabric | Lets you adjust density, size, and color before production |
Good preparation doesn’t show in the final picture, but you can feel it in how stable the eyes look and how well the stitches hold up over time.
What stitching techniques create clean and symmetrical embroidered eyes?
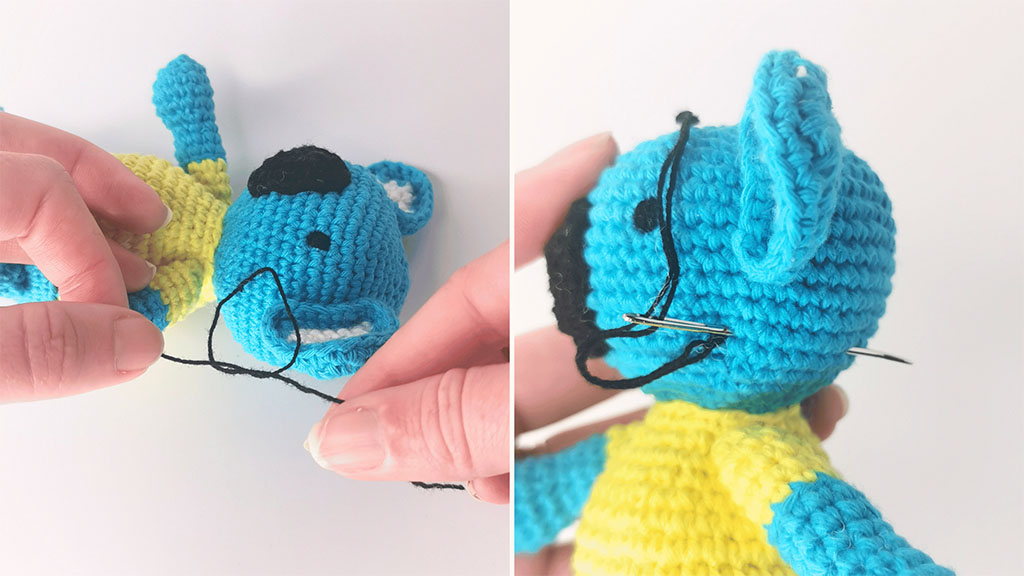
The best stitched eyes look simple to the end customer, but behind that clean look is a deliberate choice of stitches and sequence. If you are embroidering by hand, you can mix basic stitches to build shape, outline, and highlights. In mass production, we simulate these effects through digitized machine embroidery patterns.
For hand embroidery, common stitches include:
- Satin stitch for smooth, filled areas like the iris or pupil
- Backstitch or split stitch for outlines
- French knots or tiny satin stitches for highlights
- Straight stitches for lashes, eyebrows, and small details
To keep eyes symmetrical, we usually:
- Mirror the design with a template or pattern
- Count the same number of stitches and rows on both sides
- Step back regularly and compare both eyes under good lighting
In machine embroidery, symmetry is built into the design file. The digitizer places each stitch path and density, and we sew the same file in mirrored positions on the fabric pieces.
Here is how different techniques contribute to eye quality:
| Technique / Element | How It’s Used on Plush Eyes | Visual Effect | Tips for Consistent Results |
|---|---|---|---|
| Satin stitch | Filling the pupil or iris in a solid block | Smooth, clean, high-contrast areas | Adjust stitch length so it lies flat on plush |
| Backstitch | Outlining the eye shape or eyelids | Clear, defined edges | Keep stitches short for smooth curves |
| Split stitch | Flexible outlines on curved shapes | Softer outline that blends with fabric | Good for very fuzzy fabrics |
| French knot | Small highlights or sparkle points | Adds life and “shine” to the eye | Secure knot tightly and bury ends |
| Straight stitch | Lashes, eyebrows, small detail lines | Expressive, directional accents | Use strong thread and avoid overly long stitches |
| Layered fill (machine) | Overlapping fill areas for depth and shading | More complex, 3D-looking eyes | Requires careful digitizing and density control |
Whenever we create a new character for a client, we usually test two or three eye options: for example, a pure satin fill, a thicker outline, or a softer blended style. We then compare them in person, because small changes in stitch thickness can dramatically change the character’s “personality”.
How do you ensure safety and durability when embroidering eyes on plush toys?
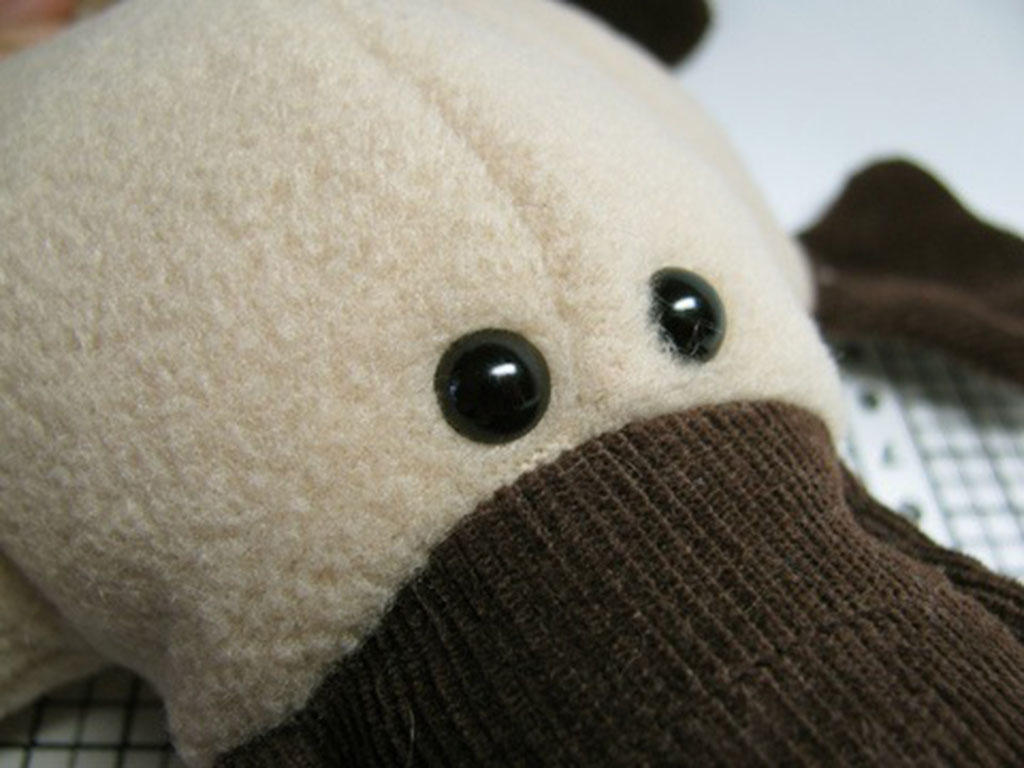
From a safety point of view, embroidered eyes are one of the best solutions for baby and toddler toys, because there are no hard plastic parts or small pieces to pull off. But they still must be done correctly. Poorly secured thread, loose knots, or weak fabric can lead to broken stitches and potential hazards.
In our factory, we treat embroidered eyes as part of the broader toy safety design. For young children (especially under 3 years), we avoid any glued decorations, loose appliqués, or unsecured trims around the face. All thread ends are secured and buried inside the fabric so that little fingers cannot grab them easily.
Durability depends on:
- Thread quality – strong, colorfast threads that do not break or bleed in washing
- Stitch density – not so loose that they snag; not so dense that they cut into the fabric
- Fabric strength – a stable backing and good base fabric to support the stitches
- Testing – simple pull tests on the eye area, and washing tests to check for distortion
For export markets, eyes are also checked during safety testing. Labs will pull on seams, rub the surface, and sometimes try to pick at details to assess risk.
Here’s how we think about safety and durability in a structured way:
| Risk / Concern | How It Can Show Up in Embroidered Eyes | Control Measures We Use | Age Group Most Sensitive |
|---|---|---|---|
| Thread breakage | Stitches loosen after pulling or washing | Strong threads, secure knots, buried ends | 0–3 years |
| Fabric tearing | Eye area weakens because of too-dense stitching | Proper stabilizer, adjusted stitch density | All ages |
| Color bleeding | Dark eye colors bleeding into light fabric | Colorfast thread, washing tests, lab checks | Babies (who may chew toys) |
| Loose decorations | Added sequins / beads near eyes | Avoid for young ages; secure stitching if used | 0–3 years – usually avoid |
| Rough texture | Eye area feels scratchy on sensitive skin | Smooth stitches, avoid harsh backing materials | Babies and toddlers |
If you are sourcing plush toys for children, a good rule is: embroidered eyes, well executed, are usually the safest choice. When you speak with a manufacturer, ask if they have experience with EN71 / ASTM testing specifically for baby plush – this helps ensure they understand the safety side, not only the visual design.
What design considerations help achieve different eye styles and expressions?
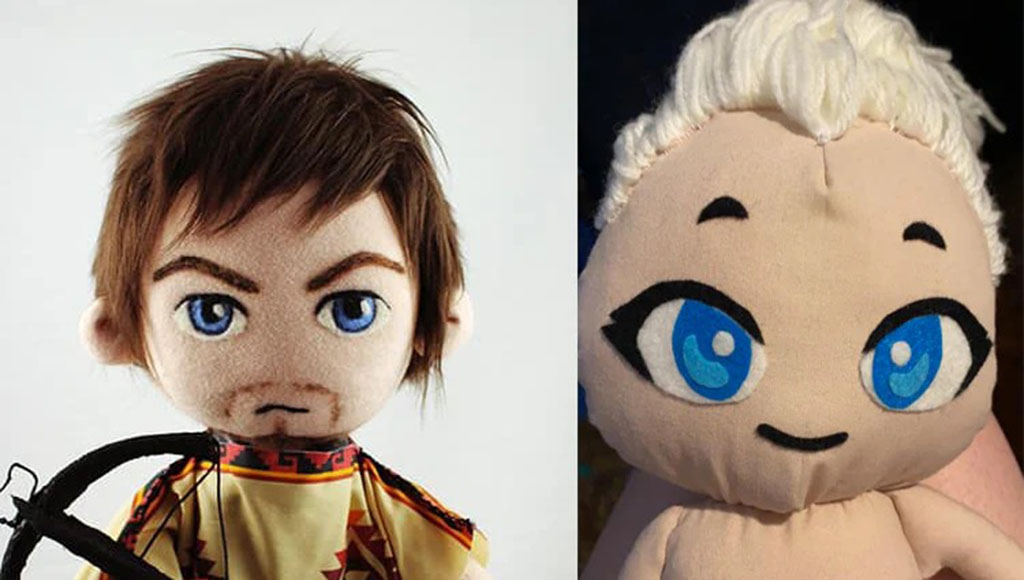
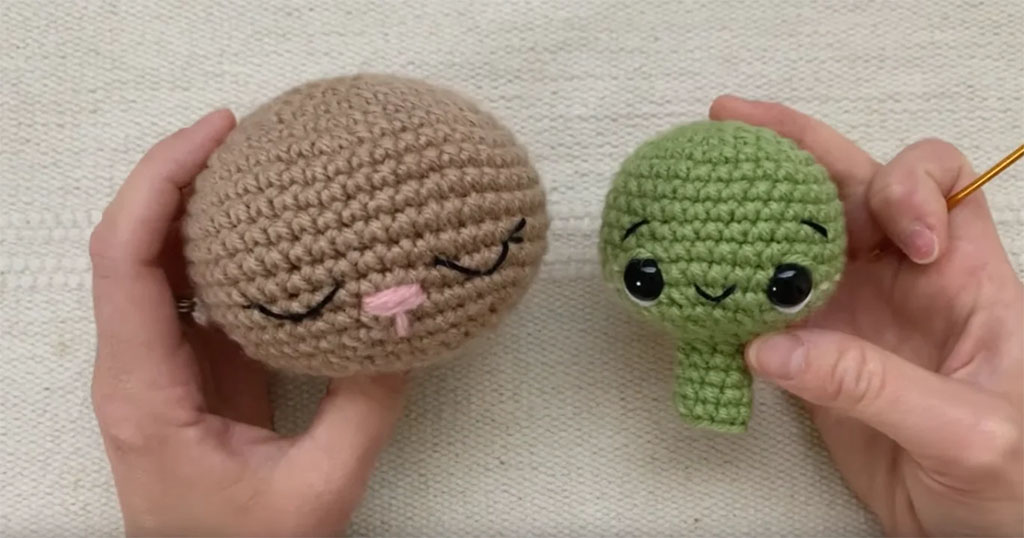
Embroidered eyes are not only about safety and technique; they are also a powerful design tool. Small changes in size, shape, spacing, and highlights can completely change the toy’s expression – from gentle and shy to energetic and mischievous.
Some key design parameters we always discuss with clients:
- Eye size – Larger eyes make characters look cuter and more child-like (“kawaii”). Smaller eyes can feel more serious, elegant, or minimal.
- Shape – Round eyes feel friendly; almond or angled eyes can look cool or mysterious.
- Position – Eyes placed lower on the face and farther apart give a cuter, more “baby-like” feeling. Higher or closer together often feel more mature.
- Outlines and highlights – Thick outlines make eyes stand out on busy fabrics. Small white highlights (a dot or crescent) add life and a sense of reflection.
- Extra details – Eyelashes, eyebrows, and eyelids help convey mood: happy, sleepy, surprised, grumpy, etc.
When we design for different markets (e.g., Europe vs. Japan vs. the US), we often adjust eyes slightly to match local tastes. Some markets prefer very bright, high-contrast eyes; others like more subtle details.
Here’s a simple table showing how eye design can support different styles:
| Eye Style / Expression | Typical Shape & Features | Visual Effect on the Character | Common Use Cases / Markets |
|---|---|---|---|
| Kawaii / cute | Big round eyes, large highlights, soft outlines | Innocent, friendly, baby-like | Baby toys, kids’ plush, Japanese-style designs |
| Minimal / modern | Small dots or simple ovals, no outline | Clean, stylish, slightly abstract | Lifestyle plush, home decor, adult gifts |
| Cool / edgy | Almond shape, sharper angles, thinner pupils | Confident, slightly mysterious | Teen / adult character plush, fashion collabs |
| Sleepy / relaxed | Half-closed eyelids, curved lines | Calm, cozy, “ready for bed” | Bedtime plush, pillows, comfort toys |
| Comical / exaggerated | Asymmetry, thick outlines, big brows or lashes | Funny, expressive, cartoonish | Cartoon IP plush, mascot characters |
For brand owners, eye design is one of the fastest ways to create a recognizable style. When characters share a similar “eye language” across a collection, customers can recognize your brand instantly, even without logos.
How do manufacturers streamline eye embroidery for large-scale production?
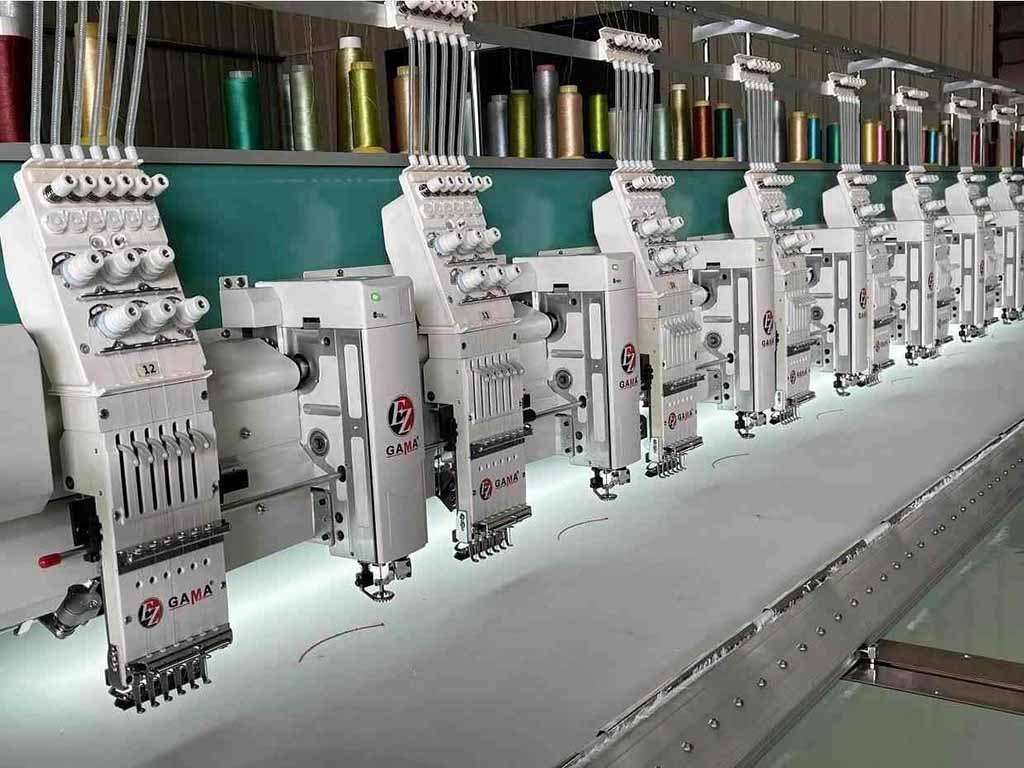
When you move from a single plush toy to thousands of pieces, the approach to eye embroidery needs to scale. At factory level, we rely heavily on machine embroidery, clear production planning, and standardized QC checkpoints to keep eyes consistent across every unit.
The process typically looks like this:
- Digitizing the design – Our team or an external digitizer converts the eye artwork into a machine file, defining stitch types, sequence, and density.
- Sample approval – We run test embroidery on the correct fabric, adjust colors and density, and get approval from the buyer.
- Bulk embroidery on panels – Instead of embroidering on finished toys, we embroider many eyes on flat fabric panels, then cut and sew the pieces into heads. This is more efficient and keeps eyes consistent in size and position.
- Hooping jigs and templates – We use fixtures to place fabric in the same position for every embroidery run, which helps keep eyes aligned.
- QC checks after embroidery – Our QC team inspects panels for skipped stitches, color issues, and distortion before they go to sewing lines.
In some cases, especially for high-volume character plush, we run multiple heads at a time on multi-head embroidery machines. This can produce hundreds of embroidered eye sets per hour.
Here is how we compare different embroidery methods in a manufacturing context:
| Method / Approach | How It Works in Production | Main Advantages | Best Use Case |
|---|---|---|---|
| Hand embroidery (small scale) | Workers embroider eyes directly onto toys or panels | Very flexible, artisanal look | Small batches, premium or handmade collections |
| Single-head machine embroidery | One head stitches multiple eyes on flat panels | Good for medium runs and frequent design changes | New IP launches, moderate order quantities |
| Multi-head machine embroidery | Many heads stitch identical designs in parallel | High efficiency, strong consistency | Large orders, long-term stable designs |
| Pre-embroidered fabric panels | Embroider first, then cut and sew | Precise placement and efficient workflow | Most mass-produced plush toys |
| Automated QC + scanning | Visual checks integrated with process | Early detection of embroidery defects | High-volume, export-focused production |
From your side as a buyer, the key questions to ask are:
- Do you embroider on panels before sewing, or on finished toys?
- How many embroidery machines do you have, and what is your daily capacity?
- What is your defect rate on embroidery, and how do you handle rework?
Factories that can answer clearly and show you samples of large-volume embroidered projects are usually more prepared to handle serious B2B orders.
Conclusion
High-quality embroidered eyes make plush toys safer, more durable, and far more expressive – whether you are creating a soft baby toy or a character-driven collectible. At Kinwin, we help global buyers turn eye designs into stable, production-ready embroidery that looks clean on every single piece, from the first sample to the final carton. If you’re planning a new plush range and want to use embroidered eyes for safety, style, and brand identity, you’re welcome to contact me at [email protected] or visit kinwintoys.com so we can explore the best solution for your project.