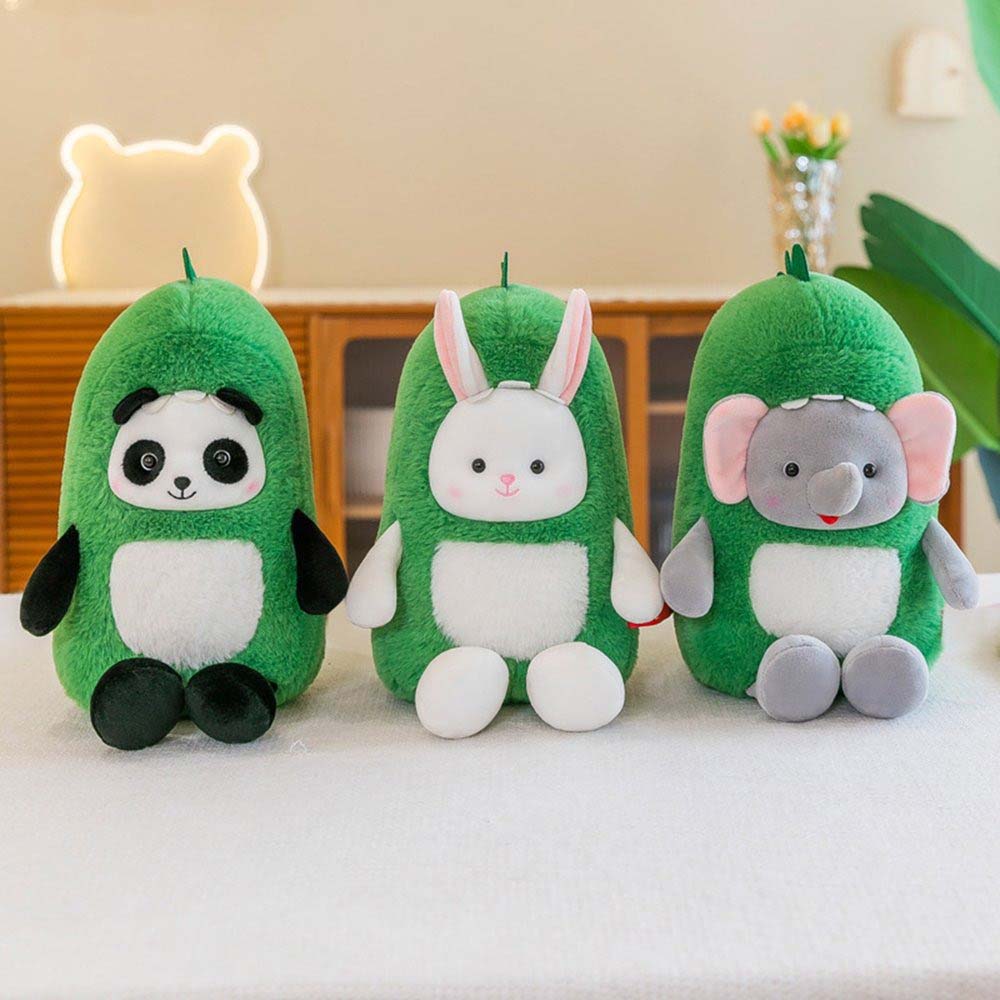
When you see a finished plush toy, it looks simple and cute. But behind that soft shape is a carefully planned pattern. If the pattern is wrong, nothing else will feel right: not the expression, not the balance, not the way it sits on a shelf.
I’m Amanda from Kinwin, a plush toy factory in China. Every day, my pattern team and I turn sketches from brands into clean, accurate pattern sets that can be scaled from one sample to thousands of pieces. In this guide, I’ll walk you through how to create plush patterns in a way that is practical, easy to follow, and ready for real production.
What tools and measurements are required to draft a plush pattern?
To create a good plush pattern, you do not need fancy tools at the beginning. You need clear thinking, basic drawing tools, and accurate measurements. When these are in place, your pattern stays consistent, and your revisions are easier.
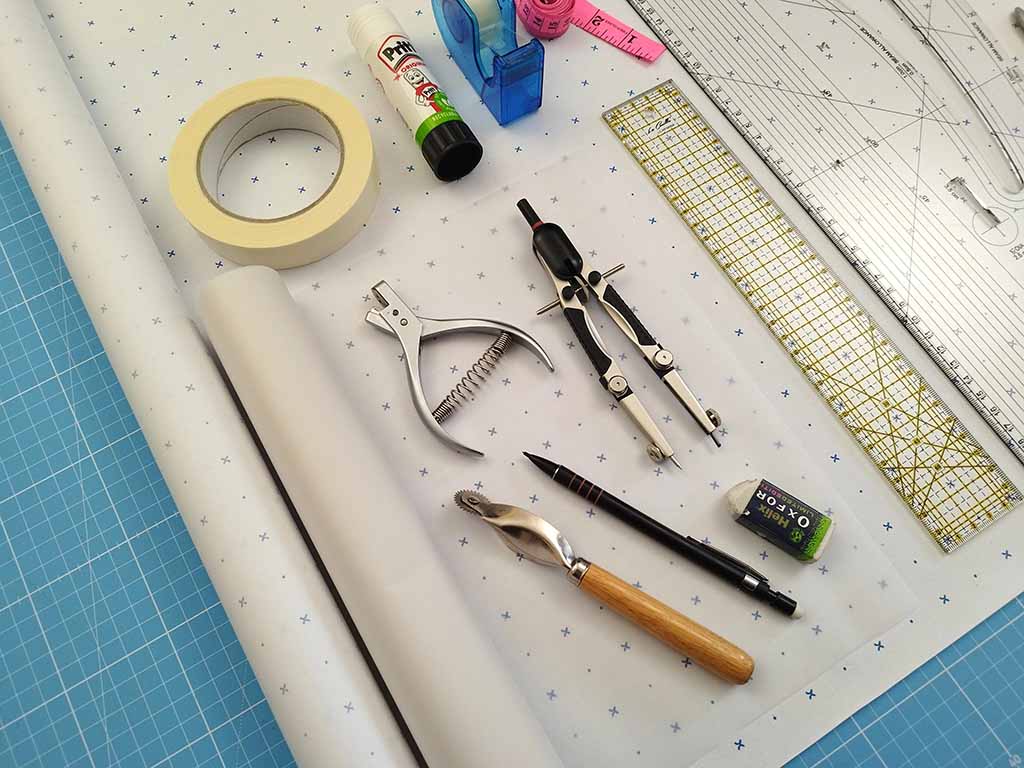
At Kinwin, we start every pattern with the same basic toolkit: paper, rulers, measurement tools, and a few simple sewing tools.
Essential tools and measuring items
Physical tools you should prepare
- Pattern paper or kraft paper (large sheets)
- Sharp pencils and an eraser
- Clear ruler (30 cm or 12″)
- Curve ruler or French curve
- Measuring tape (flexible)
- Fabric scissors and paper scissors
- Pins or pattern weights
- Tailor’s chalk or washable marker
- Notcher or small scissors for marking notches
Key measurements you must define
- Overall height or length of the finished plush
- Width of head, body, and key features (ears, arms, feet)
- Depth of body (front to back)
- Proportions: head-to-body ratio, limb length vs body
Table – Basic toolkit and what each item does
| Tool / Measurement | Purpose in Plush Pattern Drafting |
|---|---|
| Pattern paper | Base for drawing and storing pattern pieces |
| Pencil + eraser | Allow you to change curves many times |
| Straight ruler | Draw baselines, centers, and straight seams |
| Curve ruler | Shape smooth head, body, and limb curves |
| Measuring tape | Measure toys, sketches, and 3D prototypes |
| Scissors (paper/fabric) | Clean cutting of paper and fabric |
| Pins / pattern weights | Hold patterns on fabric for accurate cutting |
| Tailor’s chalk/marker | Transfer pattern outlines and reference marks onto fabric |
| Notches / small cuts | Reference points for alignment during sewing |
When your basic tools and key measurements are ready, drafting feels more like a controlled process, not guesswork.
How do you convert a plush concept into accurate flat pattern pieces?
A plush pattern is simply a 2D explanation of a 3D idea. The challenge is to translate a sketch or mascot into flat pieces that will curve correctly when sewn and stuffed.
I often tell buyers: “We start with your vision, then we break it into front view, side view, and sections.” These views guide where we will place seams and how we will shape each panel.
From concept to pattern: main steps
1. Clarify the design
- Decide the final size.
- Confirm pose: sitting, standing, or lying.
- Note which details are critical (ears, hair, clothing, tail).
2. Draw simple orthographic views
- Front view: shows width and main facial features.
- Side view: shows depth, belly curve, and head angle.
- Back view (optional): useful for tails or hair.
3. Break the plush into logical parts
- Head
- Body
- Arms and legs
- Ears, tail, wings, and other add-ons
Decide where seams will go. For example, a head can be built from two side panels and a top panel, or from multiple curved panels for a rounder shape.
4. Draft flat pieces from these sections
- Draw the center line on the paper.
- Mirror curves to get symmetrical left and right sides.
- Think of each piece as a “shell” that will wrap around stuffing.
5. Label each piece clearly
- Name (Head side, Head top, Body front, Arm, Ear, etc.)
- Indicate “cut on fold” or “cut 2 mirrored” when needed.
- Mark grain or pile direction arrows.
Table – Steps for converting a concept into pattern pieces
| Step | What You Do | Why It Matters |
|---|---|---|
| Define size and pose | Fix overall height, width, and posture | Keeps proportions stable across revisions |
| Draw views | Sketch front, side, and back | Helps you see volume and seam possibilities |
| Divide into parts | Head, body, limbs, details | Makes drafting manageable |
| Draft pattern outlines | Draw shapes on paper with centers and curves | Creates the first 2D version of your plush |
| Add labels and arrows | Name each piece, show pile direction | Prevents confusion in cutting and sewing |
| Plan seam positions | Choose where pieces will join | Affects both structure and visual style |
Once you have these flat pieces, you are ready for seam allowances and more precise shaping.
How do seam allowances and curvature shaping affect final structure?
Seam allowances and curve shapes look like small details, but they have a huge impact on how smooth, round, and stable your plush will be.
In our factory, we treat seam allowance and curvature like engineering inputs. If they are wrong, you will see wrinkles, sharp corners, or strange bulges after stuffing.
Seam allowances
For plush toys, common seam allowance is 3–5 mm. The key is consistency:
- Too small: seams may burst or fray.
- Too large: hard to sew tight curves; bulky when turned.
You should:
- Use the same seam allowance within a piece set (head, body, limb).
- Mark seam allowances clearly on your pattern or keep them included.
- Consider trimming seam allowances narrower around tight curves after sewing.
Curvature shaping
Curves need to be smooth and continuous. When two curved pieces join, they must be designed to meet correctly.
- Head panels: more belly in the curve = rounder head.
- Body panels: wider “belly” area = fuller tummy.
- Limbs: gentle curves = natural, soft shape.
Sharp changes in curve direction often create puckers or unwanted corners after stuffing.
Table – Seam allowance and curve impact
| Element | Typical Practice | Effect on Finished Plush |
|---|---|---|
| Seam allowance width | 3–5 mm for most plush toys | Balance between strength and ease of sewing |
| Seam allowance consistency | Same width on joined pieces | Helps seams match and curves align |
| Curves for heads | Smooth arcs, more volume at cheeks and back | Rounder, cuter head shape |
| Curves for bodies | Wider curve at belly, tapered toward neck and base | Natural sitting or standing shape |
| Limb curves | Slight outward curve along front, smoother back | Arms and legs look soft, not flat |
| Trimming and clipping | Trim excess and clip curves after sewing | Smoother appearance when turned and stuffed |
When you edit seam allowances and curves thoughtfully, your plush pattern produces clean, stable shapes with less trial and error.
What methods ensure symmetry and proportional accuracy in patterns?
A plush toy can be cute but still feel “off” if the pattern is not symmetrical or the proportions are inconsistent. One eye higher than the other, one arm longer, or a body that leans to one side can ruin the professional look.
To avoid this, we work with reference lines, mirroring, and measurement checks through the whole pattern process.
Using centers and reference axes
- Draw a vertical center line for each major piece (head front, body front).
- Place key points (eyes, nose, belly curve) relative to that center.
- Use a horizontal reference line at key levels (eye line, mouth line, hip line).
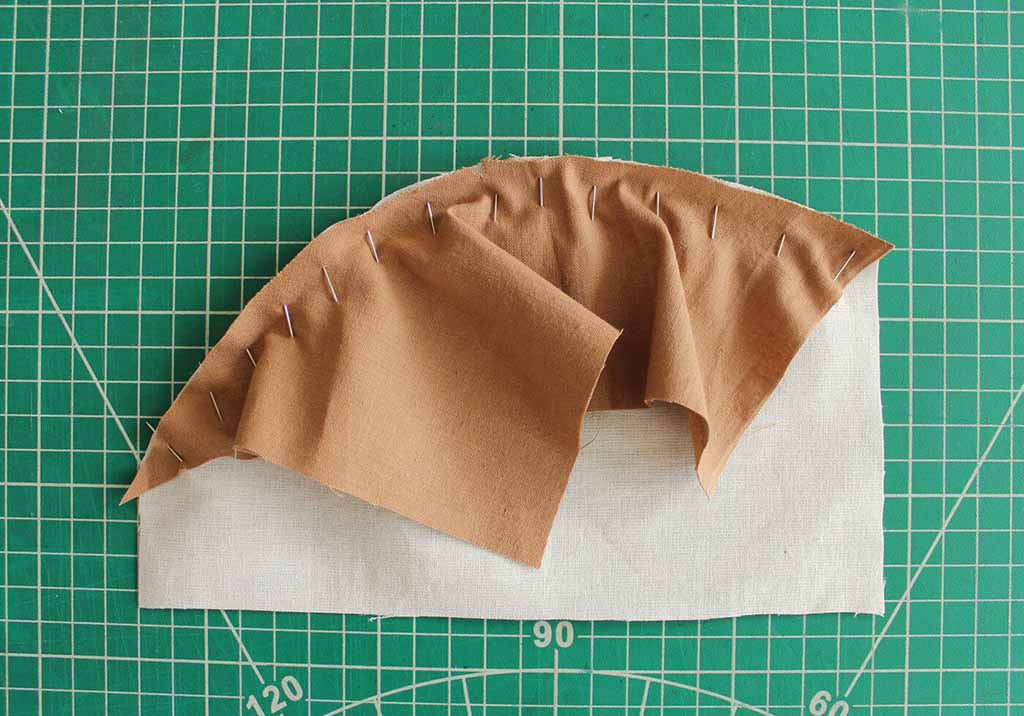
Mirroring techniques
For symmetrical pieces like head panels or ears:
- Draw only one half of the shape carefully.
- Fold the paper on the center line and trace the other half.
- Or draw on half, then cut while folded to ensure both sides match.
Proportion checks
Compare:
- Head height vs body height.
- Arm length vs body length.
- Foot size vs total plush size.
It often helps to test proportions with a scaled sketch or by placing pattern pieces on top of a printed outline of the plush.
Table – Techniques for symmetry and proportion control
| Method | How to Use It | Benefit for Pattern Quality |
|---|---|---|
| Center lines | Draw vertical middle on key pattern pieces | Keeps left–right sides balanced |
| Horizontal reference lines | Mark eye, nose, waist, and base levels | Aligns features across multiple pieces |
| Fold-and-trace mirroring | Fold along center and cut both sides together | Ensures symmetrical ears, arms, and head shapes |
| Measurement comparison | Check lengths and widths of matching parts | Prevents “one side longer than the other” errors |
| Overlay on sketch | Place pattern over drawing to compare outline | Confirms if pattern matches the original concept |
| Test mini mockup | Make a small paper or fabric mockup | Quick way to see posture and proportion |
With these methods, your pattern becomes predictable and repeatable, which is essential for both hobby projects and factory production.
How do you test and refine a prototype pattern for better fit?
No pattern is perfect on the first try. Even our experienced pattern makers still adjust after we see the first stuffed prototype. The key is to test the pattern systematically and then refine it based on what you see and feel.
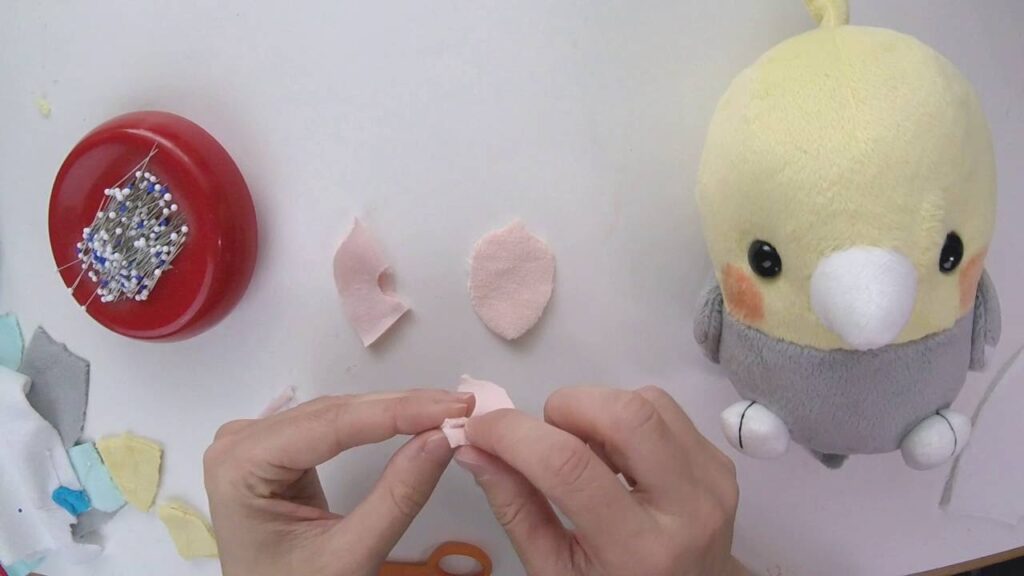
Building your first prototype
- Cut the pieces from a fabric similar to your planned production fabric.
- Mark important reference points (center front, eyes, etc.) on the fabric.
- Sew and stuff carefully, following your planned process.
- Take clear photos from front, side, and back.
Evaluating the prototype
Look at these areas:
- Head shape – too flat, too long, or just right?
- Body balance – can the plush sit or stand as expected?
- Limb placement – do arms and legs hang naturally?
- Face layout – are eyes, nose, and mouth in the right positions?
- Overall proportion – does it feel cute, elegant, funny, or as intended?
Mark your sample directly with a fabric marker: arrows, circles, and comments. It is easier to remember in the next draft.
Refining the pattern
Typical adjustments include:
- Making head panels taller or wider.
- Adding or removing belly volume.
- Changing angle or length of limbs.
- Moving notches to improve seam matching.
Then you make Sample 2, compare it with Sample 1, and continue refining until the plush matches your plan.
Table – Prototype evaluation and refinement checklist
| Area to Review | What to Check | Possible Pattern Adjustment |
|---|---|---|
| Head shape | Flat, pointy, or overly long? | Adjust head panel height, widen cheek curve |
| Body fullness | Too skinny or too bulky? | Modify side panel width or belly curve |
| Sitting/standing | Leaning forward/backward? | Adjust bottom curve or add more volume to back |
| Limb position | Arms too high/low, legs too far apart? | Move attachment points, adjust limb length |
| Facial alignment | Eyes uneven or too far apart? | Shift reference points on head pattern |
| Overall proportion | Head vs body balance (too big/small)? | Scale head or body pattern pieces |
Testing and refining a prototype is normal. It is not a sign of failure; it is part of building a professional, repeatable pattern.
How do digital design tools streamline plush pattern creation?
Many plush patterns still start with paper, but digital tools are now a big help—especially when you need multiple sizes, fast revisions, or clear communication with overseas factories.
You do not need to be a 3D expert to benefit from digital tools. Even simple 2D software can speed up your process and reduce mistakes.
Types of digital tools for plush pattern work
- 2D drawing software
- Vector tools (like Adobe Illustrator or similar programs) for clean lines.
- Easy to scale, mirror, and edit curves.
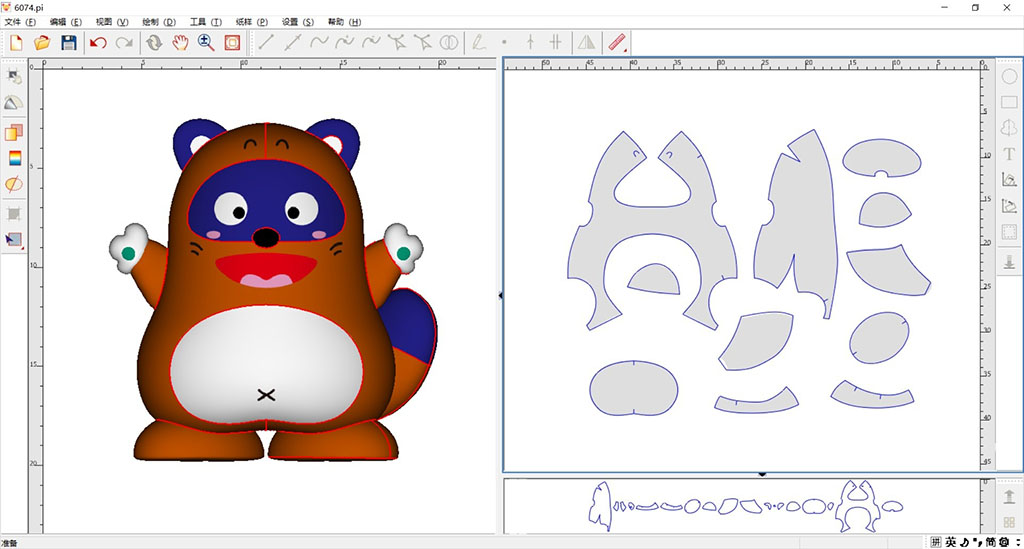
- Specialized pattern CAD
- Garment or pattern CAD systems that can handle templates, grading, and notches.
- Can print full-size patterns on multiple pages or plotters.
- 3D design tools
- Some advanced teams use 3D modeling to estimate volume.
- Helps visualize shape before sewing, especially for mascots or complex shapes.
- Digital documentation and collaboration
- PDF tech packs with pattern drawings, notches, and sewing notes.
- Cloud folders to share files with factories and designers.
Benefits of digital pattern creation
- Faster scaling to different sizes.
- Cleaner, more precise curves and symmetry.
- Easier to repeat patterns for new projects with similar shapes.
- Stronger communication with OEM/ODM partners.
Table – How digital tools support plush pattern development
| Digital Tool Type | Main Use in Plush Projects | Benefit for Your Workflow |
|---|---|---|
| 2D vector software | Draw and edit pattern lines, mark notches | Smooth curves, easy mirroring and resizing |
| Pattern CAD systems | Manage size grading, seam allowances, labels | Professional, production-ready pattern files |
| 3D modeling tools | Visualize shapes and volumes before sewing | Fewer physical samples, quicker concept validation |
| PDF tech packs | Share patterns, sewing instructions, and details | Clear communication with factories and partners |
| Cloud storage | Store versions and share with team | Better version control and project history |
| Digital measurement tools | On-screen rulers and measurement check features | Higher accuracy in length and proportion control |
In my daily work, we often combine paper and digital: sketch and experiment by hand, then tidy and finalize patterns in digital form for long-term use. This gives you the best of both worlds: creativity and accuracy.
Conclusion
Creating a plush pattern is both an art and a system. You start with a concept, then move through tools and measurements, flat pattern drafting, seam and curve control, symmetry checks, prototype testing, and finally digital refinement. When you manage each step carefully, your plush toys look consistent, feel balanced, and are ready for real-world production—not just a one-time craft.
At Kinwin, my team and I support global buyers from first sketch to production-ready patterns and full OEM & ODM manufacturing. If you want to turn a character, logo, or idea into a stable plush pattern that can scale to bulk orders, you’re very welcome to contact me at [email protected] or visit kinwintoys.com to explore how our factory can support your next plush project.