From the outside, a stuffed animal looks simple. But behind it is a structured manufacturing system: material selection, pattern design, cutting, stitching, stuffing, detailing, and strict quality and safety checks. When you understand this flow, you can brief factories more clearly, compare quotes fairly, and avoid many common problems like weak seams, flat shapes, or failed lab tests.
In this guide, I’ll walk you through how stuffed animals are made from a professional OEM/ODM factory perspective—using simple English, clear logic, and practical tables you can use directly in your sourcing and product development.
What materials and equipment are essential for making stuffed animals?
Before we draw a single pattern line or sew a single seam, we must decide what the stuffed animal is made of and what equipment is needed to handle those materials. Good inputs make good toys. Poor inputs create quality issues that no sewing skill can fully fix.
Core material groups
In modern stuffed animal production, we work with five main material groups:
- Outer fabrics – the “skin” of the toy.
- Stuffing materials – the “filling” that controls softness and shape.
- Threads and internal supports – the “skeleton” that keeps everything together.
- Trims and details – eyes, noses, embroidery, clothing, labels.
- Packaging materials – polybags, cartons, inserts, tags.
Outer fabrics are usually plush fabrics such as minky, velboa, short plush, long plush, faux fur, or fleece. For baby or natural-themed lines, we sometimes add cotton knit or terry. The chosen fabric must match your target age, price, and wash requirements.
Stuffing is generally polyester fiberfill or recycled polyester fiberfill (rPET). For special designs, we add pellet pouches for weight or foam inserts for structure.
Threads and internal supports include polyester sewing thread, interlinings, foam sheets, and inner pouches for pellets. These are rarely visible but crucial for durability.
Trims cover all visible add-ons: safety eyes, embroidered faces, ribbons, clothes, badges, woven labels, hangtags. Every trim must be selected with age grading and safety standards in mind.
Finally, packaging materials must protect the toy during shipping and carry correct barcodes, warnings, and branding.
Key equipment
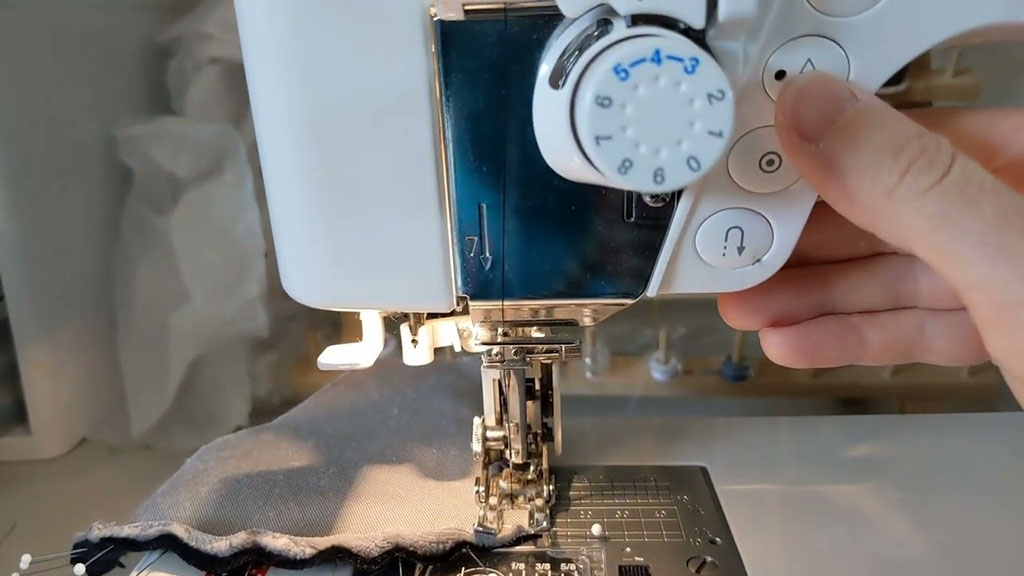
At home, you might use a simple sewing machine and scissors. In a factory, we scale this up with:
- Fabric spreading tables and cutting tools
- Industrial sewing machines (lockstitch, overlock, bartack)
- Computerized embroidery machines
- Stuffing machines and pellet-filling systems
- Needle detection machines for metal safety
- QC tools like scales, rulers, and test fixtures
This equipment allows us to keep shape, size, and quality consistent across thousands of pieces, not only one or two.
Essential materials and equipment for stuffed animals
| Category | Examples | Role in Production | Buyer Tips |
|---|---|---|---|
| Outer fabrics | Minky, velboa, fleece, short plush, long plush, faux fur, cotton knit | Provide touch, look, and overall impression | Match fabric to age group, price tier, and wash expectations |
| Stuffing | Polyester fiberfill, rPET fiberfill, pellet pouches, foam pieces | Control softness, volume, weight, and posture | Decide if you want squishy, medium, firm, or weighted feel |
| Threads & supports | Polyester sewing thread, interlining, foam sheets, inner pouches | Keep seams strong and shapes stable | Ask about thread quality and where extra reinforcement is used |
| Trims & details | Safety eyes/noses, embroidery thread, felt patches, clothing fabrics | Add character, expression, and branding | Align trims with age grading (under-3 vs 3+ vs 14+) |
| Labels & packaging | Woven labels, care labels, swing tags, polybags, cartons | Communicate safety info and protect products in transit | Ensure correct fiber content, care, and warning text |
| Core equipment | Sewing machines, embroidery machines, cutting tools, stuffing machines | Enable efficient, repeatable production | Choose factories with suitable machines for your complexity |
| Safety equipment | Needle detectors, measuring tools, QC fixtures | Support safety and quality control | Always confirm needle detection for export stuffed animals |
How do designers create accurate patterns and digital prototypes?
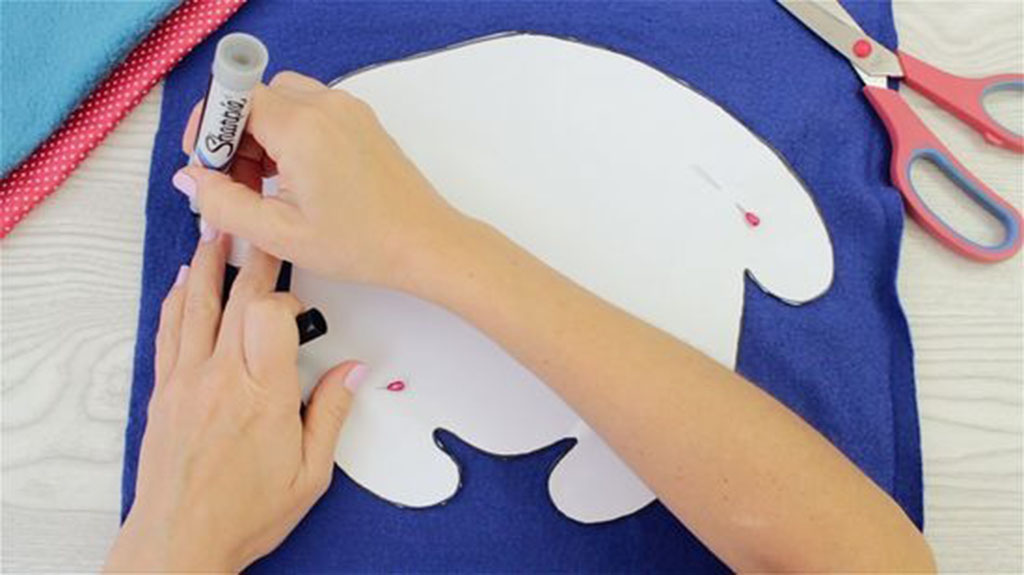
A stuffed animal is a 3D object built from flat fabric pieces. The job of the designer and pattern maker is to translate your idea—often a 2D drawing—into a pattern that gives a balanced, cute shape in real life. This pattern stage decides whether your toy will look “off” or “perfect” on the shelf.
From concept to pattern
The process usually starts with:
- A brief: target age, market, cost level, fabric type, approximate size.
- Artwork: front view, sometimes side and back views, plus any color references or style notes.
The designer studies your character’s proportions, personality, and pose. They decide:
- Is it standing, sitting, or lying down?
- Is the style realistic, chibi (big head, small body), or very simplified?
- Which features are most important (eyes, cheeks, ears, tail, belly, etc.)?
Then the pattern maker creates 2D pieces for:
- Head (front, back, sides, gussets)
- Body (front, back, and sometimes belly gussets)
- Arms and legs
- Ears, tail, horns, wings, and other details
Each piece includes seam allowance, notches for alignment, and pile direction. This ensures that when we sew everything, the fabric flows correctly and the stuffed animal looks symmetrical.
Digital prototypes and refinement
Many factories now support digital patterning:
- Patterns are drafted in CAD or pattern software.
- We can scale sizes more easily and keep multiple versions.
- We sometimes create simple 3D simulations to preview volume.
But the real test is still the physical prototype. We cut fabric, sew a first sample, stuff it, and review:
- Does the head look too big or small?
- Are the limbs too long or too short?
- Does it sit or stand as planned?
- Does it match your artwork’s “emotion”?
We often go through 1–3 rounds of adjustments before we lock a “golden pattern” for production.
Pattern and prototype development steps
| Step | What Happens in the Factory | Purpose | How You Can Help as a Buyer |
|---|---|---|---|
| 1. Brief & goals | Confirm target age, size, fabric, price, and usage | Align design direction and constraints | Provide clear goals and reference products |
| 2. Artwork analysis | Study character views, proportions, and key features | Capture the right “personality” | Highlight which details must be exact |
| 3. Initial pattern draft | Create 2D head, body, limb, and detail pieces with seam allowance | Turn concept into sewable shapes | Review pattern sketches or photos if offered |
| 4. 1st physical sample | Cut, sew, and stuff using chosen fabrics | Test real-world volume and look | Give specific feedback (“shorter body,” “bigger eyes”) |
| 5. Pattern refinement | Adjust curves, add darts, refine proportions | Improve shape, symmetry, and balance | Approve changes quickly to keep timelines on track |
| 6. Digital pattern lock | Save final pattern; grade to other sizes if needed | Ensure consistent production across all SKUs | Decide how many sizes you want in the line |
| 7. Golden sample | Produce final reference sample for QC and lab testing | Create reference for all future production | Approve golden sample formally and keep photos/notes |
Good pattern work can cost time and some sample rounds, but it saves you money, complaints, and redesigns once you move into large orders.
What are the main steps in cutting, stitching, and assembling plush parts?
When the pattern is ready and materials are approved, we enter the physical manufacturing stage. Here, we turn rolls of fabric into fully assembled shells of stuffed animals before stuffing. This stage is all about precision and sequence.
Cutting
Fabric is first spread on tables, often in several layers. We place pattern markers that:
- Use fabric efficiently (reduce waste)
- Follow pile direction so every piece reflects light the same way
- Respect grain and stretch, especially for knit plush
Cutting can be done by:
- Manual scissors (for small runs or complex shapes)
- Rotary cutters or electric knives
- Die-cutting or automatic cutters for big volumes
Clean, accurate cutting ensures each piece matches the pattern and will sew correctly.
Stitching small parts and main pieces
Sewing usually follows this sequence:
- Small parts first: ears, tails, horns, small accessories.
- Head assembly: sew head panels, attach ears and muzzles.
- Body assembly: sew front and back body panels, attach tails or wings if needed.
- Limbs: sew arms and legs, then turn them right-side out.
- Join parts: attach limbs to body, connect head to body if it’s a separate piece.
During stitching, we control:
- Stitch length (often around 2.5–3.0 mm for plush)
- Seam allowance consistency
- Reinforcement at stress points (neck, limb bases, tail base)
We also perform in-line QC checks to catch problems—like misaligned ears or twisted limbs—before they reach stuffing.
Pre-stuffing shells
Before stuffing, we:
- Turn all pieces right-side out
- Check for open seams, skipped stitches, or fabric defects
- Confirm that openings for stuffing are in the correct position and size
Only clean, correctly sewn shells are sent to the stuffing department.
Main manufacturing steps: cutting, stitching, assembly
| Stage | Key Operations | Quality Focus | Common Risks if Not Controlled |
|---|---|---|---|
| Fabric spreading | Lay fabric layers, align pile and grain | Consistent appearance and minimal waste | Patchy color, distorted shapes, high scrap |
| Cutting | Cut pieces using scissors, knives, or dies | Precise shapes, clean edges | Misalignment, off-size pieces, rough edges |
| Small-part sewing | Sew ears, tails, accessories, then turn right-side out | Symmetry, clean tips and curves | Blunt ears, uneven tails, weak small seams |
| Head assembly | Attach muzzles, sew head seams, integrate ears | Balanced head shape; correct ear placement | Crooked faces, asymmetry, visible puckers |
| Body & limb sewing | Sew body panels, arms, and legs | Correct lengths, neat curves | One limb longer, twisted seams, mis-sewn curves |
| Joining parts | Attach limbs and head to body | Strong joints, natural posture | Toy cannot sit/stand well; weak joints |
| Pre-stuff check | Inspect shells, check openings, trim threads | Ready for safe stuffing and final assembly | Hidden seam breaks, missed parts |
When you visit or audit a factory, watch how organized their cutting and stitching lines are. Clean patterns and clear sewing sequences usually mean better quality and fewer surprises for you later.
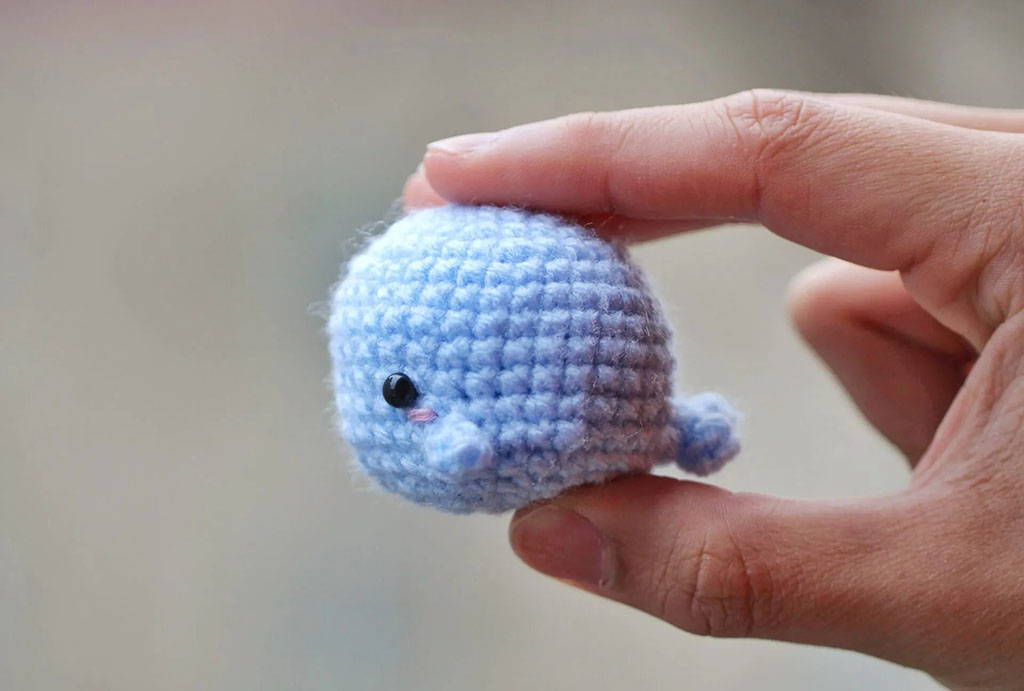
How is stuffing inserted and adjusted for balanced softness and shape?
Stuffing is where a stuffed animal comes to life. The exact type, amount, and placement of stuffing will decide whether the toy feels cheap and flat, or full, soft, and premium. Good factories treat stuffing as a controlled, measurable step, not guesswork.
Inserting stuffing
Stuffing can be done:
- By hand using loose fiberfill
- With pneumatic stuffing machines that blow fiberfill into shells
- With measured pellet filling into inner pouches for weighted designs
We usually stuff through openings in the back, bottom, or side seam, or through a dedicated closing seam. Operators are trained to fill from corners and extremities first (like paws and tips), then the main volume, to avoid hollow spots.
Balancing zones
Different parts of the toy require different stuffing levels:
- Head – often firmer to keep facial shape stable and support eyes and nose.
- Body – medium density for hugging comfort and volume.
- Limbs – slightly softer or more flexible for natural movement.
- Base/bottom – sometimes firmer or filled with pellet pouches to help the toy sit properly.
We define target gram weights for each size and sometimes for the entire toy. In production, QC checks random units on scales to keep weight inside a defined range.
Adjusting softness, shape, and weight
Your brand’s positioning will influence stuffing strategy:
- For bedtime and cuddle plush, we choose softer stuffing density, especially in the body.
- For display or fashion plush, we may choose firmer stuffing so the toy stands tall and holds clothing nicely.
- For weighted plush, we integrate pellet pouches in key zones (belly, base) and adjust fiberfill around them.
We then check:
- How the toy sits or stands on a flat surface.
- How it feels when squeezed from different directions.
- Whether there are any lumps or hollow spots.
Stuffing insertion and density control
| Zone / Aspect | Typical Stuffing Approach | Effect on Feel & Shape | Buyer Decisions |
|---|---|---|---|
| Head | Medium–firm polyester fiberfill | Stable facial shape; eyes and nose stay aligned | Decide how “sharp” or “soft” you want the face |
| Body | Medium density fiberfill | Huggable but not collapsing; good volume | Softer for pillow-like products; firmer for display |
| Limbs | Light–medium density | More flexible arms and legs; natural drape | Choose floppy vs structured limbs |
| Base / bottom | Firm fiberfill or pellet pouch + fiberfill (for 3+ only) | Better sitting stability; lower center of gravity | Weighted plush vs regular plush |
| Overall weight | Target grams per size | Consistent feel and perceived quality across units | You can request “slightly heavier” or “lighter” feel |
| Special structure | Foam pieces or shaped inserts where needed | Keeps special forms (long snouts, large heads) stable | Use only where design demands stronger structure |
When you review stuffed samples, always do your own “hug test”: squeeze, press, and set the toy upright. If it collapses or feels uneven, you can ask the factory to adjust stuffing grams or distribution.
How are details like eyes, embroidery, and accessories securely added?
Eyes, noses, mouths, and accessories give a stuffed animal its character and emotional impact. But they are also the most common area for safety and durability issues if not designed and attached correctly. Factories must balance aesthetics and safety for each target age group.
Eyes and noses
We manage faces differently based on age grading:
- For babies and under-3 toys
- Use fully embroidered eyes and noses.
- No hard or detachable parts.
- All stitches must be smooth and secure.
- For 3+ and older
- Can use plastic safety eyes and noses with locking washers inside the head.
- Must pass pull tests to prove they will not detach under stress.
- Still often combined with embroidery for extra expression.
Choice of eye size, shape, and color strongly influences perceived cuteness and personality.
Embroidery and appliqué
We use computerized embroidery machines to add:
- Faces (eyes, nose, mouth, eyebrows)
- Markings (spots, stripes, patches)
- Logos and branding (on paws, clothing, or belly)
We also use appliqué fabric patches, stitched tightly around the edges, to create layered details or color blocks. Embroidery density must be adjusted:
- Too dense → fabric becomes stiff and may pucker.
- Too light → lines look broken or incomplete.
We test embroidery on the actual plush fabric, because pile height and texture affect the final look.
Clothing and accessories
Clothing, scarves, hats, and other accessories add story and value. They can be:
- Sewn-on (non-removable) for lower age grades.
- Removable (dressed plush) for higher age grades or collector items.
All accessories must be designed to avoid small loose parts (buttons, beads, etc.) for young children. Even for older-age plush, strong stitching and sensible design reduce warranty claims and bad reviews.
Labels and hangtags provide brand, care, and safety information and must be attached securely.
Facial details and accessories – design and safety
| Component | Recommended Approach | Safety & Durability Focus | What to Decide as a Buyer |
|---|---|---|---|
| Eyes & noses (under-3) | Fully embroidered; no hard parts | No small parts risk; smooth, soft surface | Simplify designs; focus on cute but safe faces |
| Eyes & noses (3+) | Safety eyes/noses with locking washers + pull test | Must resist pulling; no sharp edges | Choose style (size, shine, color) within safety limits |
| Facial embroidery | Toy-grade thread; controlled density; tested on final fabric | Stable lines; no puckering or loose threads | Approve embroidery proofs and physical samples |
| Appliqué patches | Tightly stitched edges; secure fabrics | No lifting edges or fraying | Use for markings, belly patches, logos |
| Clothing & trims | Sewn-on for low ages; well-constructed outfits for higher ages | Avoid choking hazards; seams must be strong | Decide if outfits are decorative or removable, and for which age group |
| Labels & hangtags | Sewn firmly; clear printing | Meet legal requirements; reinforce brand identity | Include logo, website, care instructions, and safety marks |
When you inspect samples, pull gently on eyes, noses, clothing, and accessories. If anything feels loose now, it will become a real problem after children play with it.
How do factories perform quality control and safety testing before shipment?
Even the cutest, softest stuffed animal must pass quality control (QC) and safety testing before it is safe to ship to major retailers and countries. This is where professional factories truly differentiate themselves from “cheap only” suppliers.
In-factory quality control
We use multiple QC checkpoints:
- Incoming material inspection
- Check fabric color, hand-feel, thickness, and defects.
- Check stuffing cleanliness and odor.
- Check trims (eyes, zippers, labels) match specs.
- In-line sewing QC
- Inspect semi-finished pieces while stitching is in progress.
- Look for open seams, misaligned parts, broken stitching.
- Stuffing and shape QC
- Randomly check weight and softness.
- Verify that toys sit or stand properly.
- Final AQL inspection
- Use Acceptable Quality Limit (AQL) sampling standards.
- Check appearance, seams, dirt/stains, labels, hangtags, and packaging.
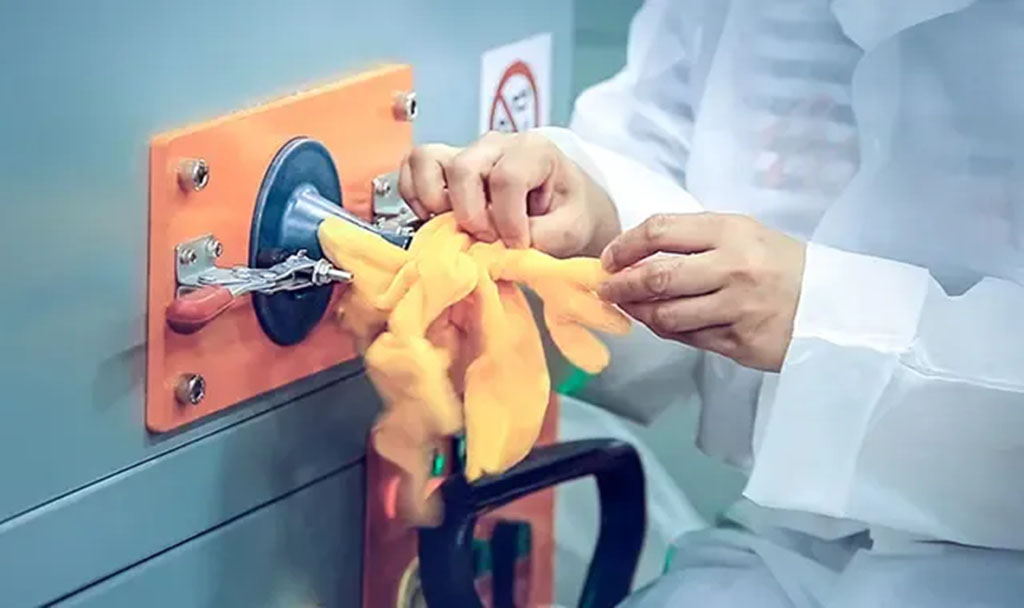
- Needle detection
- Run all stuffed animals through a needle detector.
- Ensure no broken needle fragments or metal pieces remain inside.
Each step reduces the chance of defects reaching your warehouse or customer.
Safety and compliance testing
For export markets, stuffed animals must also pass formal lab tests. Typical standards include:
- EN 71 (Europe)
- EN 71-1: Mechanical and physical properties
- EN 71-2: Flammability
- EN 71-3: Migration of certain elements
- ASTM F963 (USA) – Toy safety standard.
- CPSIA (USA) – Lead and phthalate limits; tracking labels.
- Additional local standards depending on target regions.
We send golden samples—built with the exact materials and constructions used in production—to third-party labs such as SGS, TÜV, or Intertek. Only after passing do we move into bulk production. If materials or structures change, we may need to re-test.
Documentation and traceability
Professional factories maintain:
- Material records and supplier lists
- Lab reports linked to specific SKUs and materials
- Internal QC records and inspection photos
- Production dates and batch information
This documentation protects you if questions arise from regulators, retailers, or customers.
Quality control and safety testing overview
| Control Layer | What is Checked | Purpose | What You Should Request as a Buyer |
|---|---|---|---|
| Incoming material check | Fabric, stuffing, trims, labels | Block defective or wrong materials early | Photos, basic specs, and confirmation of toy-grade inputs |
| In-line sewing QC | Seams, symmetry, part placement | Catch errors before stuffing and finishing | In-line photos, not just final glamour shots |
| Stuffing & shape QC | Weight, softness, posture (sit/stand) | Keep hug feel and appearance consistent | Weight ranges and feedback from squeeze tests |
| Final AQL inspection | Overall appearance, defects, packaging, labels | Ensure shipment matches golden sample and spec | AQL inspection reports; option to use third-party inspectors |
| Needle detection | Hidden metal fragments | Guarantee no broken needles inside stuffed animals | Written confirmation that 100% of goods pass needle detectors |
| Lab safety testing | EN 71, ASTM F963, CPSIA, and others as needed | Provide legal safety proof for target markets | Official lab reports tied to your exact SKUs and materials |
If a supplier cannot explain this structure or refuses to share test reports, that is a red flag—especially if you plan to sell in strict markets like the EU, USA, Japan, or big international retail chains.
Conclusion
A good plush toy is safe, soft, durable, and appealing while also offering branding opportunities. Understanding how stuffed animals are made—from material selection, pattern development, cutting and stitching, stuffing and detailing, all the way to quality control and safety testing—helps you build products that delight customers and pass strict global standards.
At Kinwin, we support global buyers from concept to shipment: we help you choose fabrics and stuffing, refine patterns, control production, and manage lab testing so each stuffed animal is ready for your market. Contact us at [email protected] or visit kinwintoys.com to discuss your next project and explore how our factory can support your success.