Turning a favorite photo into a custom stuffed animal is one of the most emotional projects you can ask a factory to do. It might be a beloved pet, a brand mascot, or a child’s drawing turned into a “real” friend. The challenge is making the plush look like the photo and survive real-life hugs, shipping, and safety tests.
When you order a custom stuffed animal from a photo, the best results come from clear materials planning, careful 2D-to-3D design, accurate color and detail reproduction, and a structured sampling process. When this work is done well, your plush feels like a faithful, huggable twin of the original image—safe, durable, and ready for retail or gifting.
In this guide, I’ll walk you through how my team at Kinwin handles photo-based custom plush, from the first image you send to mass production and shipment, using simple language and a practical B2B point of view.
What materials and techniques recreate a photo-accurate custom stuffed animal?
The first big decision is what this plush should feel like in real life. The photo shows color and shape, but it doesn’t show fabric, weight, or texture. To get close to “photo-accurate,” we choose materials and techniques that capture the spirit of the image while staying safe and manufacturable.
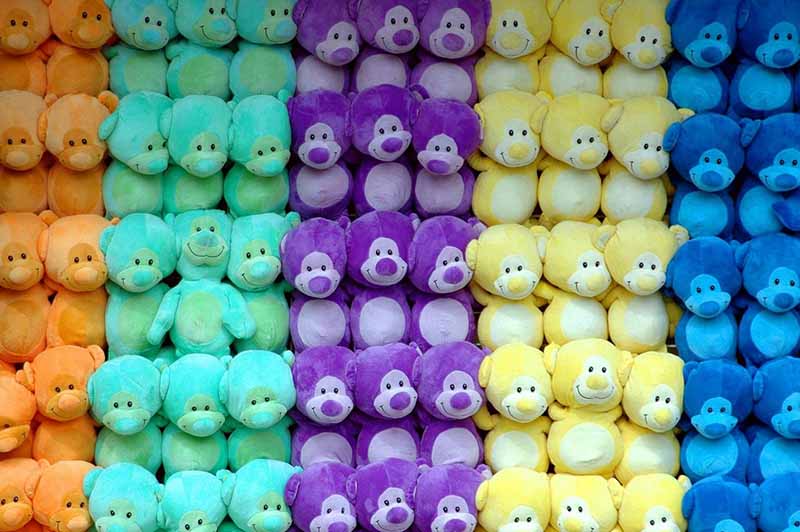
For most projects, we combine short plush or minky fabrics for the body, high-quality polyester fiberfill for softness, and different surface techniques such as embroidery, appliqué, and sometimes digital printing to recreate markings or clothing.
Key material and technique choices
| Element | Typical Options We Use | When It Works Best |
|---|---|---|
| Main body fabric | Short plush, minky, velboa | Pets, mascots, characters that should feel soft and cuddly |
| Special textures | Faux fur, textured plush, fleece | Long-hair pets, fluffy tails, textured clothing or hair |
| Details & markings | Embroidery, appliqué, digital print on fabric | Eyes, logos, fur patterns, small symbols |
| Stuffing | High-resilience polyester fiberfill | Standard soft plush feel with good shape recovery |
| Weight options | Poly pellets (sealed inside) | Sitting stability or gentle weight (for older users) |
| Internal structure | Foam blocks, felt or tricot reinforcement | Very big heads, long ears, parts that must stand or hold shape |
From a buyer’s side, you don’t need to know every technical term. But if you can tell us how soft or firm you want the plush, and which areas must look almost identical to the photo (for example, eyes, nose, logo, or unique markings), we can match materials and techniques to that priority list.
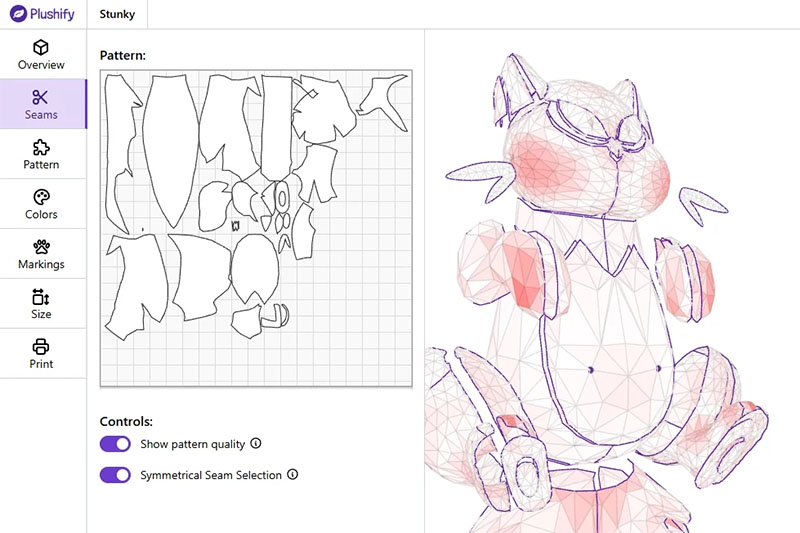
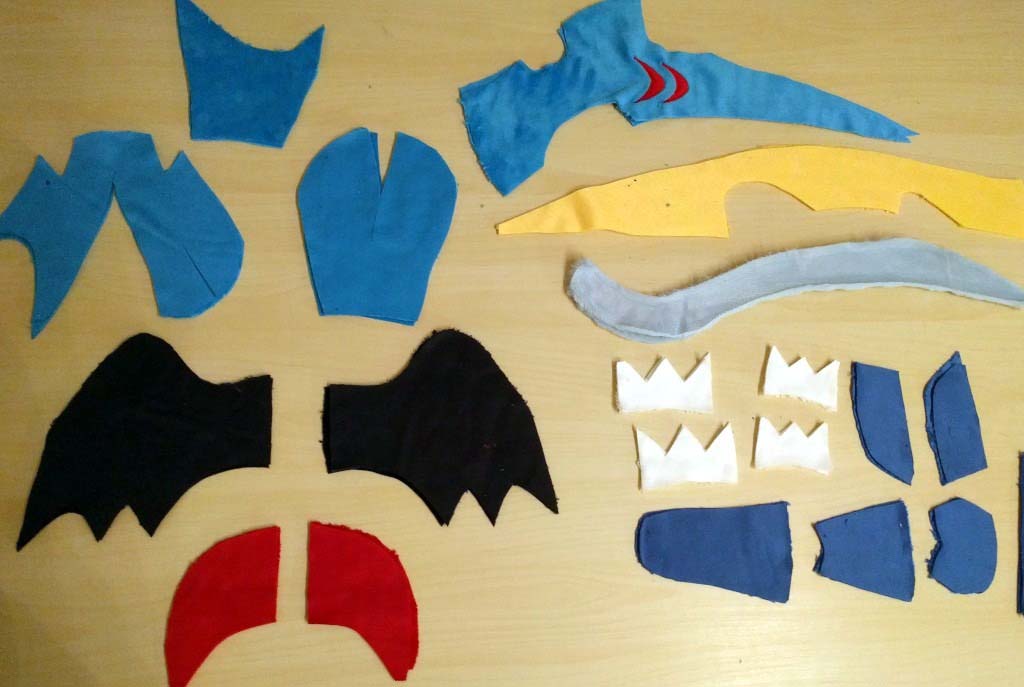
How do designers convert a 2D photo into a 3D plush pattern and model?
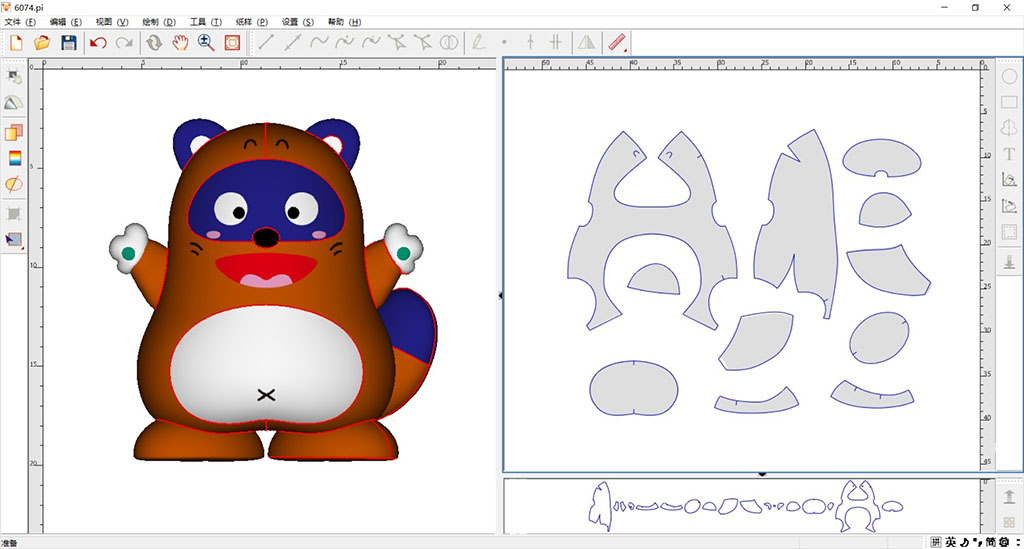
A photo is flat. A plush is fully 3D and needs front, side, and back. This is one of the most misunderstood parts of custom plush: even if you send a perfect photo, designers still have to make choices about depth, angles, and hidden areas.
Our goal at Kinwin is to respect the key identity points from your photo—silhouette, expression, color balance—while building a pattern that sews, stuffs, and sits correctly.
The 2D-to-3D design pipeline
| Step | What We Do at the Factory | What You See as the Client |
|---|---|---|
| Photo analysis | Study photo(s): pose, proportions, markings, clothing | We may ask for extra angles if possible |
| Concept sketch / redraw | Create a clean 2D design based on the photo | Flat front view (and sometimes side/back) for approval |
| 3D thinking & notes | Decide head-body ratio, pose (sitting, standing, lying) | Notes on size, posture, and main features |
| Pattern drafting | Turn the 2D design into pattern pieces (head, body, limbs) | You might see line drawings or just receive the sample |
| First prototype | Cut, sew, and stuff the first sample | Physical sample or detailed photos for your feedback |
What we need from your photo
To make this step smoother, you can:
- Send multiple clear photos if possible (front, side, back or at least front + one angle).
- Tell us what must not change (for example, “keep the collar and heart-shaped patch exactly the same”).
- Decide if you want a realistic plush or a slightly chibi / cute version.
Inside the factory, our pattern makers imagine how your subject looks from all angles. For example, if you send a dog photo, we decide how wide the chest should be, how long the snout is in 3D, and how the ears attach. For a mascot, we decide how thick the limbs look and how big the head should be for your market (kids, adults, collectors, etc.).
How do manufacturers reproduce colors, textures, and small features precisely?
When you say, “I want this plush to look exactly like my photo,” most of the pressure lands on colors and small details. If the eye color, collar stripe, or logo is wrong, the plush feels “off” even if the shape is good.
We treat color and detail as a separate mini-project: first we match colors with charts or swatches, then we choose the right combination of embroidery, appliqué, and printing for each detail.
Color and texture control
| Area to Match | How We Recreate It | Typical Tools and Choices |
|---|---|---|
| Main body color | Choose plush fabric closest to the photo; adjust in sampling | Fabric swatch books, Pantone reference, lighting checks |
| Fur / hair texture | Select pile length and density; sometimes mix fabrics | Short plush, minky, faux fur, textured fleece |
| Clothing & accessories | Use fabric + embroidery or printed panels | Woven fabrics, felt, digital print on fabric, trims |
| Markings & patterns | Embroidery, appliqué, or printed patches | Multi-color thread, layered cut pieces, print files |
Reproducing small features
For photo-based custom plush, I always ask clients to mark small features they care about most. This might include:
- Unique eye shape or highlight
- Scar, spot, or special fur marking
- Jewelry, collar tags, or small logos
- Specific mouth expression (smile, smirk, open mouth)
We usually use embroidery for these, because it is safe, durable, and clean-looking. Tiny logos or fine lines may be simplified slightly so they still read clearly after sewing and stuffing.
During sampling, we send close-up photos so you can see:
- Eye size and color
- Mouth line and nose shape
- Print or embroidery alignment
If colors look different under your local lighting, you can give feedback and we adjust in the next sample.
What sampling and revision steps ensure the plush matches the original photo?
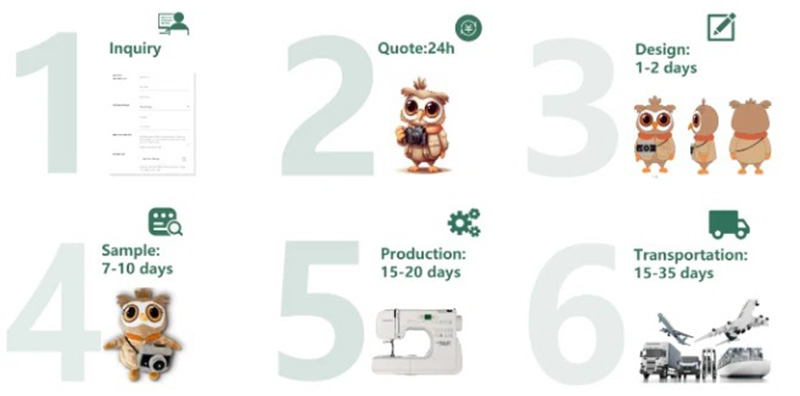
The heart of a photo-based project is the sampling stage. This is where we turn your photo and notes into a real plush for the first time. A good project usually has 1–3 sample rounds before mass production.
Each round is a chance to move closer to your mental picture. The most successful clients treat this as a partnership: we provide the technical sample, you provide clear feedback, and together we refine until both sides are happy.
Typical sampling and revision flow
| Stage | What Happens | Your Role as Client |
|---|---|---|
| 1st sample (prototype) | We build the first plush based on your photo and brief | You review photos or physical sample |
| Feedback round | You mark changes on photos (shape, colors, details) | Prioritize what matters most |
| 2nd sample | We adjust pattern, stuffing, embroidery, accessories | You re-check; usually only smaller points remain |
| Golden sample | Final approved version for mass production | You sign off; we keep one in factory as reference |
Giving effective feedback
To keep the project moving smoothly, it helps to:
- Use simple, clear comments like “Make the head 10% smaller” or “Eye color is too dark; closer to this code.”
- Circle or highlight areas on the sample photos and send them back.
- Focus first on overall shape and expression, then on small details.
From our side, we compare each new sample to:
- Your original photo(s)
- The previous sample
- Our internal “golden sample” expectations for sewing quality and stuffing balance
When the golden sample is approved, we lock all specs—pattern, fabric codes, thread colors, stuffing density—and use this as the strict reference during production.
What safety, durability, and compliance standards apply to custom plush orders?
Even if the plush is based on a personal photo, once you sell or distribute it to customers, it becomes a consumer product. That means it must meet the safety and compliance standards of the markets where it will be sold.
At Kinwin, we build photo-based custom plush to align with toy safety standards such as EN71, ASTM F963, CPSIA, and related regulations, depending on your regions and target age group. The exact testing plan depends on whether the plush is for children, adults, or purely decorative use.
Main safety and compliance areas
| Area | What We Check or Plan For | Why It Matters |
|---|---|---|
| Mechanical safety | Seams strength, small parts, pull tests on attachments | Avoid choking hazards and breakage |
| Chemical safety | Fabric and print chemistry tested to limits (e.g. lead, phthalates) | Keeps materials safe for skin contact |
| Flammability | Fabrics and stuffing tested to relevant flammability rules | Reduces fire risk in normal use |
| Age grading | Decide if plush is suitable for 0+, 3+, or adults only | Guides labeling, testing depth, and marketing |
| Labeling & tracking | Care labels, country of origin, batch / tracking info | Supports recalls, legal compliance, and clarity |
Durability in real use
Durability is not just about passing lab tests. We also plan for:
- Seam strength in high-stress areas (arms, legs, head, tail).
- Stuffing control so shape lasts after many hugs.
- Washability, if you want the product to be machine-washable.
When you brief us, it helps if you say:
- Who the main users are (babies, kids, adults, collectors).
- Which markets you will ship to (USA, EU, Japan, etc.).
- Whether you need third-party lab test reports before shipping.
This lets us budget for testing and choose materials that are already widely used in compliant products.
How do pricing, MOQs, and lead times affect photo-based custom plush production?
Photo-accurate custom plush sits between art project and factory project. It uses more design time and pattern work than a standard catalog toy, so pricing, minimum order quantity (MOQ), and lead time need to reflect that.
From your side, it’s important to know that:
- The first unit is always the most expensive (design + sampling).
- Per-unit cost drops when you order higher quantities.
- Lead times include both sampling and bulk production, plus shipping.
What drives the price
| Cost Driver | How It Affects Pricing | How You Can Optimize |
|---|---|---|
| Size of the plush | Larger = more fabric, stuffing, and freight | Choose a compact but impactful size |
| Complexity of design | More pattern pieces, accessories, and colors | Simplify where possible while keeping key identity |
| Number of samples | Extra rounds = more labor and material | Give focused feedback to reduce sampling rounds |
| Materials & techniques | Special fabrics, digital printing, accessories | Use premium features only where they matter most |
| Quantity (MOQ and above) | Higher quantity = lower unit cost | Plan realistic campaign or order volume |
| Testing & compliance | Lab tests add fixed cost per project | Combine tests across variants when possible |
Typical MOQs and timelines (general guidance)
Every factory is different, but to give you a rough feeling for planning:
| Item | Typical Range (for reference only) |
|---|---|
| Sampling time | ~2–4 weeks for first sample; +1–2 weeks for revisions |
| Bulk lead time | ~30–60 days after golden sample approval (depends on quantity) |
| Common MOQs | Often 300–1,000 pcs per design for B2B orders |
| Smaller runs | Sometimes possible at higher unit cost |
| Shipping time | By sea: several weeks; by air/express: faster, higher cost |
From a U-shaped perspective: when you share your budget range, target quantity, and launch window, we can propose a realistic plan that protects your margins and helps you deliver on time. You gain clarity on cost, and we gain clarity on how to schedule production.
Conclusion
A good custom stuffed animal from a photo is accurate enough to make people say, “That’s exactly them,” but also engineered to be safe, durable, and practical to produce at scale. When you combine smart material choices, clear 2D-to-3D design work, precise color and detail handling, structured sampling, and realistic planning around safety, price, and timing, you get a product that feels both personal and professional.
At Kinwin, we help global buyers turn photos of pets, mascots, characters, and brand icons into production-ready plush—supporting you from early concept and sampling all the way through testing, mass production, and export. If you’re planning a photo-based custom plush project and want a factory partner who understands both emotion and engineering, you’re very welcome to contact me at [email protected] or visit kinwintoys.com to explore how our team can support your next launch and long-term growth.