Turning a simple drawing into a real plush is one of the most exciting projects you can do with a factory. A child’s sketch, a game character, a brand mascot, or a comic figure can all become huggable, sellable products when the process is clear.
To create custom plush from a drawing, you first choose suitable materials and construction methods, then convert the 2D artwork into 3D patterns and prototypes. After that, you match colors and textures, refine samples through several revision rounds, check safety and durability, and finally confirm pricing, MOQs, and lead times before bulk production.
When you understand each stage, it is much easier to control quality, manage expectations inside your team, and talk clearly with your manufacturing partner.
What materials and techniques translate a drawing into a custom plush?

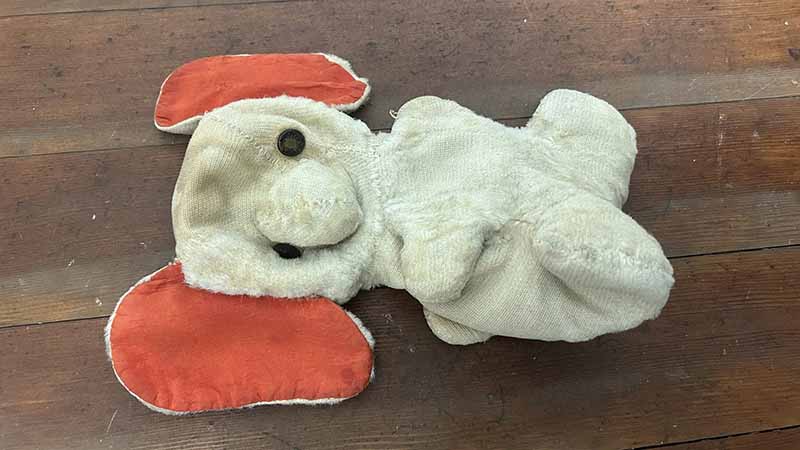
The first step is to “translate” your drawing into real-world materials. Fabric choice, stuffing type, and internal structure all influence how close the plush feels to the original art. Good choices keep the character spirit, but also make the toy practical, safe, and scalable for production.
In most cases, a drawing becomes a plush using soft outer fabrics (minky, short plush, velboa, or faux fur), polyester fiberfill, strong polyester thread, and sometimes extra components like pellets, foam, or inner frames for special shapes. Techniques include embroidery, appliqué, printing, and careful panel cutting to follow the drawing’s lines.
Here is a simple overview of common materials and where they fit in custom plush:
| Component | Typical Options | Role in Translating the Drawing | Notes for Custom Projects |
|---|---|---|---|
| Outer fabric | Minky, short plush, velboa, faux fur | Recreates surface look and feel | Choose pile length to match character style |
| Inner filling | Polyester fiberfill, foam pieces, pellets | Gives volume, weight, and balance | Density affects how “solid” or floppy it feels |
| Thread | Polyester sewing and embroidery thread | Builds structure and surface details | Color matching is important for outlines |
| Detail materials | Felt, printed fabric, vinyl patches | Adds shapes, logos, and graphic elements | Good for sharp logos or flat patterns |
| Internal supports | Foam sheets, inner pouches, soft wire | Helps tricky poses or very long limbs | Must be safely covered and age-appropriate |
Choosing a “material language” for the character
Your drawing already has a visual language: flat colors, simple lines, or maybe heavy shading and texture. My job as a manufacturer is to help you find a material language that fits that look:
- Smooth minky for simple, cute styles
- Slightly textured plush or faux fur for animals and monsters
- Felt or printed panels for graphic symbols and logos
If the design will be used for children, I will always suggest materials that are soft, low-shedding, colorfast, and tested for safety. For adult collectors, we can sometimes use more special textures, as long as they are still safe and durable.
How do designers convert a 2D sketch into accurate 3D patterns and prototypes?
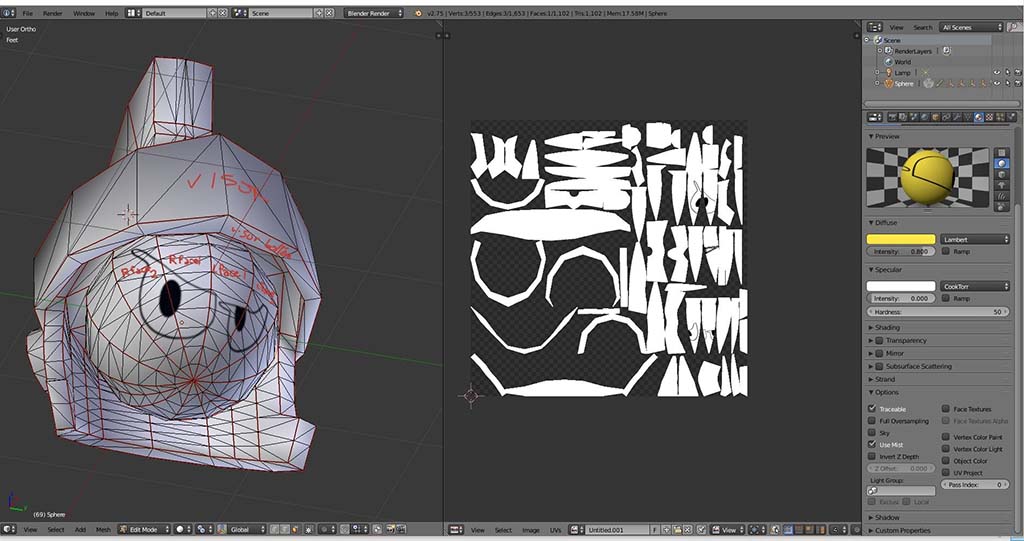
A drawing is flat. A plush is three-dimensional. The big challenge is to convert 2D lines into a body that looks correct from every angle, not just from the front. This is where pattern design and 3D thinking become very important.
To convert a drawing into a plush, designers start by analyzing the character: head-to-body ratio, limb thickness, key angles, and pose. Then they break the figure into simple 3D shapes (cylinders, spheres, cones) and translate those shapes into flat pattern panels. After drafting, they sew a prototype and adjust the pattern until the plush matches the drawing’s proportions and energy.
You can think of the process like this:
| Step Stage | What the Designer Does | Key Questions Asked |
|---|---|---|
| Character analysis | Studies drawing from front, side, and back ideas | How big is the head? How long are arms and legs? |
| Shape breakdown | Turns body into basic 3D forms | Where do we need separate panels? |
| Pattern drafting | Draws flat panels with seam allowance | How will these panels curve when sewn? |
| First prototype | Cuts, sews, and stuffs a test sample | Does the plush look like the character? |
| Pattern revision | Adjusts curves, lengths, and widths | What should be bigger, smaller, rounder, flatter? |
Balancing cuteness and accuracy
Often, drawings are “perfect” on paper but need small edits for plush form. For example:
- A very thin neck in a drawing might break easily in real plush, so we thicken it slightly.
- Extremely long legs might cause standing issues, so we adjust pose or add support.
- Tiny fingers or spikes may be simplified so they can be sewn and turned cleanly.
I will always tell you honestly where we need to simplify or reinforce the design so that the final plush still looks accurate but works in real life. Our goal is to keep the soul of the drawing, not every single tiny line.
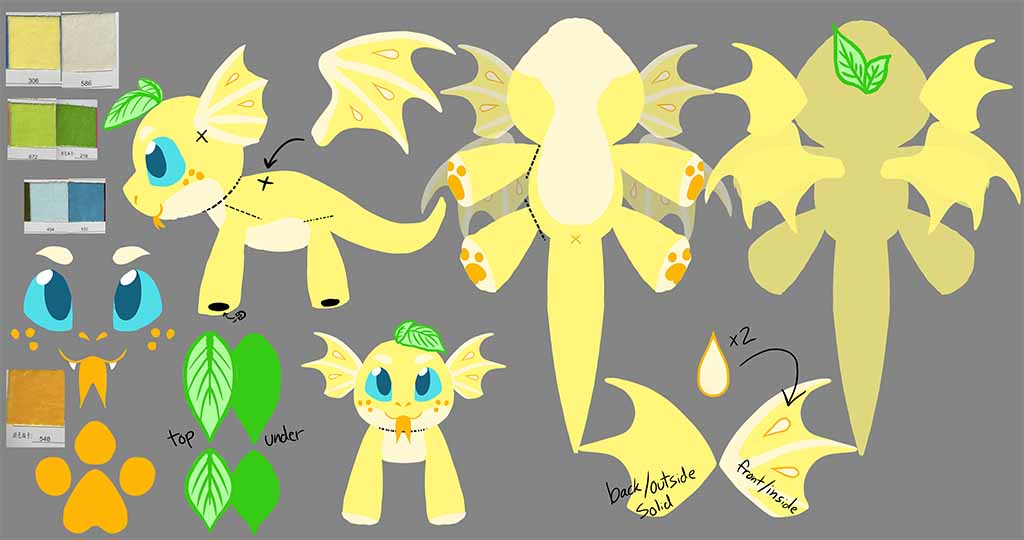
Using 3D mockups and turnarounds
For larger projects, we sometimes create simple 3D mockups (digital or physical) or ask for a “turnaround” sheet (front, side, back, and 3/4 view). This helps our pattern team see how the character should look from all sides, not just the front sketch.
Even if you only have a front drawing, we can help you imagine the side and back views, and we will share those interpretations with you during sampling so you can approve or request changes.
How are colors, textures, and fine details replicated from the drawing?
A custom plush is not only about shape. Colors, textures, and small details carry a lot of your brand’s identity. Eye color, blush, markings, clothing prints, and logos must all feel “right.”
To match a drawing, we usually use a mix of fabric color selection, embroidery, appliqué, and printing. For more graphic or logo-heavy designs, we can also use heat-transfer printing or sublimation onto fabric panels. The aim is to keep the plush clean, readable, and close to the original color mood.
Here is how different detail methods compare:
| Detail Type | Technique Used | Best For | Notes |
|---|---|---|---|
| Eye and mouth | Embroidery or safety parts | Faces, expressions | Embroidery is safest and most precise |
| Small markings | Embroidered shapes or felt appliqué | Cheeks, patches, small logos | Good when shapes are clear and simple |
| Large graphics | Printed fabric panels or sublimation | Clothing prints, complex symbols | Great for detailed artwork and gradients |
| Texture effects | Different fabrics or pile lengths | Fur areas, scales, armor vs. fabric contrast | Gives depth and premium feel |
| Color blocks | Cut-and-sew panels in different colors | Strong, flat design elements | Very strong impact but more pattern work |
Color matching process
If you provide Pantone codes or clear digital hex/RGB references, we match fabrics as closely as possible. Not all plush fabrics are produced in every color, but we can usually get close.
For large projects, we can also dye custom colors, but this increases MOQs and lead time. For most brands, a good “near match” from existing fabric ranges already works well, especially if the overall character design is strong.
Keeping fine details clean at production scale
Fine lines, tiny symbols, and very thin outlines are hard to reproduce in plush, especially in small sizes. We usually:
- Thicken line weights slightly for embroidery
- Simplify micro-details that would blur at a distance
- Test embroidery density so fabric does not pucker
I will always show you how a detail will look in embroidery format before sewing, so you can adjust if needed. This is one of the key steps between “pretty drawing” and “clean production.”
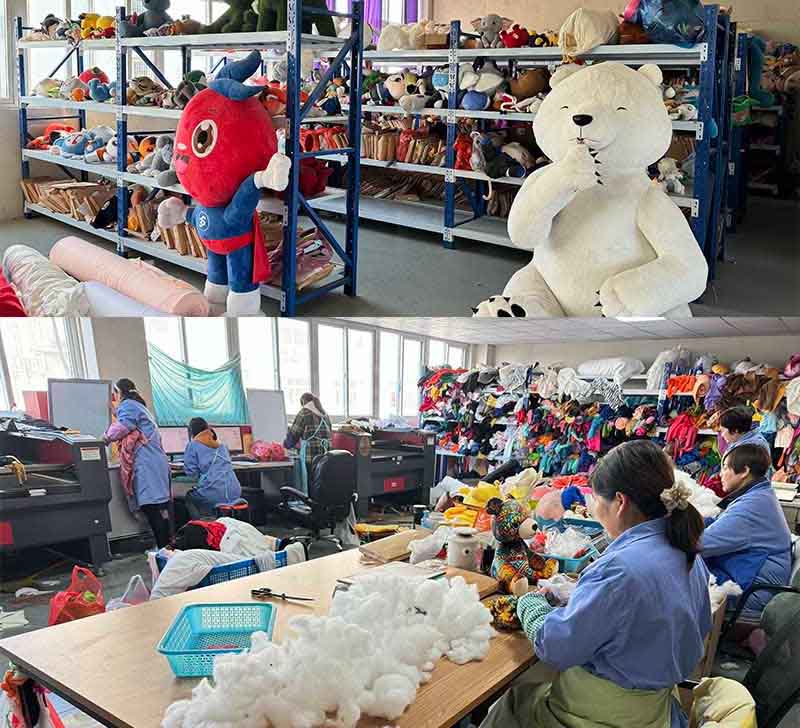
What sampling and revision steps refine the plush to match the artwork?
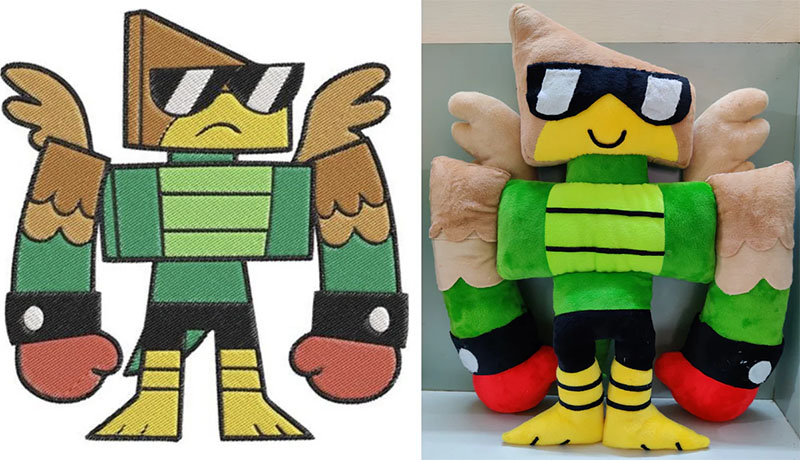
No matter how good the first prototype is, custom plush from drawing almost always needs at least one or two rounds of revision. Sampling is where you and the factory align expectations and fix issues before mass production.
The typical flow looks like this:
| Sampling Step | What Happens | Main Goals |
|---|---|---|
| 1. First prototype | Factory creates initial plush based on artwork | Check shape, size, and overall feeling |
| 2. Feedback round | You review photos and/or physical sample | Mark changes: head size, colors, details |
| 3. Revised sample | Factory adjusts pattern, colors, and details | Bring plush closer to drawing and comments |
| 4. Pre-production (PP) sample | Final approved version for bulk | Set as “golden sample” for production |
Typical adjustment requests
When I work with clients, the most common adjustments after the first sample are:
- “Make the head bigger / smaller” – to improve cuteness or accuracy.
- “Change the eye size or position” – faces are very sensitive; small changes matter.
- “Increase stuffing in the belly or legs” – for better balance or hug feel.
- “Tidy seams or markings” – sharpen lines by changing embroidery or appliqué.
- “Adjust color of fabric or embroidery” – to match artwork more closely.
Our team marks all requested changes clearly and keeps a version history, so nothing is lost between rounds.
Why a clear feedback method helps
For smooth communication, it is very helpful if you:
- Annotate photos with arrows and short comments
- Use simple language (“head too long”, “ears higher”, “tail thicker”)
- Prioritize top 3–5 changes for each round
This speeds up decision-making and helps us focus on what matters most for your brand and your customers.
What safety, durability, and compliance standards apply to custom plush creation?
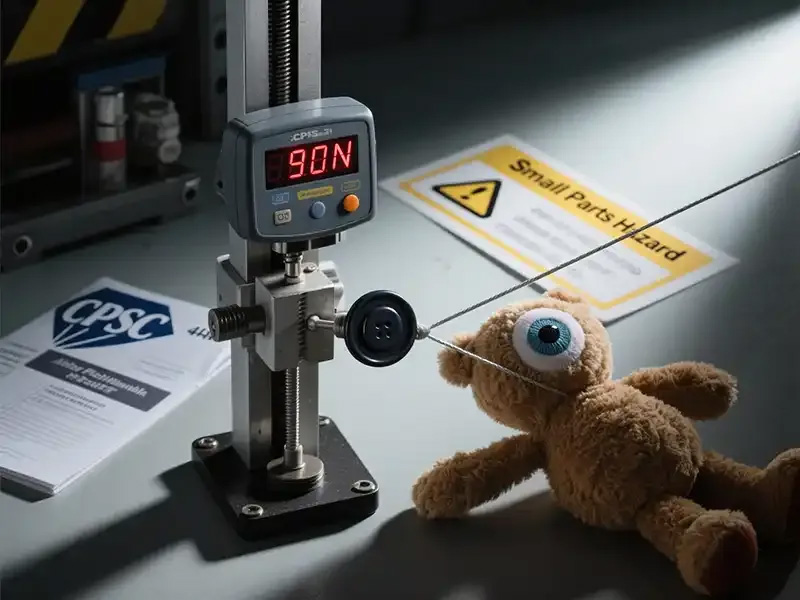
Even if the character comes from a fun drawing, the final plush is still a real product in the hands of children and families. Safety and compliance are not optional. They are a core part of every serious custom plush project.
Applicable standards depend on your target market, but common ones include EN71 in Europe, ASTM F963 and CPSIA in the USA, and similar regulations in other regions. These cover mechanical risks (small parts, sharp edges, seam strength), flammability, and chemical safety (dyes, heavy metals, etc.).
Here is a simple overview:
| Region / Market | Key Standards / Regulations | Main Focus Areas |
|---|---|---|
| Europe (EU) | EN71, REACH | Mechanical safety, flammability, chemicals |
| USA | ASTM F963, CPSIA | Mechanical and chemical toy safety |
| Other markets | Local toy standards, import regulations | Age grading, labeling, chemical limits |
| Labels | CE mark, tracking labels, warnings | Traceability and consumer information |
Design choices that support safety
From the beginning, we design with safety in mind:
- Prefer embroidered faces or certified safety eyes for young age groups
- Avoid long cords, loose beads, or sharp accessories
- Use strong seam construction and suitable seam allowances
- Choose fabrics and stuffing that are test-friendly and stable
For weighted plush, sound modules, or inner frames, we use inner pouches and careful structure so components cannot be accessed easily.
Testing and documentation
For serious B2B projects, it is normal to send the final approved sample to a third-party lab for testing. Once the sample passes, the lab issues reports you can use for customs, retailers, or platform compliance checks.
As your manufacturing partner, I help:
- Prepare the right samples and documents
- Choose suitable labs if you don’t already have a partner
- Adjust design if a potential risk appears in testing
This may sound complex, but when safety is considered from the start, most tests are straightforward.
How do pricing, MOQs, and lead times affect drawing-based custom plush orders?
Even the best design must also work on the business side. Custom plush from drawing involves fixed development costs, minimum order quantities, and realistic lead times. Understanding these factors early helps you plan budgets and launch dates with less stress.
Pricing depends on size, materials, complexity, and quantity. MOQs depend on fabric sourcing, dyeing needs, and factory capacity. Lead times include design confirmation, sampling, testing (if needed), and bulk production plus shipping.
You can think about the business side like this:
| Factor | What Influences It | Typical Impact on Your Project |
|---|---|---|
| Unit price | Size, fabrics, details, stuffing, quantity | More complex + lower quantity = higher price |
| MOQ | Custom fabrics, special colors, components | Higher MOQ for custom-dyed or printed items |
| Sampling time | Number of revisions, speed of feedback | More rounds = longer pre-production phase |
| Production lead time | Order size, factory schedule, QA steps | Affects launch date and campaign planning |
| Shipping time | Sea vs air freight, destination, season | Must be built into your timeline |
Practical ranges (for planning mindset only)
Exact numbers depend on the factory and your design, but in general:
- Very simple, small plush can have lower MOQs and lower unit cost.
- Large, complex plush with many colors, prints, or accessories will naturally cost more and may require higher MOQs.
- Adding custom printed fabrics, custom packaging, or sound modules will increase both development cost and lead time.
I always suggest you decide early:
- Your target retail price
- Your target launch window
- Your priority between complexity and cost
Then we can work backward together to propose size, construction, and order structure that match those goals.
Why clear expectations create smoother projects
When everyone understands the relationship between drawing complexity, safety requirements, MOQ, and timeline, decision-making becomes much easier. You can adjust the design slightly to hit better pricing, or you can choose to keep all details and position the plush as a more premium hero product.
At Kinwin, we try to be very transparent about these trade-offs, so buyers like you can make informed choices—not surprises.
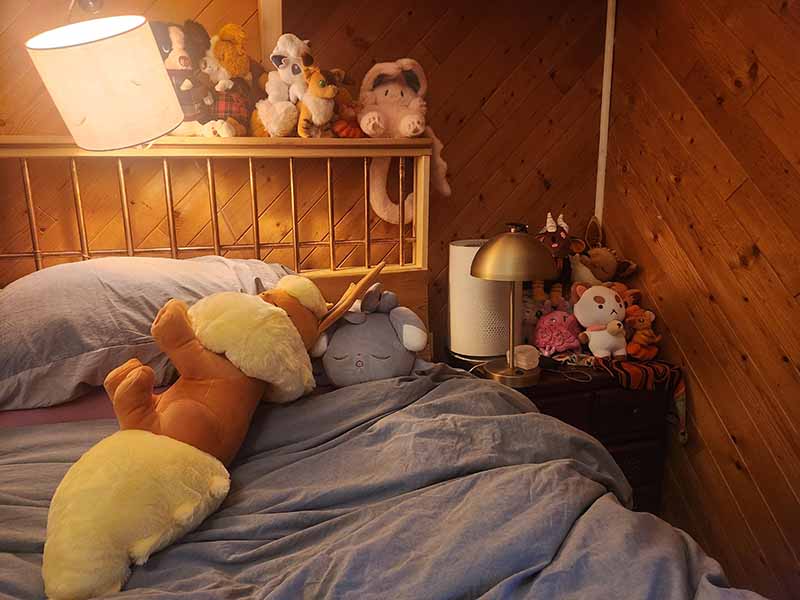
Conclusion
Creating a custom plush from a drawing is a journey: from choosing the right materials and 3D patterns, to matching colors and details, to refining samples and passing safety tests, and finally to balancing pricing, MOQs, and timing. When each step is clear, your drawing can become a real product that customers want to hold, gift, and collect.
At Kinwin, my team works with global buyers every day on drawing-based custom plush—children’s characters, brand mascots, game heroes, and more. If you are planning to turn your artwork into a soft, export-ready plush line, I’m happy to support you from concept and sampling to full OEM/ODM production with CE and ASTM compliance. You are very welcome to contact me at [email protected] or visit kinwintoys.com to discuss your next custom plush project.