Skip to content
 When people ask me, “How do you make a stuffed animal that looks like it came from a real factory, not just a hobby desk?”, they are really asking about the entire process—from materials, patterns, and stitching to stuffing, safety, and final inspection.
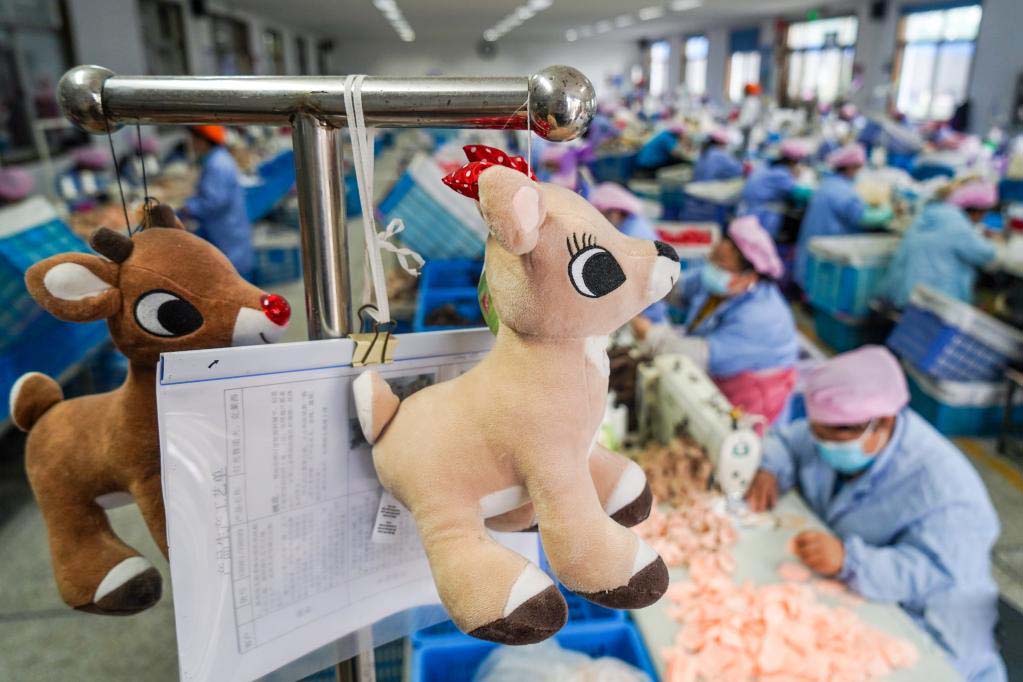
I’m Amanda from Kinwin, a plush toy manufacturer in China. My team helps global brands and retailers turn sketches into safe, soft, export-ready stuffed animals for markets like the USA, Europe, Japan, and more. In this guide, I’ll walk you through how to make stuffed animals step by step, using simple English and a practical, B2B-style mindset.
What essential materials and tools are needed to make stuffed animals?

A high-quality stuffed animal starts with the right materials and tools. If your fabric is too thin, stuffing is lumpy, or thread is weak, you will see problems in every later step. If you choose well at the start, sewing becomes easier, shapes look clean, and the toy feels better in the hand.
You can think about three layers: outside (fabric), inside (filling and structure), and details (eyes, nose, trims, labels)—plus the tools that help you cut, sew, and finish everything.
| Category | Common Options for Stuffed Animals | Role in the Finished Toy | Tips from Factory Practice |
|---|---|---|---|
| Outer fabric | Short plush/velboa, minky, faux fur, fleece, cotton blends | Controls softness, look, and first impression | Choose soft, non-scratchy fabrics; test colour and pilling |
| Inner filling | Polyester fiberfill, recycled fiberfill, pellet bags, foam | Controls volume, softness, rebound, and weight | Use clean, consistent grade; fluff before stuffing |
| Structural elements | Plastic pellets, discs/joints (for movable limbs), foam cores | Adds stability, weight, or poseability | Always enclose pellets in fabric bags; avoid loose pellets |
| Face detail materials | Embroidery thread, felt, safety eyes/noses | Creates expression and character | For under-3s, prefer embroidery and felt only |
| Trims & accessories | Ribbons, collars, scarves, clothes, tags | Adds personality, play value, branding | Must be age-appropriate and strongly attached |
| Thread | Polyester sewing thread (various strengths) | Holds everything together | Use colourfast, strong thread; match weight to fabric |
| Cutting tools | Fabric scissors, rotary cutter, cutting mat | Accurate, clean pattern pieces | Keep fabric scissors only for fabric to stay sharp |
| Sewing tools | Sewing machine, hand needles, pins/clips | Joins pieces with strength and accuracy | Use clips rather than pins for thick plush if needed |
| Marking tools | Fabric pen/chalk, tracing paper, rulers | Mark seam lines, notches, and feature placement | Choose washable or disappearing ink |
| Stuffing tools | Stuffing sticks, chopsticks, narrow rulers | Push filling into small parts like paws and tails | Work gently to avoid stretching seams |
| Finishing & QC tools | Seam ripper, lint roller, small iron, simple pull gauge | Corrects errors, removes fluff, checks attachment strength | Build a simple QC station before packaging |
Once you have this basic “kit” ready, you can focus on design and technique instead of fighting against poor materials.
How do you design patterns and prototypes for accurate plush shaping?
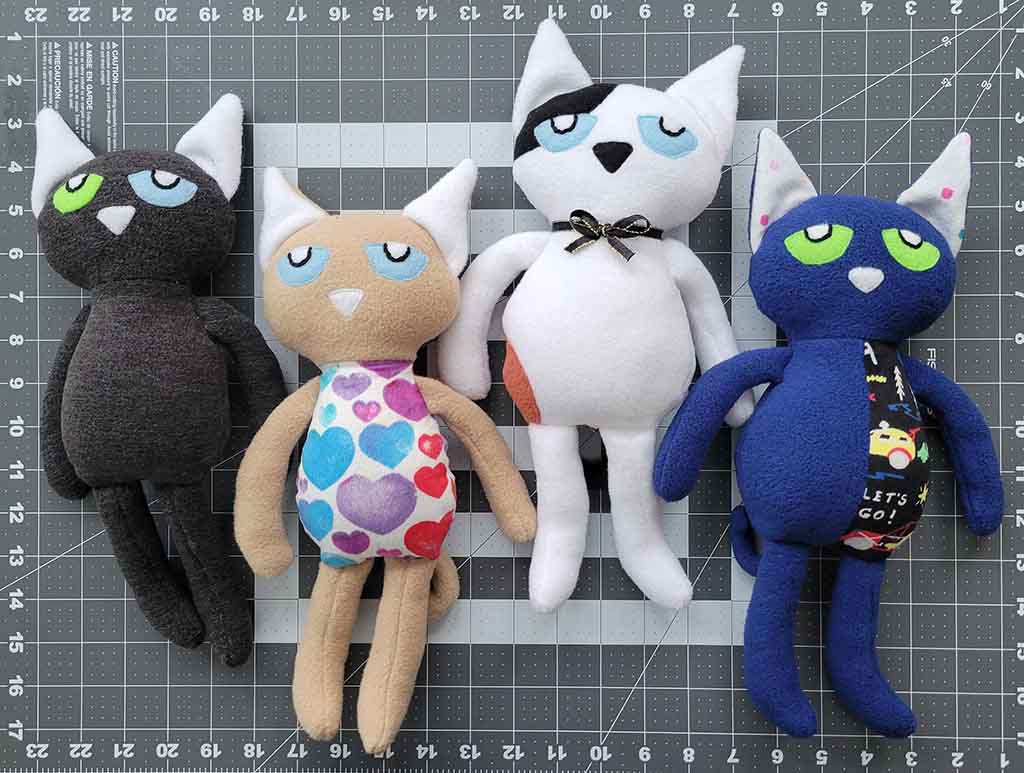
Pattern design is the hidden “engineering” behind every stuffed animal. A good pattern gives you a clean, balanced shape. A weak pattern creates twisted legs, flat faces, or strange bodies—even if your sewing is perfect.
Before we cut fabric in my sampling room, we always lock in three things:
- Overall size and height
- Head-to-body ratio (cute vs realistic)
- Key animal features (snout, ears, tail, wings, etc.)
Then we break the animal into 2D pieces that will form a 3D shape.
| Body Region / Element | Pattern Guidelines | Effect on Final Shape & Feel | Practical Notes for Development |
|---|---|---|---|
| Head & snout | Use multiple panels; add separate snout/muzzle pieces | Round, expressive head; clear animal identity | 4–6 head panels give smoother curves than 2-piece heads |
| Ears | Match ear size and shape to species and style | Adds personality (floppy dog ears, perky cat ears) | Add inner-ear fabric for contrast where needed |
| Body / torso | Slight belly curve; enough depth in profile | Plush looks full, not flat | Plan for sitting or standing posture from the start |
| Legs & paws | Gentle curves; avoid very narrow ankles or wrists | Stable standing/sitting; easy stuffing | Mark front/back clearly to avoid twisted legs |
| Tail / wings | Size and placement influence silhouette and balance | Strong species identity (fox, dragon, bird, etc.) | Reinforce tail base and wing root seams |
| Seam placement | Put seams in less visible areas when possible | Cleaner look on face and belly | Hide key seams along side or back when design allows |
| Seam allowance | 0.5–1 cm, consistent around all pieces | Predictable final size and strength | Add notches to help match curves and joint positions |
From sketch to prototype
- Start with reference images or a character sketch
- Front and side views help a lot.
- Define proportions
- Big head + small body looks cute. Longer body + realistic head looks more natural.
- Draft pattern pieces
- Head, snout, ears, body, limbs, tail, and any special parts.
- Add seam allowances and markings
- Notches, grainline or pile direction, and match points.
- Cut and sew a test sample in inexpensive but similar fabric
- This is your “shape prototype”.
- Evaluate the prototype
- Check symmetry, balance, and silhouette from all angles.
- Adjust pattern and repeat
- In our factory we often go through 1–3 sample rounds until we are happy.
A clear, well-tested pattern is the strongest foundation for factory-scale production and consistent quality.
What stitching and assembly techniques ensure durability and precision?
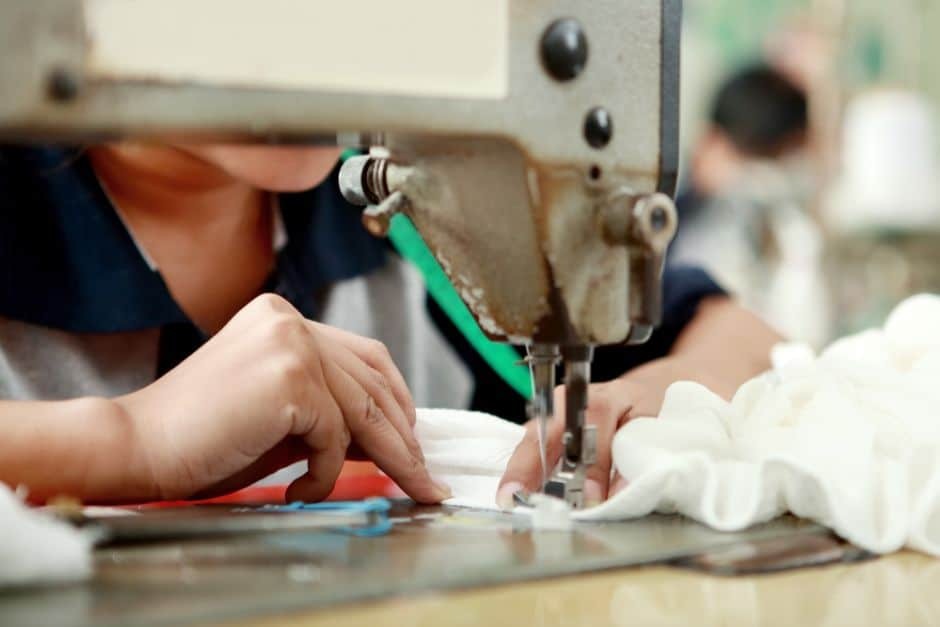
Once you have a solid pattern, the next step is to sew everything together in a way that is strong, clean, and repeatable. Good stitching and assembly techniques protect your design during real use—running, squeezing, dragging, and washing.
We focus on three main areas: stitch type, seam design, and assembly order.
| Area / Step | Recommended Technique | Benefit for Durability & Precision | Common Problems if Ignored |
|---|---|---|---|
| Basic seams | Straight stitch, 2–2.5 mm length on curves | Smooth curves, strong seams | Puckering, visible gaps, weak seams |
| Seam allowance | 0.5–1 cm depending on size and fabric thickness | Enough “meat” for strength and adjustments | Seams that rip after stuffing or play |
| Edge finishing | Zigzag or overlock on woven fabrics | Less fraying, cleaner interior | Frayed edges causing seam failure over time |
| High-stress points | Double stitching at neck, limb joints, tail base, openings | Better resistance to pulling and shaking | Holes at joints, tails coming off, seam bursts |
| Curves & corners | Clip convex curves and notch concave curves after sewing | Pieces turn smoothly without bulk | Lumpy edges and wrinkles after turning |
| Assembly order | Small parts → face → head → limbs → body → final join | Easier access and cleaner finishes | Hard-to-reach seams, messy last-minute additions |
| Closing openings | Ladder (invisible) stitch by hand or neat topstitch | Professional look, low risk of reopening | Visible gaps or rough, uneven hand stitching |
Typical assembly sequence for a stuffed animal
- Prepare small components
- Ears, tail, small patches, special details.
- Build the face
- Add embroidery, appliqué, or safety eyes to the head front.
- Attach ears or horns to appropriate panels.
- Sew head panels together
- Leave an opening for stuffing if needed.
- Sew limbs
- Arms and legs (or front/back legs) right sides together, with openings for stuffing.
- Sew the body
- Join front and back (and side) pieces, leaving openings for limbs and stuffing.
- Attach limbs to body (if they are inset, not floppy)
- Insert limbs into body seams at marked points and secure.
- Turn all pieces right side out
- Check seams before stuffing.
A well-planned assembly order saves time and reduces errors, especially when you scale up to a production line.
How is stuffing density managed to achieve ideal softness and structure?
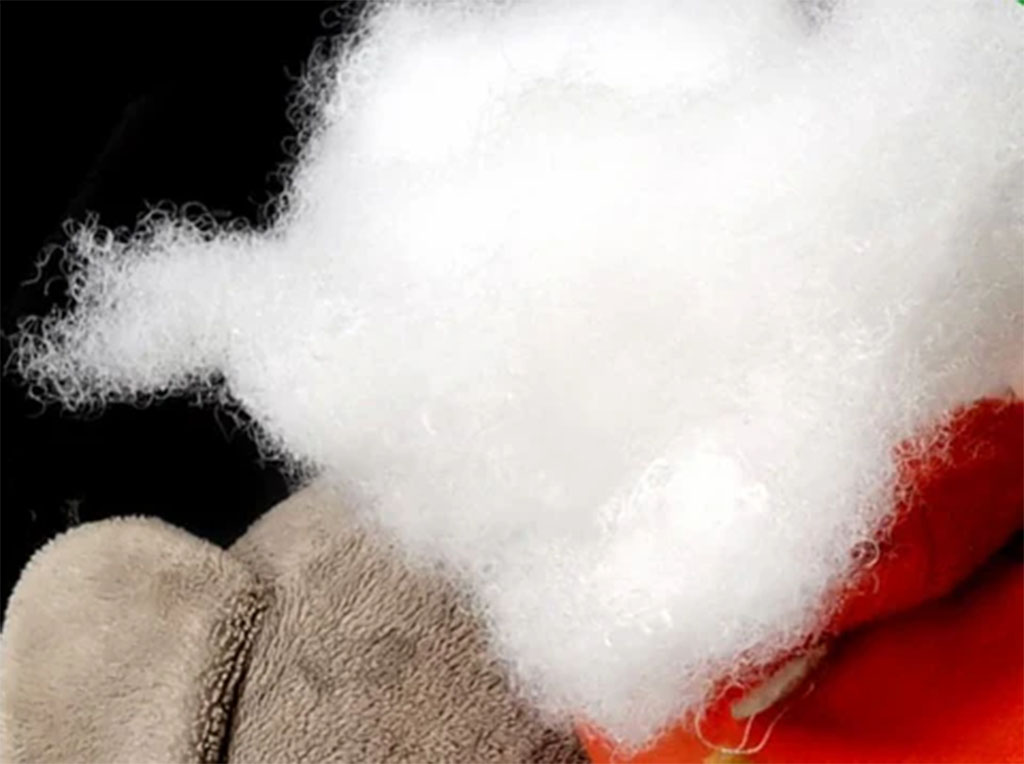
Stuffing is where your stuffed animal becomes truly “alive”. The same pattern can feel cheap or premium depending on how you manage stuffing density. Too soft and the toy feels flat and low value. Too hard and it loses comfort and can even strain seams.
We like to think in stuffing zones: head, face, body, base, limbs, and tail. Each zone may need a slightly different density for the best feel and structure.
| Zone / Area | Recommended Stuffing Strategy | Target Feel & Performance | Tips for Control |
|---|---|---|---|
| Head core | Medium-firm fiberfill, evenly distributed | Keeps face shape, supports features | Add in small portions; check from all angles |
| Snout / muzzle | Slightly softer than core but well rounded | Soft touch and clear animal profile | Shape with fingers; avoid sharp lumps |
| Ears | Light stuffing or none (depending on style) | Natural drape or perky shape | Overstuffing makes ears stiff and heavy |
| Body / torso | Medium density, with extra support in chest and belly | Comfortable to hug; stable silhouette | Balance front and back; avoid hollow spots |
| Base / hips | Medium fiberfill + pellet pouch (optional) | Stable sitting; nice weight in hand | Always sew pellets into inner bags; not free inside |
| Limbs | Medium-soft, not fully rigid | Easy to pose and hug; natural movement | Compare left/right limbs for equal fill |
| Tail | Light to medium stuffing depending on tail length | Tail can hold shape without pulling seams | Reinforce tail base when tail is long or heavy |
| Neck area | Firm but not rock-hard; may use extra internal support | Supports head; reduces wobbling and seam stress | Stuff neck last and test by gently moving the head |
Simple stuffing workflow
- Fluff the filling
- Loosen fiberfill so it is not clumpy. This gives smoother results.
- Start with small parts
- Stuff paws, legs, and tail first using a stick or chopstick.
- Fill gradually, not in one big lump.
- Stuff the head
- Focus on cheeks and top of the head to keep the face full and balanced.
- Check symmetry—eyes should sit at the same height and distance from center.
- Stuff the body and base
- If using pellets, place inner pellet bags first at the base.
- Add fiberfill around them and shape by hand.
- Check overall feel
- Squeeze body, limbs, and head.
- Ask yourself: “Would a child or adult enjoy hugging this?”
- Adjust before closing
- It is always easier to remove or add stuffing before the final ladder stitch.
In factory production, we also define a target weight range for each model to keep density consistent across thousands of pieces.
How are facial details, trims, and accessories safely added?
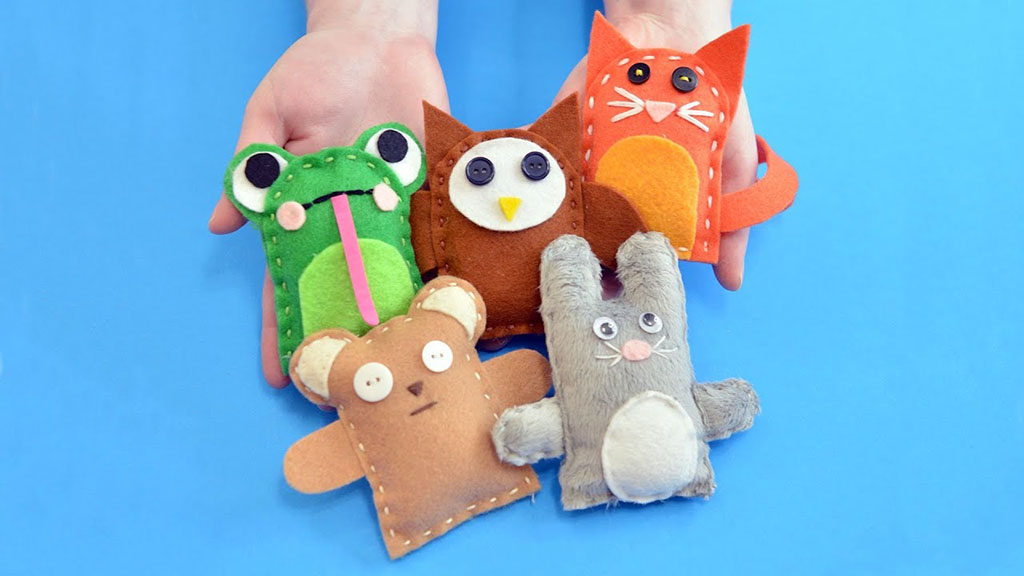
Facial details and accessories turn a stuffed shape into a real character. But these elements also create most safety risks if they are not designed and attached correctly. The goal is to make the animal cute and expressive, while still safe and durable for the target age group.
You have three main detail types: face, trims, and accessories.
| Detail Type | Typical Methods | Benefits for Look & Play | Safety Considerations |
|---|---|---|---|
| Eyes | Embroidery, appliqué, plastic safety eyes | Define emotion and style | For under-3, use embroidery or appliqué only |
| Nose & mouth | Embroidery, felt/fabric appliqué, moulded nose pieces | Complete expression and species identity | Moulded noses must be securely fixed and tested |
| Whiskers, spots, etc. | Embroidery, print, small appliqués | Adds character details | Avoid thin, long threads for baby products |
| Collars & scarves | Sewn-on fabric, felt, or ribbon | Adds charm and species “story” | Avoid long loops or strings; use short secured ends |
| Clothes | Fixed or removable garment pieces | Increases play value and style | For young ages, fix clothes or make them simple |
| Tags & labels | Woven labels, hangtags, brand labels | Communicate brand and care information | Place labels where they do not irritate the skin |
| Props & extras | Fish, bones, bags, hats, small objects | Strong storytelling and branding possibilities | Must be age-graded and pass small parts tests |
Facial details by age level
- For babies and under-3s:
- Embroidered eyes, nose, and mouth
- No plastic parts, buttons, or glued details
- Soft inner-ears and facial patches made from fabric
- For 3+ years and older children:
- Safety eyes and noses with certified locking backs
- Some appliqué details and simple trims
- Strong attachment and clear warning labels where needed
- For teen/adult / collector items:
- More complex eyes (safety eyes with special finishes, layered fabrics)
- More trims, clothing, and props
- Still built with safe and strong attachments, to avoid complaints and breakage
In factory settings, we also do pull tests for eyes, noses, bows, and other attachments, using standards like EN71 and ASTM F963. If a detail comes off under defined force, we redesign it.
What quality and safety checks complete a professionally made stuffed animal?
The final step that separates a “cute idea” from a professional stuffed animal is quality and safety control. Even with a good design, bad QC will show up quickly in reviews: open seams, uneven faces, strange smells, or broken parts.
You do not need a huge lab to start thinking like a factory. Even for small batches, you can use a simple checklist. For export-scale production, we add formal inspections and third-party tests.
| Check Area | What to Inspect or Test | Why It Matters | Simple Methods / Factory Practices |
|---|---|---|---|
| Overall appearance | Cleanliness, fabric condition, correct colours | First impression, gift-worthiness | Visual check under good light; compare with master sample |
| Shape & symmetry | Balanced head, limbs, tail, and body posture | Stuffed animal looks “right”, not crooked | View from front, side, and back |
| Seams & stitching | No open seams, skipped stitches, or long loose threads | Prevents stuffing leaks and fast damage | Gently pull at key seams (neck, limbs, tail, body) |
| Stuffing distribution | No hard lumps or hollow spots; consistent density | Comfort and premium feel | Squeeze multiple areas; compare left/right limbs |
| Face accuracy | Eye placement, nose/mouth alignment, expression | Character consistency and brand identity | Compare random pieces to approved sample photo |
| Attachment security | Eyes, nose, trims, clothes, and tags firmly fixed | Safety, especially for children | Manual pull test; lab pull test for standards |
| Sitting/standing test | Toy can sit or stand as designed | Usability for play and display | Place on flat surface and observe stability |
| Labels & documentation | Brand label, care label, age grading, safety marks | Legal compliance and clear customer guidance | Confirm text, symbols, and position on sample and batch |
| Odour & surface feel | No strong chemical smell; surface feels pleasant | Customer comfort and trust | Random smell and touch checks on each carton |
Safety testing for export markets
For stuffed animals sold in children’s channels, we usually work with our clients on:
- EN71 tests for Europe/UK (mechanical/physical, flammability, and chemical tests)
- ASTM F963 and CPSIA tests for the USA
- Other regional standards like ISO 8124 as needed
We send pre-production samples to accredited labs and only move to mass production after a PASS result. During bulk production, we keep the same materials, patterns, and processes as the tested sample, so the final stuffed animals match the certified version.
Building this mindset early—even if you are still small—will make it much easier to enter big markets and platforms in the future.
Conclusion
Making stuffed animals that feel truly “professional” is not just about sewing two pieces of fabric together. It is a full process: selecting safe, soft materials; developing accurate patterns; sewing with strong, clean seams; controlling stuffing density; adding safe, expressive details; and finishing with honest quality and safety checks. At Kinwin, we help global buyers move smoothly from sketch to export-ready stuffed animals that pass EN71, ASTM and other standards, while still looking cute, modern, and on-brand. If you are planning a new stuffed animal range or want to upgrade your current products, you are welcome to contact me at [email protected] or visit kinwintoys.com so we can explore how our factory can support your next successful plush project.