Skip to content
 I’m Amanda from Kinwin in China. Every season, buyers send us sketches, mood boards, or even a child’s doodle and ask:
“How do we turn this into a safe, beautiful stuffed animal that can be sold worldwide?”
Behind every cute character, there is a very clear process:
- choose the right materials and tools,
- build and refine accurate sewing patterns,
- control cutting, stitching, and assembly,
- manage stuffing density for shape and softness,
- add faces, embroidery, and trims in a safe way,
- and finally inspect and test everything before shipment.
In this guide, I’ll explain how manufacturers like us build a stuffed animal from zero, using simple language but a professional, factory-level point of view.
What materials and tools are essential for making a stuffed animal?
Making a good stuffed animal starts with good inputs. If your fabric is weak or your stuffing is cheap, no amount of sewing skill will make the toy feel premium. So we first decide what goes inside the toy and what tools we need to handle those materials.
For modern stuffed animals, most projects use four core material groups:
- Outer fabrics – what the customer sees and touches.
- Inner stuffing – what controls hug feel and shape.
- Details and trims – eyes, noses, embroidery thread, appliqué, clothing, labels.
- Hidden technical materials – interlinings, pouches, foam, thread, zippers or Velcro (when needed and allowed).
Outer fabrics
Most stuffed animals use polyester plush: minky, velboa, short plush, fleece, or faux fur. These fabrics are soft, colorfast, and easy to wash. For baby products, we prefer short, dense fabrics with low lint. For collectors, we might use long plush or faux fur for a richer look.
Stuffing
The main filling is polyester fiberfill (PP cotton). It is clean, light, bouncy, and washable. For eco lines, we often use recycled polyester (rPET) fiberfill. For special effects (weighted plush, sitting posture), we add pellets or beads in sealed pouches inside the body.
Details and trims
Eyes, noses, mouths, and clothing give the stuffed animal its personality. For under-3 toys, we use embroidered faces only. For older ages, we may use safety eyes and noses with locking backings. Clothing uses knit, fleece, or woven fabrics, but must be sewn securely so children cannot pull off small parts.
Tools
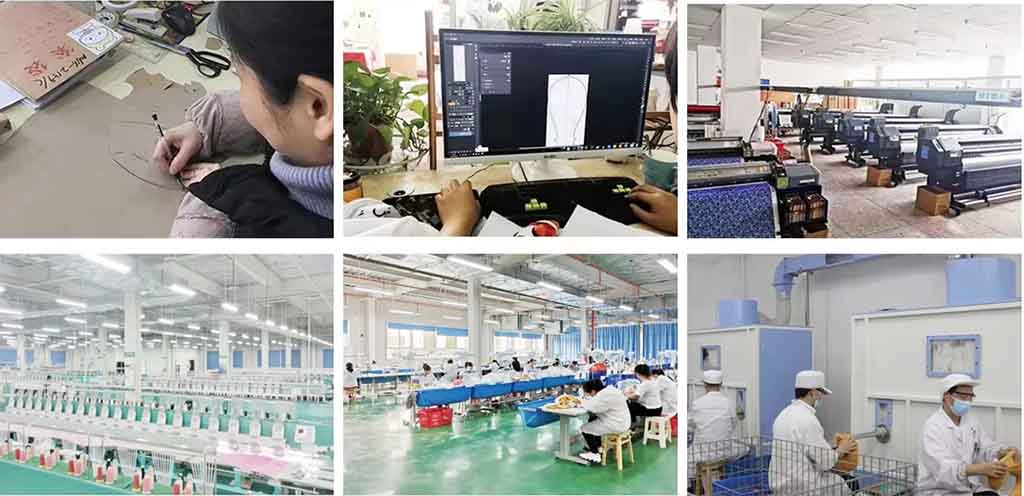
At home, you can use paper patterns, fabric scissors, pins, and a home sewing machine. In a factory, we add:
- pattern software or hard templates,
- spreading tables and cutting tools,
- industrial sewing machines,
- embroidery machines and sometimes printing equipment,
- stuffing machines,
- needle detectors, scales, and QC tools.
These tools do not replace human skill, but they help keep shape, size, and quality consistent for thousands of pieces.
Materials and tools overview
| Category | Examples | Why they matter | Notes from a manufacturer |
|---|---|---|---|
| Outer fabrics | Minky, velboa, fleece, short plush, long plush, faux fur, cotton knit/terry | Define softness, look, and wash behavior | Short, dense fabrics for baby; long plush/faux fur for premium and décor |
| Stuffing | Polyester fiberfill, rPET fiberfill, pellet pouches, foam inserts | Control hug feel, weight, and posture | Pellet pouches only for 3+; all fillings must be clean and low-odor |
| Detail materials | Embroidery thread, felt appliqué, safety eyes/noses, fabrics for clothing | Give expression, style, and brand identity | Under-3: embroidered faces only; older: can mix embroidery and safety parts |
| Hidden materials | Interlining, foam sheets, knit linings, pouches, Velcro, zippers | Support ears, muzzles, and weight areas | All hidden parts must still be safe and firmly fixed |
| Sewing consumables | Polyester thread, hand needles, pins, chalk | Physically assemble the toy | Good thread reduces seam breaks and rework |
| Cutting equipment | Scissors, rotary cutters, die-cut tools, cutting machines | Create accurate pieces from fabric | Direction of pile and stretch must be aligned |
| Machines | Industrial sewing machines, overlockers, bartacks, embroidery machines, stuffing machines | Increase speed and consistency | Different machines for different operations increases quality |
| QC and safety tools | Scales, rulers, checklists, needle detector | Confirm weight, size, and safety | Needle detection is essential for export plush toys |
How do designers create and refine accurate sewing patterns?
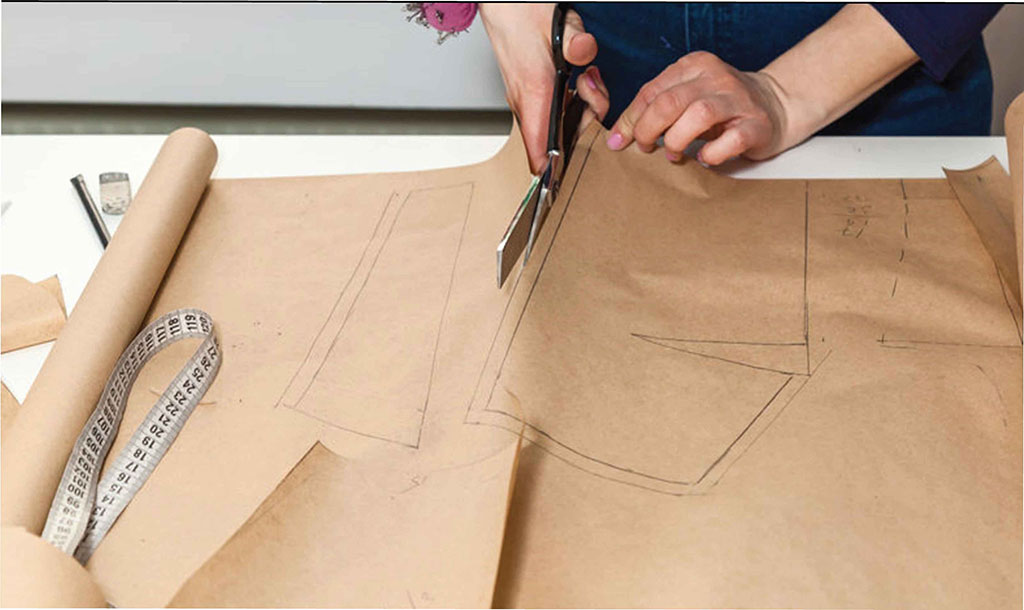
A stuffed animal is 3D, but we build it from flat fabric pieces. The sewing pattern turns your drawing into real volume. If the pattern is wrong, the toy will look strange even with perfect fabric and stitching.
From artwork to pattern
We start with an image: a character sketch, reference photos, or a digital drawing. From this, the pattern designer decides:
- Pose – sitting, standing, lying, long pillow, or chibi (big head, small body).
- Proportions – head-to-body ratio, limb length, ear size, tail length.
- Key features – cheeks, muzzle, belly, horns, wings, etc.
The pattern maker then drafts shapes for:
- head panels (front, back, sides),
- body panels (front, back, gussets),
- arms and legs (front and back or side pieces),
- ears, tails, muzzles, and other details.
Each pattern piece includes seam allowance, alignment marks (notches), and sometimes grain or pile direction arrows.
Prototyping and refinement
We almost never get the perfect shape on the first try. Factories like mine create a first sample using the draft pattern. We stuff it, stand it on a table, and look from all angles:
- Is the head too narrow or too flat?
- Are the limbs too long or too short?
- Does the toy sit or stand properly?
- Does the character match the artwork’s “emotion”?
We then mark adjustments directly on the sample and pattern: change curves, add darts or gussets, resize certain parts. After this, we make a revised sample. Only when the buyer says “Yes, this looks right” do we lock the final pattern, and then scale it if the project needs multiple sizes.
Pattern creation and refinement
| Step | What happens | Goal | Buyer’s role |
|---|---|---|---|
| Analyze artwork | Study front, side, and personality | Understand character’s key features | Provide clear art, notes about mood and proportions |
| Decide pose & size | Choose sitting/standing/lying and final height | Match toy to usage (bed, shelf, keychain) | Confirm target size and pose early |
| Draft first pattern | Design head, body, limb, and detail pieces with seam allowance | Convert 2D art to 2D fabric shapes | Review drawings or photos of pattern pieces if needed |
| Sew first prototype | Use test fabric or final fabric | See real-world volume and balance | Give specific feedback: “head too big,” “legs shorter,” etc. |
| Adjust and refine | Add darts, change curves, tune proportions | Make character look natural from all angles | Approve changes quickly to avoid timeline delays |
| Finalize & grade | Confirm final pattern and create other sizes | Ensure consistent shape across all SKU sizes | Decide how many sizes are in the line |
Good patterns save you money over time. When your shapes are correct and stable, every new color or outfit can use the same base pattern, which reduces development cost and risk.
What are the main steps in cutting, stitching, and assembling body parts?

Once the pattern is ready and materials are approved, we move into the physical build: cutting fabric, stitching pieces, and turning flat shapes into a real stuffed animal. Each stage must be controlled to avoid distortion, weak seams, or mismatched parts.
Cutting
We lay fabrics on cutting tables, often in layers. Using pattern markers, we position pieces to save fabric and control pile direction. For plush fabrics, pile direction is very important: if one piece is upside down, that area will look darker or lighter.
Cutting is done by scissors, rotary cutters, or electric knives. For very large orders, we may use die-cutting or automatic cutting machines. Accurate cutting ensures each piece is true to the pattern size.
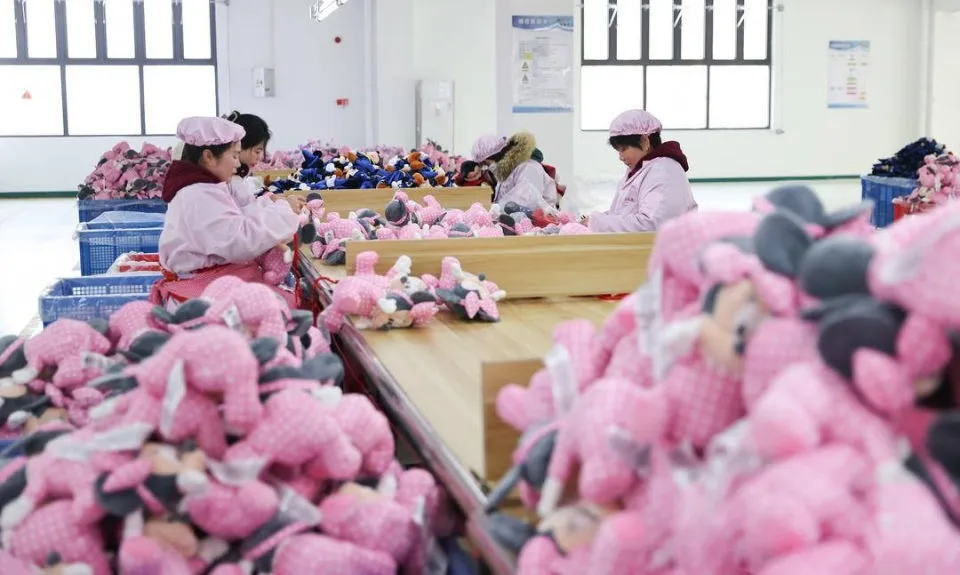
Stitching and assembly sequence
We don’t just sew everything at random. We follow a sequence that keeps control and efficiency:
- Small pieces first: ears, tails, small accessories are stitched and turned right-side out.
- Head components: muzzles or extra panels are attached, then head panels are sewn together.
- Body panels: front and back bodies are sewn, arms and tails are inserted if needed.
- Limbs: arms and legs are sewn and turned.
- Join parts: limbs are attached to body; head is attached to body (if not one-piece pattern).
- Leave stuffing openings: one or more openings are left for inserting filling.
During sewing, we use consistent stitch length and reinforce stress areas with bartacks or double stitching. Skilled operators follow the pattern carefully so curves stay smooth and seam allowances stay correct.
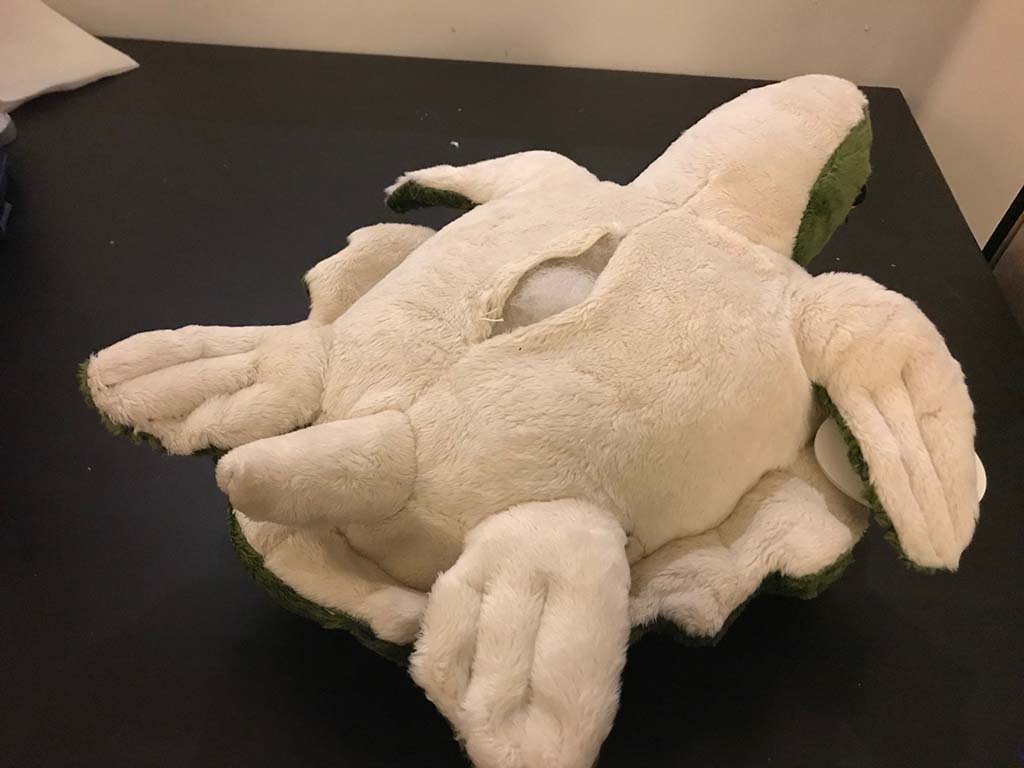
Pre-stuffing check
Before stuffing, we check the “shell”:
- Are all seams closed except the planned openings?
- Are ears and tails symmetrical?
- Are there any puckers or skipped stitches?
Only clean shells go to the stuffing line.
Cutting, stitching, and assembly steps
| Stage | Actions | Quality focus | Common issues if not controlled |
|---|---|---|---|
| Fabric spreading & marking | Lay fabric, align pile, mark pattern layouts | Even pile direction, low fabric waste | Patchy look, excess waste, mismatched colors |
| Cutting | Cut pieces by hand or machine | Clean edges, correct size, respect grain | Uneven pieces, shape distortion, poor pattern match |
| Small parts prep | Sew and turn ears, tails, small decorations | Symmetry, clean tips and curves | Blunt ears, twisted tails, weak small seams |
| Head assembly | Attach muzzles, sew head seams | Balanced head shape, correct alignment | Crooked faces, uneven cheeks, visible mismatching seams |
| Body and limb assembly | Sew front/back bodies, arms, legs, tails | Correct length and angles, neat edges | One leg longer, twisted limbs, misaligned tails |
| Joining parts | Attach limbs and head to body | Strong joints, proper posture | Toy cannot sit/stand well; visible wrinkles |
| Pre-stuff inspection | Check shell inside and out | No open seams, no missing pieces | Seams may burst under stuffing if unchecked |
When you ask a factory about their process, listen for clear explanations of this sequence. A supplier who can describe their sewing flow and in-line checks usually handles production more seriously.
How is stuffing density managed to balance softness and shape?
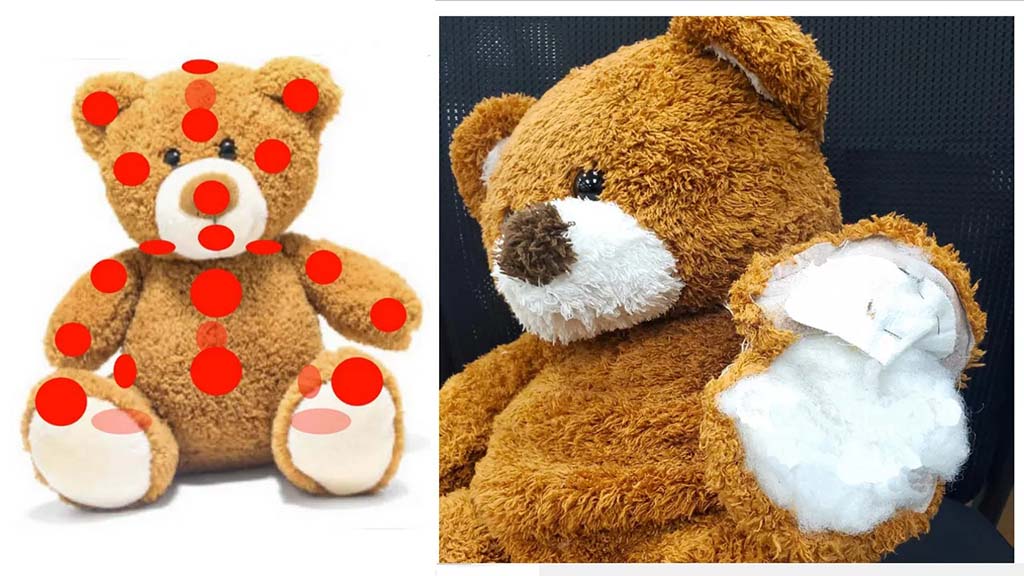
Stuffing is where the stuffed animal gains its hug feel and final form. Many people think we just “fill until it looks okay.” In reality, we treat stuffing as a controlled parameter: weight, density by zone, and sometimes mix of materials.
Zone-based stuffing
Different parts of the toy need different densities:
- Head – usually firmer, to keep facial features crisp and stable.
- Body – medium density, to stay huggable without collapsing.
- Limbs – slightly lighter, so they move and drape naturally.
- Base / bottom – sometimes firmer, or filled with pellet pouches for sitting balance (for 3+).
We set target gram weights for each size and often run trials to find the best balance between softness and shape. After we find a good spec, we write it into the production instruction sheet, so every operator knows the target.
Types of stuffing
- Polyester fiberfill – standard choice; light, bouncy, washable.
- rPET fiberfill – similar behavior but with recycled content.
- Pellets / beads – usually plastic pellets in sealed fabric pouches; used to add weight or lower center of gravity.
- Foam pieces – sometimes used in muzzles or special shapes for extra structure.
For baby toys, we do not use loose pellets. Any weighting must be secure, and we focus on full fiberfill with good elasticity and low lint.
Feel versus function
If your brand promise is “super squishy,” we choose lower density, softer fiberfill and designs without narrow legs or sharp shapes. If your stuffed animal must stand on a shelf or wear detailed clothing, we may choose slightly firm stuffing, especially in legs and torso.
Stuffing density and shape control
| Zone / Aspect | Typical stuffing approach | Why it works | Buyer decisions |
|---|---|---|---|
| Head | Medium–firm fiberfill | Keeps face smooth, eyes and nose aligned | Decide if you want more defined or softer head shape |
| Body | Medium density | Comfortable hugging, reasonable structure | Softer for bedtime plush; firmer for display pieces |
| Limbs | Light–medium | Arms/legs feel relaxed and natural | Choose floppy or more structured limbs by density |
| Base / bottom | Firm fiberfill or pellet pouch + fiberfill (3+ only) | Adds stability and sitting posture | For baby toys, avoid pellets; for older kids, can use them |
| Overall weight | Gram targets for each size | Consistent feel across all units | You can request “slightly heavier” for a more premium feel |
| Special structure | Foam in muzzles or noses | Maintains volume and profile | Use only when needed; test comfort and safety |
When stuffing is well controlled, your brand will feel consistent. Customers may not know the gram number, but they will notice that every size in your line feels “correct” in the hand.
How are facial features, embroidery, and trims securely attached?
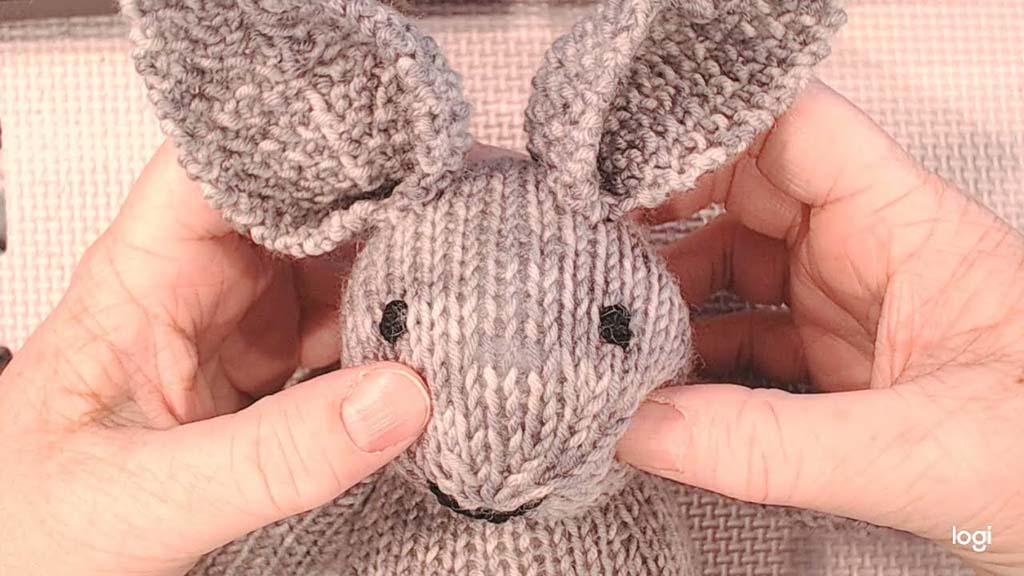
The face is where people fall in love with a stuffed animal. But it is also where many safety risks can appear if parts are loose or poorly attached. We must balance cute design with strong construction.
Faces for different age groups
For babies and under-3 toys, we use fully embroidered faces: eyes, noses, mouths, and sometimes cheeks. Everything is stitched directly into the fabric, so there are no hard parts to pull off. The embroidery must be smooth and not scratchy.
For older children and collectors, we can use plastic safety eyes and noses with locking washers inside the head. These parts must pass tension tests to ensure they do not detach under force. Embroidery still plays a large role in eyebrows, cheeks, whiskers, markings, and logos.
Embroidery and appliqué
We use computerized embroidery machines to place faces and logos precisely. When planning embroidery, we adjust:
- stitch density (so it does not sink too deep into plush),
- underlay (support stitches),
- and size (to keep curves smooth, not jagged).
For larger shapes like belly patches, markings, or clothing details, we may use appliqué: small pieces of fabric sewn on top of the base with a secure edge stitch. This adds dimension and color contrast.
Clothing, accessories, and labels
Clothing (T-shirts, dresses, scarves, hats) and accessories (bags, bows) add value and branding space. But they must be sewn in a way that matches the toy’s age grading:
- For low ages, avoid tiny buttons, loose bows, and unsecured parts.
- For higher ages (14+ decor or collector items), you have more freedom, but accessories should still be safe and durable.
Labels and hangtags carry brand, safety, and care information. They must be easy to see, but not easy to remove in a way that could damage the toy.
Facial features, embroidery, and trims
| Component | Recommended method | Safety focus | Design options for you |
|---|---|---|---|
| Eyes & noses (under-3) | Full embroidery, no hard parts | No choking hazards, smooth surface | Simple, clear expressions; soft colors for baby |
| Eyes & noses (3+ and up) | Safety eyes/noses with locking washers; tested pull strength | Parts must not detach under force | Choose eye size, shape, and shine for brand look |
| Mouth, cheeks, markings | Embroidery and/or appliqué | Must not fray or lift | Use different thread colors and stitch patterns |
| Logos & branding | Embroidered patches, woven labels, printed tags | Secure attachment; clear and legible | Put logo on paw, clothing, or small patch |
| Clothing & accessories | Sewn-on garments or removable outfits (higher age) | Small parts rules; seam strength | Seasonal outfits, uniforms, co-branded apparel |
| Labels & hangtags | Sewn-in labels + swing tags | Correct info: fiber, care, age, warnings | Use tags to tell character story and brand values |
When all these details are carefully planned and attached, your stuffed animal not only looks attractive but also passes lab tests and real-life usage.
How do manufacturers inspect and test stuffed animals for safety and quality?
Before a stuffed animal can be sold in the USA, Europe, or many other regions, it must pass safety standards and quality checks. A serious manufacturer will treat this as a core part of the process, not an afterthought.
Safety and compliance
Depending on your target markets, we work with standards like:
- EN 71 (Europe) – for mechanical and physical properties, flammability, and migration of certain elements.
- ASTM F963 (USA) – toy safety standard.
- CPSIA (USA) – limits on lead, phthalates, and tracking labels.
- Other regional rules depending on your sales area.
For stuffed animals, labs test:
- Seam strength and small parts – pull on limbs, eyes, noses, and seams.
- Flammability behavior – how fabric burns under controlled testing.
- Chemical safety – heavy metals, banned dyes, phthalates in coatings or prints.
- Labeling – correct age grading and warnings.
We send golden samples that match bulk production materials and construction to certified labs (e.g., SGS, TÜV, Intertek) and keep the reports on file.
In-factory quality control
Inside the factory, we run our own QC steps to catch problems early:
- Incoming material inspection – check fabric color, hand-feel, thickness, defects, and stuffing quality.
- Inline QC – inspectors check semi-finished toys on the sewing line.
- Stuffing QC – confirm weight and feel by random checks from each batch.
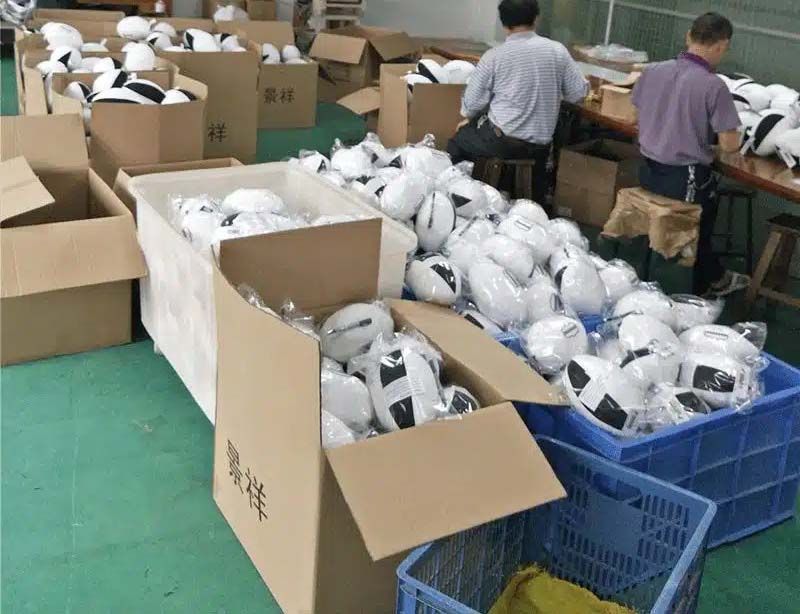
- Final inspection – according to AQL sampling, inspect finished toys for appearance, stitching, labels, and function.
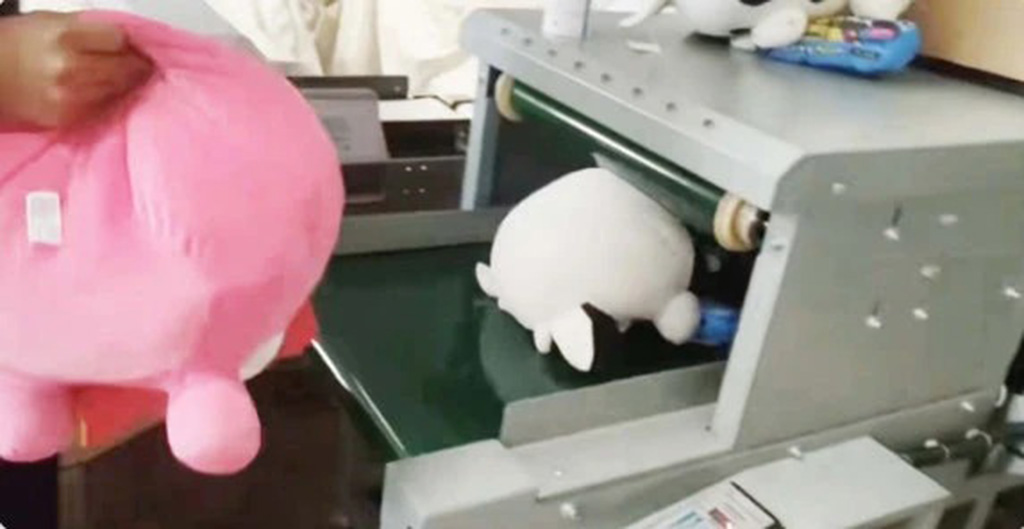
- Needle detection – run all toys through a metal detector to ensure no broken needles are left inside.
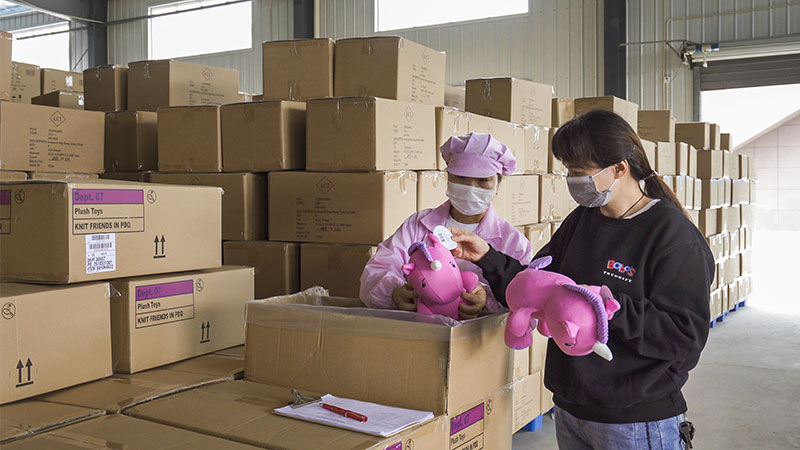
Only after these steps are finished do we pack and load cartons for shipment.
Safety and quality inspection
| Stage | What is checked | Goal | Buyer’s practical actions |
|---|---|---|---|
| Material incoming check | Fabric quality, color, hand-feel, defects; stuffing cleanliness; trims | Avoid defects entering production | Ask for material photos/videos and basic specs before bulk |
| Inline QC | Sewing quality, part placement, symmetry, open seams | Catch issues early before stuffing | Request inline photos, not only final photos |
| Stuffing & weight check | Stuffing density, overall weight, posture (sit/stand) | Keep hug feel consistent | Approve a “golden sample” and weight range |
| Final inspection (AQL) | General appearance, dirt/stains, labels, hangtags, loose threads | Confirm shipment matches standard | Ask which AQL standard is used and request inspection reports |
| Needle detection | Hidden metal fragments from broken needles | Essential for toy safety and retailer requirements | Confirm that 100% of goods pass through needle detectors |
| Lab testing | Mechanical, flammability, chemical tests | Legal compliance and retailer acceptance | Request official test reports and keep them on record |
If your factory can explain this process in detail and share real test reports, you are in a safer position for long-term business.
Conclusion
A good stuffed animal is safe, soft, durable, and appealing while also offering branding opportunities. At Kinwin, we help global buyers turn ideas and sketches into production-ready stuffed animals by managing materials, patterns, sewing, stuffing, detailing, safety testing, and final inspection as one complete system. Contact us at [email protected] or visit kinwintoys.com to discuss your next project and explore how our factory can support your success.