Skip to content
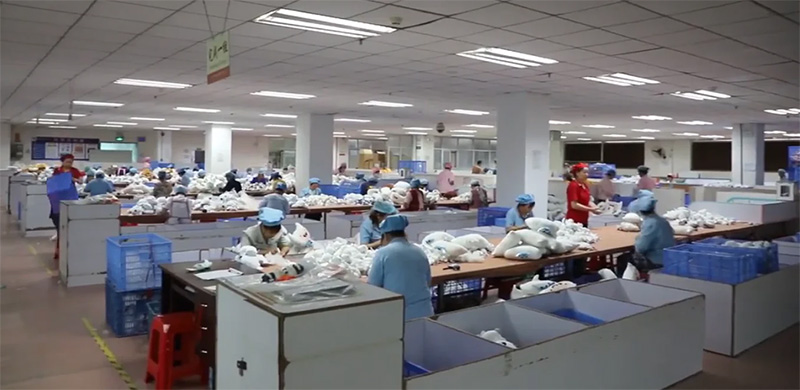
 Sampling is a necessary part of custom plush toy development. There is no way around it — before any product goes into mass production, it needs to exist as a physical prototype that can be evaluated, tested, and approved. That process costs money, and for most buyers, it is money well spent.
The problem is that sampling costs have a way of growing far beyond what buyers initially budget for. What starts as a single prototype fee turns into three revision rounds, each one costing additional time and money. A buyer developing five designs simultaneously finds that sampling alone has consumed a significant portion of their product launch budget before a single bulk unit is ordered.
Most of this overspending is preventable. Sampling waste rarely comes from the process itself — it comes from entering the process unprepared, communicating standards imprecisely, evaluating samples inefficiently, and making decisions that generate avoidable revision cycles.
This guide breaks down exactly where sampling money gets wasted, and what buyers can do at every stage of the process to protect their budget without compromising on the quality of the final product.
Why Do Plush Toy Sampling Costs Get Out of Control for So Many Buyers?

Understanding why sampling budgets spiral is the first step toward controlling them. In most cases, the root cause is not the factory’s pricing — it is the buyer’s approach to the sampling process. Specific patterns appear repeatedly across sourcing relationships where sampling costs run significantly higher than necessary.
Plush toy sampling costs get out of control primarily because buyers enter the process without adequate preparation, provide incomplete or ambiguous design briefs, change their minds about design direction mid-development, request too many designs simultaneously, and fail to consolidate feedback efficiently between revision rounds. Each of these behaviors adds cost and time to a process that, when managed well, should be predictable and budget-controlled.
Here is a breakdown of the most common drivers of sampling cost overruns:
| Cost Driver | How It Inflates Sampling Spend | Estimated Impact |
|---|---|---|
| Incomplete design brief | Factory misinterprets design, triggering full rebuild | 1–3 extra revision rounds |
| Changing design direction mid-sample | Previous work becomes unusable | Full resample cost |
| Fragmented revision feedback | Factory addresses some changes, misses others | Additional rounds for missed items |
| Too many simultaneous samples | Management complexity increases error rate | Higher per-design error rate |
| Unclear material specification | Wrong materials sourced, require replacement | Material cost + delay |
| No internal alignment before briefing | Design changes requested after sampling begins | Restarts or partial rebuilds |
| Skipping digital mockup stage | 3D problems discovered only in physical sample | Avoidable early revision round |
The Hidden Cost of Indecision
One pattern that drives sampling waste more than almost anything else is unresolved internal decision-making. When a buyer submits a design brief that has not been fully agreed upon internally — where different stakeholders have different ideas about the final product — the factory produces a sample based on their interpretation, and the sample review becomes the forum where those internal disagreements finally surface.
The result is a revision round driven not by factory error but by the buyer’s own evolving requirements. This is the most avoidable form of sampling waste, because it has nothing to do with manufacturing capability and everything to do with preparation and internal alignment before the brief is submitted.
When Sampling Becomes a Design Tool
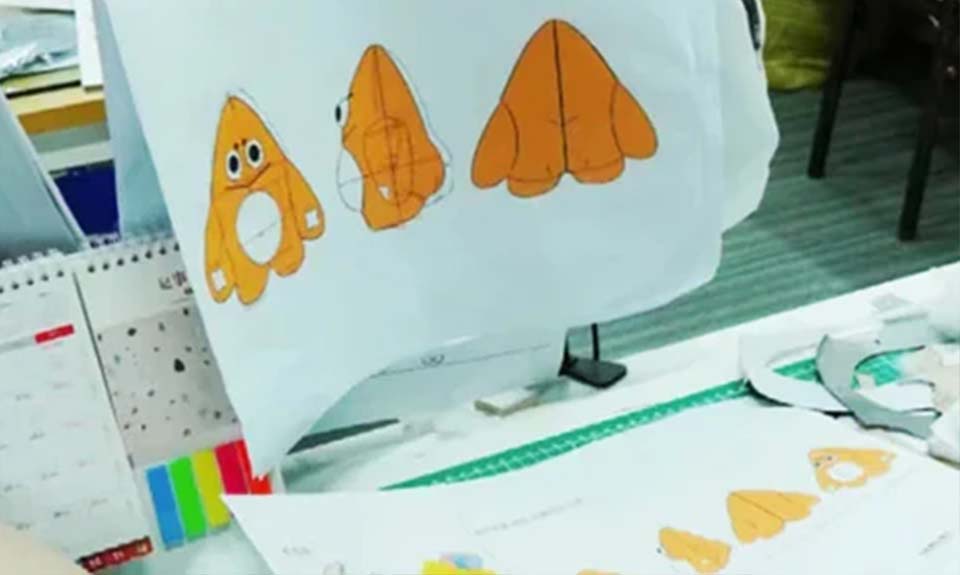
Another common pattern is buyers using the physical sample as a design exploration tool rather than a production confirmation tool. Sampling works most efficiently when the design is largely resolved before the brief is submitted — and the sample’s role is to confirm that the factory can execute it accurately. When buyers are still making fundamental design decisions during the sampling process — exploring different proportions, reconsidering the character concept, testing different material feels — every change triggers a cost.
Design exploration should happen before sampling begins, through sketches, digital mockups, and reference gathering. Physical sampling should be the final stage of design confirmation, not the middle stage of design development.
What Information Should You Prepare Before Requesting a Plush Sample?

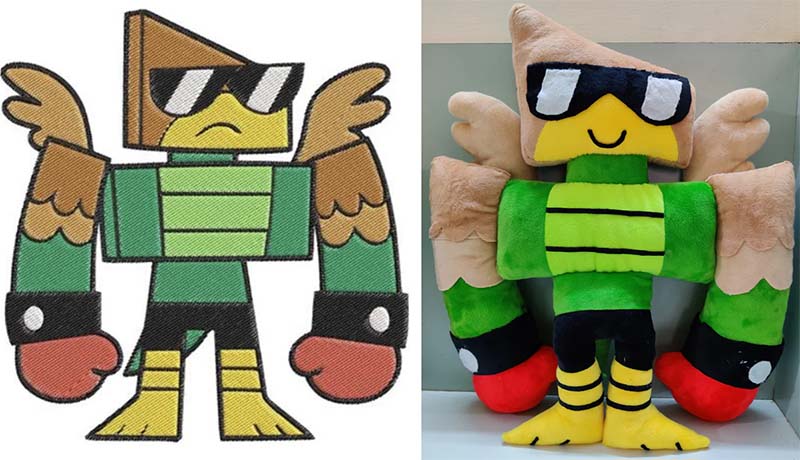
The quality of a design brief determines the quality of the first sample — and the quality of the first sample determines how many revision rounds are needed. Buyers who invest time in preparing thorough, precise briefs consistently receive more accurate first samples, complete the sampling process in fewer rounds, and spend significantly less on total sampling costs than buyers who approach the factory with rough ideas and expect the sample process to fill in the gaps.
Before requesting a plush toy sample, buyers should prepare a complete design brief that includes detailed reference imagery, precise dimensions, Pantone color codes, material specifications, construction notes, accessory details, and packaging requirements. The more complete and specific this information is before sampling begins, the fewer assumptions the factory needs to make — and the fewer revision rounds result from those assumptions.
Here is a checklist of everything a complete pre-sampling brief should include:
| Brief Element | What to Include | Format | Impact if Missing |
|---|---|---|---|
| Design reference | Front, back, side view artwork or reference images | Flat illustration or 3D render | Factory interprets shape freely |
| Dimensions | Overall height, width, limb length with tolerances | Measurement table in centimeters | Incorrect size in first sample |
| Color references | Pantone codes for every color area | Pantone TPX or TPG codes | Color guessed from reference image |
| Fabric specification | Fabric type, pile height, feel description | Written spec + physical swatch if possible | Wrong fabric sourced |
| Filling specification | Filling type, target density or firmness | Written spec + compression standard | Incorrect feel and shape |
| Facial features | Eye type, size, placement, embroidery design | Annotated diagram + artwork file | Facial expression differs from intent |
| Accessories | All attachments with dimensions and placement | Item list with diagrams | Wrong accessories sourced |
| Construction notes | Seam type, closure method, stuffing access | Written notes | Construction varies from standard |
| Label requirements | Care label, brand label, compliance label content | Written spec with regulatory notes | Non-compliant labeling |
| Packaging reference | Box type, insert, retail presentation | Dieline or reference image | Packaging misaligned with brief |
Preparing Color References Correctly
Color is one of the most frequent sources of first-sample inaccuracy — and one of the most easily prevented. Reference images on a computer screen display colors differently depending on the monitor calibration. Photos of reference products capture colors under specific lighting conditions that the factory cannot replicate.
The only reliable color communication tool is a Pantone reference — either a specific Pantone TPX or TPG code, or a physical Pantone swatch card. If you do not have access to Pantone references, the next best option is a physical fabric swatch from a previous product or a material supplier, shipped to the factory as a color standard. Describing colors in words — “warm beige,” “dusty pink,” “forest green” — leaves too much room for interpretation and almost always produces a color correction request in the first revision round.
The Value of Physical Reference Samples
In addition to design documentation, physical reference samples from the market are one of the most effective briefing tools available. A buyer who sends the factory a commercially available product that demonstrates the fabric quality, stuffing density, or finishing standard they are targeting gives the factory a tangible, immediate reference that written descriptions cannot match.
This is especially useful for communicating tactile qualities — how soft a fabric feels, how firm a stuffing density should be — that are difficult to specify precisely in words but immediately understood when experienced physically.
How Does a Weak Design Brief Lead to Expensive Sample Revisions?
The connection between brief quality and revision cost is direct and predictable. Every piece of information missing from a design brief becomes a decision that the factory must make independently. Some of those decisions will align with the buyer’s expectation. Many will not — and each misalignment produces a revision request that adds cost and time to the development cycle.
A weak design brief leads to expensive sample revisions because it forces the factory to fill in missing specifications with their own assumptions. When those assumptions differ from the buyer’s intent — which they frequently do, because the buyer’s intent is not clearly communicated — the resulting sample requires correction. Each correction round costs money and delays the production timeline, and multiple rounds of correction on the same issue indicate a fundamental communication problem rather than a factory capability problem.
Here is how specific brief weaknesses translate into revision costs:
| Brief Weakness | Factory Assumption Made | Likely Revision Outcome | Cost Impact |
|---|---|---|---|
| No Pantone color reference | Factory matches from reference image | Color does not match buyer’s expectation | 1 revision minimum |
| No dimension table | Factory estimates size from illustration | Product too large or small | 1–2 revisions |
| Fabric described as “soft” | Factory selects from existing stock | Feel differs from buyer’s standard | Potential material resample |
| No facial feature placement guide | Factory positions by visual judgment | Expression feels wrong | 1 revision minimum |
| Filling density not specified | Factory uses standard density | Product too firm or too soft | 1 revision minimum |
| Accessory type not specified | Factory uses standard safety eyes | Wrong size or style | 1 revision minimum |
How Vague Briefs Compound Over Multiple Designs
The cost of brief weakness multiplies when a buyer is developing multiple designs simultaneously. Each vague brief generates multiple revision requests. With five designs in development, each requiring two to three revision rounds due to brief inadequacy, the total revision cost can easily exceed the cost of the original samples themselves — representing pure waste that a more thorough briefing approach would have prevented entirely.
The Revision Round Calculation
A practical way to understand the cost of brief weakness is to apply a simple revision round calculation. If a single sample costs $200 and each revision round costs $120, the total cost of a product that requires three revision rounds is $560. A product that requires only one revision round — achieved through a more complete brief — costs $320. The $240 difference per design represents time invested upfront in brief preparation rather than money spent on avoidable revisions.
Across a product line of ten designs, this difference amounts to $2,400 in avoidable sampling spend — before accounting for the time cost of managing additional rounds and the delay in reaching production.
Which Sample Types Should Buyers Request at Each Stage of Development?
Not every stage of product development requires the same type of physical sample. Understanding the different sample types available — and which one is appropriate at each stage — helps buyers manage sampling costs more strategically by avoiding unnecessary expenses and ensuring that the right type of sample is requested at the right time.
Different stages of plush toy development call for different sample types, each serving a specific purpose and carrying a different cost. Requesting the most expensive sample type at every stage is unnecessary and wasteful. A structured sampling sequence — moving from lower-cost concept confirmation to higher-cost production verification — gives buyers the quality assurance they need at each stage without overspending on sample types that exceed what is required.
Here is a guide to the main sample types and when to use each:
| Sample Type | Purpose | Cost Level | When to Request |
|---|---|---|---|
| Reference sample | Confirm overall concept and proportion | Low | Very early stage, before full brief |
| Development sample | Evaluate design interpretation and material selection | Medium | After complete brief is submitted |
| Revision sample | Address specific changes from previous round | Medium | After structured revision feedback |
| Counter sample | Confirm production materials and processes before bulk | Medium-High | After development sample is approved |
| Production sample | Random unit from actual production run | Low additional cost | During mass production |
| Pre-shipment sample | Final confirmation before shipment approval | Low additional cost | Before balance payment |
When a Reference Sample Saves Money
For buyers who are still in the early stages of defining a product concept — unsure about proportions, character direction, or size — requesting a low-cost reference sample before committing to a full development brief is a cost-effective approach. A reference sample uses simplified construction and standard materials to give a rough physical sense of the design direction without the full cost of a precision prototype.
Reference samples are not suitable for production approval — they are concept exploration tools. But they can prevent a buyer from investing in a full development sample for a concept that, once seen in three dimensions, turns out to need fundamental redesign.
The Counter Sample Step Most Buyers Skip
The counter sample is one of the most underutilized — and most valuable — sample types in the development sequence. Produced after the development sample is approved, the counter sample is built using the actual bulk production materials, patterns, and processes rather than the carefully selected materials used during development sampling.
Its purpose is to confirm that the production environment can reproduce the approved design accurately before the full production run begins. If the counter sample reveals any deviation — due to batch material differences or process adjustments — this is the last point at which corrections can be made without affecting bulk production output. Buyers who skip the counter sample step and move directly from development sample approval to mass production are removing an important final safeguard against sample-to-bulk inconsistency.
How Can Buyers Evaluate a Sample Efficiently to Minimize Revision Rounds?
Efficient sample evaluation is a skill that experienced buyers develop over time, but its core principles are straightforward and can be applied from the very first sample review. The goal is to identify every issue that requires correction in a single, comprehensive review — and communicate all of them clearly and completely in one feedback document — so that the factory can address everything in a single revision round rather than spreading corrections across multiple back-and-forth exchanges.
Buyers can minimize revision rounds by evaluating samples systematically against a structured checklist rather than reviewing impressionistically, documenting all feedback with specific measurements and annotated photographs rather than general descriptions, consolidating all revision requests into a single comprehensive document before sending, and confirming internally that all stakeholders have reviewed the sample before feedback is submitted to the factory.
Here is a structured sample evaluation checklist:
| Evaluation Category | What to Check | Documentation Method |
|---|---|---|
| Dimensions | Measure all key dimensions against spec | Measurement table with deviations noted |
| Color accuracy | Compare under daylight and indoor lighting | Annotated photo with Pantone reference |
| Fabric quality | Assess pile height, density, surface consistency | Written description + close-up photo |
| Shape and proportion | Compare silhouette to design reference | Side-by-side photo with markup |
| Facial feature placement | Measure position against specified coordinates | Annotated photo with measurements |
| Stuffing density | Compress and assess firmness and recovery | Written description with target standard |
| Stitching quality | Inspect all seams under tension | Close-up photos of any concerns |
| Accessory attachment | Pull test all eyes, buttons, and trims | Written result with force applied |
| Finishing standard | Check for loose threads, marks, surface defects | Annotated photo of any issues |
| Label placement and content | Compare against regulatory and brand requirements | Photo with annotations |
Writing Revision Notes That Factories Can Act On
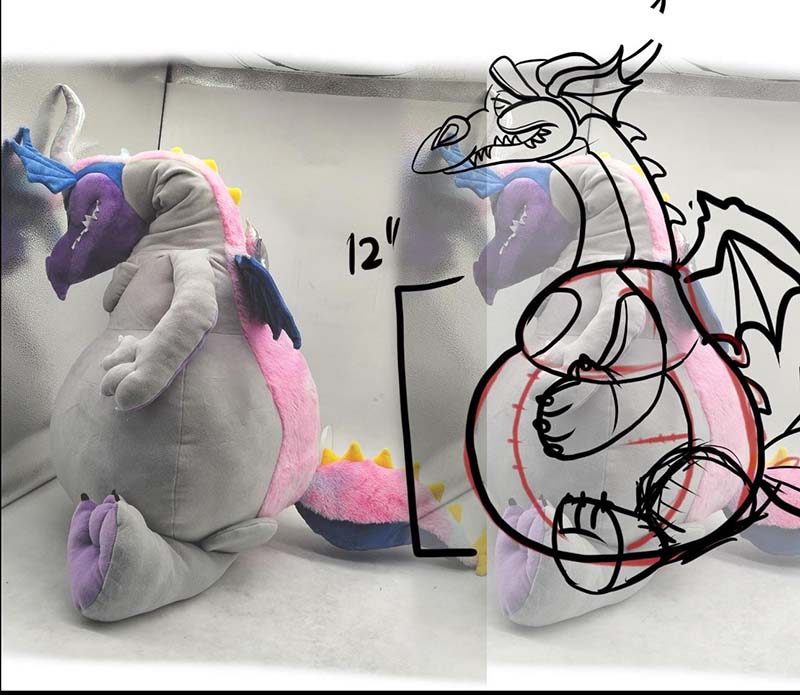
The quality of revision feedback is as important as the quality of the original brief. Vague feedback — “the face looks a bit off” or “the body feels too soft” — leaves the factory without a clear corrective action and frequently results in a revision that does not address the buyer’s actual concern.
Effective revision notes are specific, measurable, and action-oriented. Instead of “the body feels too soft,” write “stuffing density is approximately 20% below the approved reference sample — please increase filling weight by 15 to 20% and reconfirm with compression test result.” Instead of “the eye position looks wrong,” write “left eye is positioned 3mm too low relative to the nose — please adjust to match the annotated photo attached.”
This level of specificity gives the factory a clear, actionable brief for the revision and significantly reduces the likelihood of the same issue reappearing in the next round.
Consolidating Stakeholder Feedback Before Submission
One of the most avoidable sources of additional revision rounds is fragmented stakeholder feedback submitted at different times. A buyer submits initial feedback, the factory makes corrections, and then a second stakeholder reviews the revision and raises new concerns that were apparent in the original sample but were not included in the first feedback document.
Establishing a firm internal rule — all feedback is consolidated and agreed upon before any communication is sent to the factory — prevents this pattern entirely. The extra time required to gather and align all internal feedback before submission is always less than the time and cost of an additional revision round caused by piecemeal communication.
When Is It Worth Paying for a More Expensive Sample Upfront?
Not all sampling investment is equal. In some situations, paying more for a higher-quality or more comprehensive sample upfront produces a better return than minimizing sample cost and discovering problems later. Understanding when to invest more in sampling — and when to keep costs lean — is part of managing the overall development budget intelligently.
Paying more for a higher-quality or more comprehensive sample upfront is worthwhile when the product is complex, the production volume is large, the target market has strict quality requirements, or the cost of post-production quality failures significantly exceeds the cost of more thorough pre-production confirmation. In these situations, the upfront investment in sampling reduces a much larger potential downstream risk.
Here is a decision framework for determining when higher sampling investment is justified:
| Situation | Invest More in Sampling? | Reason |
|---|---|---|
| Complex design with many components | Yes | More development work reduces bulk production risk |
| First order with a new factory | Yes | Counter sample confirms factory capability before bulk |
| Large order volume (5,000+ units) | Yes | Cost per unit impact of quality failure is very high |
| Strict compliance market (US / EU retail) | Yes | Compliance problems in bulk are extremely costly |
| New product category being launched | Yes | Market uncertainty makes prototype validation valuable |
| Simple repeat design with proven factory | No | Established standards reduce sampling need |
| Small test order to validate market | No | Lower volume limits downside of any quality issue |
The ROI of a Thorough Counter Sample
For large orders, the counter sample investment deserves specific attention. A counter sample costing $200 to $400 that prevents a quality problem in a 5,000-unit production run worth $50,000 represents an extraordinarily high return on investment. The same logic applies to any situation where the gap between sample quality and bulk quality is a significant risk — which it always is when working with a new factory, a new design, or a new material combination for the first time.
When Premium Sampling Materials Are Worth the Cost
Some buyers choose to minimize sampling costs by allowing the factory to use readily available standard materials rather than sourcing the specific premium materials specified for bulk production. This reduces sample cost but creates a disconnect between the sample that is approved and the product that will be mass-produced.
For products where material quality is central to the value proposition — weighted plushies, premium retail products, items positioned in the wellness or luxury gift market — it is worth paying the additional cost to sample with the actual specified production materials. Approving a sample made with substitute materials means the approval is based on an incomplete picture of the final product.
How Do You Avoid Common Mistakes That Trigger Unnecessary Sample Rounds?
Beyond brief preparation and evaluation efficiency, there are specific recurring mistakes that consistently generate unnecessary revision rounds across many different sourcing relationships. Recognizing these patterns — and actively avoiding them — is one of the most practical ways to keep sampling costs under control.
Buyers can avoid unnecessary sample rounds by completing internal design alignment before briefing, using digital mockups to resolve proportion questions before physical sampling, specifying materials precisely enough to allow accurate sourcing, evaluating samples in the right lighting conditions, and maintaining a clear record of every change approved between rounds. Each of these practices addresses a specific pattern that commonly produces avoidable revision cycles.
Here is a structured overview of common mistakes and how to prevent them:
| Common Mistake | How It Creates Extra Rounds | Prevention |
|---|---|---|
| Reviewing sample under incorrect lighting | Color appears different — triggers color revision | Always review under D65 daylight standard |
| Changing design after brief is submitted | Factory must restart or partially rebuild | Freeze design before submitting brief |
| Feedback submitted by multiple people separately | Factory receives conflicting instructions | Single point of contact for all factory communication |
| Not photographing approved revision points | Same issue reappears in next round | Document every approved change with photo |
| Approving sample without measuring dimensions | Dimensional issues discovered at bulk | Always measure against spec before approval |
| Not testing accessory attachment | Attachment failure discovered after approval | Pull test all accessories before sign-off |
The Lighting Problem in Sample Review
One of the most commonly overlooked technical sources of unnecessary revision is reviewing samples under incorrect or inconsistent lighting. Colors appear significantly different under warm incandescent light compared to cool fluorescent light or natural daylight. A fabric that matches the Pantone reference under daylight may appear too warm under office lighting — triggering a color correction request that would not have been raised under standardized review conditions.
The industry standard for color-critical evaluation is D65 daylight — a standardized light source that replicates natural daylight conditions. If your sample evaluation environment does not use D65 lighting, invest in a daylight evaluation lamp. The cost is minimal relative to the revision rounds it prevents.
Keeping a Change Log Between Rounds
A change log — a simple document recording every change approved or requested at each revision stage — is one of the most effective administrative tools for preventing revision waste. When a change is documented clearly after each round, both the buyer and the factory have a shared record of what has been agreed, what has been addressed, and what the current production standard is.
Without a change log, the same issues can resurface across multiple rounds because neither party has a clear shared record of what was resolved. With one, every revision round starts from an agreed baseline, making it easier to identify whether the factory has correctly addressed all requested changes and preventing circular revision cycles.
How Should Buyers Manage the Sampling Process Across Multiple Designs?

Buyers developing multiple plush designs simultaneously face a more complex sampling management challenge than those working on a single product. The risk of confusion, miscommunication, and avoidable revision rounds multiplies with each additional design in development — unless the sampling process is structured deliberately to manage that complexity.
Buyers managing sampling across multiple designs should stagger development timelines where possible, use consistent briefing and feedback formats across all designs, maintain separate and clearly labeled documentation for each design, prioritize designs by commercial importance to allocate review attention appropriately, and establish clear internal ownership of each design’s approval process to prevent conflicting stakeholder input.
Here is a practical multi-design sampling management framework:
| Management Element | Single Design | Multiple Designs | Additional Complexity |
|---|---|---|---|
| Brief management | One document | Separate labeled document per design | Risk of cross-contamination |
| Sample tracking | One sample reference | Separate tracking log per design | Delays if samples confused |
| Feedback consolidation | One review process | Parallel reviews required | Stakeholder bandwidth constraint |
| Timeline management | Linear | Staggered or parallel | Factory capacity coordination |
| Cost tracking | Single budget line | Per-design budget tracking | Budget visibility at risk |
Staggering Development Timelines
One of the most effective strategies for managing multi-design sampling efficiently is staggering development timelines so that different designs are at different stages simultaneously rather than all entering sampling at the same time.
When all designs are submitted for sampling simultaneously, all first samples arrive at the same time — creating a large review burden that reduces the quality of individual sample evaluations. All revision requests go to the factory at the same time — creating capacity pressure that can slow revision turnaround and increase error rates. And all second samples arrive simultaneously — repeating the problem.
Staggering submissions by one to two weeks per design ensures that each design receives focused attention at every review stage and that the factory can manage revision work without capacity conflicts.
Prioritizing Designs by Commercial Importance
Not all designs in a development pipeline carry equal commercial importance. A hero product that will anchor a product launch deserves more thorough sampling investment — more revision rounds if needed, premium material confirmation, counter sample before bulk — than a secondary design that will be produced in smaller volume or tested as a market experiment.
Allocating sampling budget and management attention proportionally to commercial importance ensures that the most critical products receive the quality confirmation they require while lower-priority designs are managed more efficiently.
At Kinwin, we work with buyers across all stages of the sampling process — from initial brief review and material sourcing through revision management and counter sample confirmation. Our development team is experienced in helping buyers prepare thorough briefs, interpret sample feedback efficiently, and structure their sampling investment to get the best possible result from every development round. If you are planning a new product development cycle and want a manufacturing partner who helps you sample smarter rather than just faster, we would be glad to walk you through our process.
Conclusion
Wasting money on plush samples is almost always a preparation and process problem — not a factory problem. The buyers who control their sampling costs effectively are the ones who invest time before the sample is requested rather than spending money fixing problems after it arrives.
A thorough design brief prevents the majority of first-round revision requests. Structured, consolidated feedback prevents revision rounds from being repeated unnecessarily. The right sample type at the right development stage prevents spending on confirmations that are not yet needed. And internal alignment before briefing prevents the most avoidable source of sampling waste — changing direction mid-development because the brief reflected incomplete agreement rather than a clear, shared product vision.
Sampling is an investment in the quality and reliability of your final product. Managed well, it is money spent precisely. Managed poorly, it is money spent repeatedly on the same problems.
At Kinwin, we help our clients get more from every sampling round by bringing manufacturing experience into the briefing and feedback process — identifying potential issues before they become revision rounds, suggesting material and construction alternatives that improve both quality and cost efficiency, and maintaining clear documentation throughout development so that every approval builds reliably toward a production-ready standard.
FAQ
Q1: Can I ask a factory to send me a sample of an existing product before paying for a custom sample?
Yes — and this is something experienced buyers do routinely before committing to a custom sample fee. Requesting an off-the-shelf sample from the factory’s existing product portfolio gives you direct physical evidence of their standard production quality without any development investment. Evaluate the fabric quality, stitching standard, stuffing density, and finishing of the portfolio sample against your expectations. If the factory’s baseline quality does not meet your standard, there is no reason to expect a custom sample to perform better. Most reputable factories will provide existing product samples for a nominal fee covering material and shipping costs.
Q2: Is it reasonable to ask a factory to absorb the cost of revision rounds caused by their own errors?
Yes — when a revision is clearly the result of the factory deviating from a specific, documented specification in your brief, it is entirely reasonable to request that the factory absorb the revision cost. The key word is documented: if your brief clearly specified a dimension, color reference, or material type and the factory did not follow it accurately, the correction cost should be the factory’s responsibility. If the revision is requested because your brief was incomplete or your requirements have changed, the cost is appropriately yours. Keeping clear, timestamped records of every brief submission and revision request makes it straightforward to determine responsibility in any specific case.
Q3: How do digital 3D mockups help reduce physical sampling costs?
Digital 3D mockups allow buyers and factories to resolve proportion, shape, and design direction questions before any physical sampling begins. Many proportion-related revision rounds — “the head is too large relative to the body,” “the limbs are too short,” “the overall shape needs to be rounder” — can be identified and corrected digitally in hours rather than waiting one to two weeks for a physical revision sample. The cost of digital design revision is significantly lower than the cost of a physical resample. For complex character designs or products where overall silhouette is critical, investing in a digital mockup stage before physical sampling consistently reduces total revision rounds and total sampling spend.
Q4: What should I do if I receive a sample that is completely wrong and needs to be rebuilt from scratch?
If a first sample is so far from the brief that it requires a complete rebuild rather than targeted revisions, the first step is to understand why the deviation occurred before requesting the rebuild. Review the brief against the sample systematically and determine whether the deviation resulted from factory misinterpretation, unclear brief communication, or a fundamental mismatch in understanding between what you described and what the factory produced. If the brief was clear and the factory misinterpreted it, request the rebuild at the factory’s cost and ask for a pre-shipment photo of the rebuilt sample before it is dispatched to avoid a repeat of the same issue. If the brief had gaps that contributed to the misinterpretation, address those gaps comprehensively in your revised brief before the rebuild begins.
Q5: At what point should I stop revising a sample and reconsider either the design or the factory?
A general guideline is that if a design requires more than three full revision rounds without clear progress toward the approved standard, it is worth pausing to diagnose the root cause before continuing. More than three rounds of revision typically indicates one of three underlying problems: the brief is still not communicating requirements clearly enough, the factory does not have the technical capability to execute the design accurately, or the design itself has structural or production complexity that makes consistent execution difficult. Identifying which of these is the real issue determines the right next step — improving the brief, switching factories, or simplifying the design — rather than continuing to invest in revisions that are not converging toward an acceptable outcome.