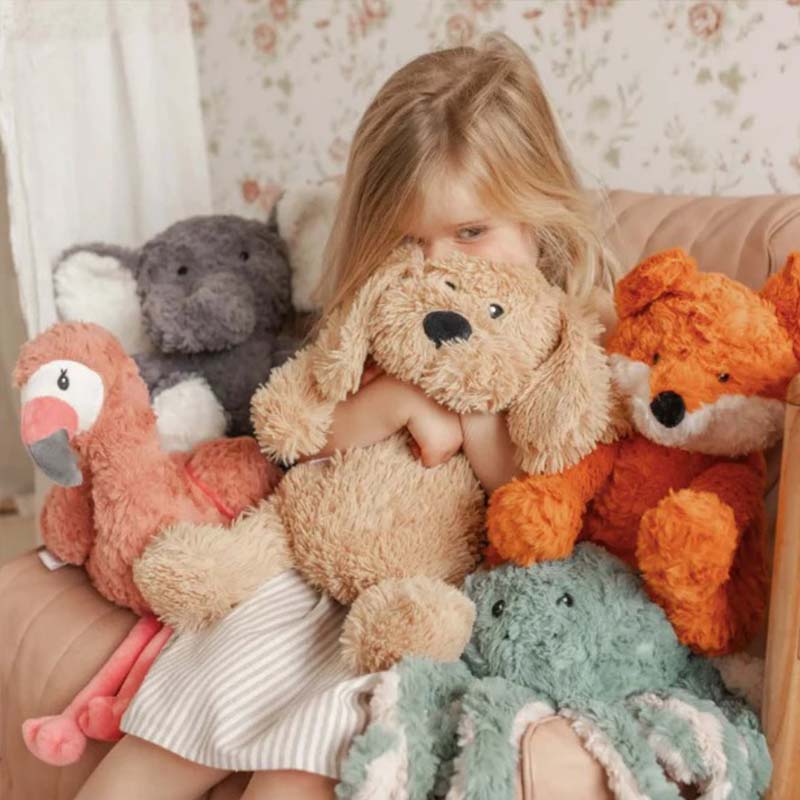
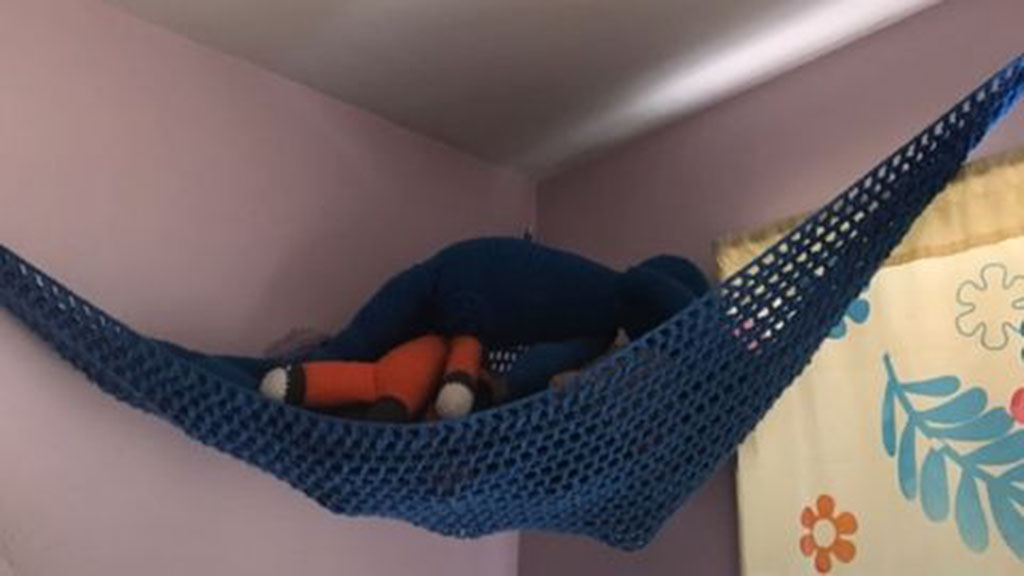
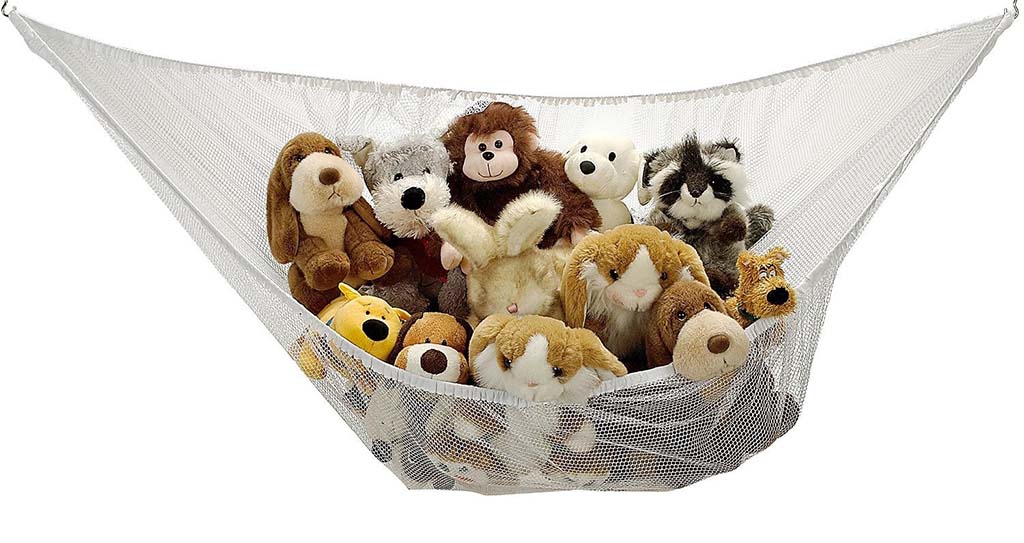
If your bed, sofa, or kids’ room is covered with stuffed animals, a stuffed animal hammock is one of the simplest and most charming storage ideas. It saves floor space, keeps plush toys visible, and can even become a cute design element in the room.
As a plush manufacturer, I often talk with buyers and parents about how to store plush toys safely and attractively. In this guide, I’ll show you how to make your own stuffed animal hammock step by step—using simple tools, clear measurements, and safe mounting methods. You can apply this whether you are a parent at home, a retailer planning an in-store display, or a brand designing lifestyle content for your customers.
What materials and tools are needed to make a stuffed animal hammock?
Before you start, it is important to choose materials that are strong, safe, and easy to clean. Even though stuffed animals are light compared with humans, a hammock full of plush toys will still carry a surprising amount of weight.
From my point of view, a good hammock combines:
- A durable main fabric (not thin or stretchy like cheap T-shirts).
- Strong edge reinforcement so the fabric does not tear.
- Reliable hooks or wall mounts that match the wall type.
- Cords or straps that are easy to adjust and tie.
You do not need expensive materials, but you should avoid anything that looks worn, very stretchy, or weak.
Table 1 – Basic materials and tools for a stuffed animal hammock
| Category | Recommended Options | Why It Matters |
|---|---|---|
| Main fabric | Medium-weight cotton, canvas, denim, sturdy polyester | Holds weight, resists tearing, easy to sew |
| Reinforcement trim | Bias tape, cotton webbing, grosgrain ribbon | Strengthens edges and corners |
| Hanging hardware | Wall anchors, screws, ceiling hooks, command hooks (light loads) | Securely connects hammock to wall or ceiling |
| Cord/rope | Nylon cord, cotton rope, strong ribbon or webbing | Distributes load and allows height adjustment |
| Sewing supplies | Thread (polyester), sewing machine or hand needles | Creates strong seams and corners |
| Measuring tools | Tape measure, ruler, fabric chalk or pen | Helps cut accurate shapes and sizes |
| Cutting tools | Fabric scissors, rotary cutter (optional) | Clean edges for neat sewing |
| Safety items | Drill (if using anchors), wall plugs, small step stool | Safe installation of hooks and mounts |
If the hammock is for a child’s room, make sure all cords and hanging parts are high enough that small children cannot wrap them around their neck or pull the hammock down. Safety should always come before style.
How do you measure and cut fabric to achieve a stable hammock size?
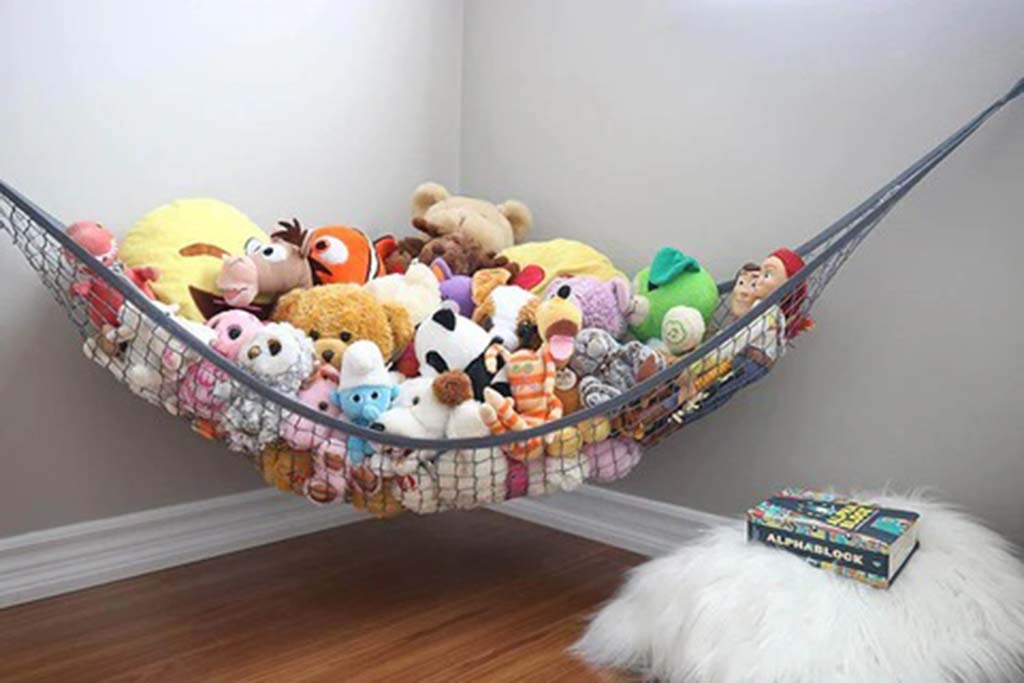
The classic stuffed animal hammock is shaped like a triangle that fits across a room corner. One side goes along one wall, one side goes along the other wall, and the third side forms the “front” curve holding the toys.
To plan the size, think about:
- Where you will hang it (which corner or wall).
- How many toys you want to store.
- Height from the floor (out of the way, but reachable when needed).
Simple size planning
For a child’s bedroom corner:
- A common side length is 90–120 cm (35–47 in) for each wall side.
- For large toy collections, you might go up to 150–180 cm (59–71 in).
You can model it like this:
- Measure the distance you want along Wall A.
- Measure the distance along Wall B.
- Mark a triangle on fabric with those two sides.
- Cut about 1.5–2.5 cm (0.6–1 in) extra around the edges for seam allowance.
Table 2 – Example hammock sizes and uses
| Hammock Size (each wall side) | Suggested Use | Notes |
|---|---|---|
| 60–80 cm (24–31 in) | Small room corner, a few plushies | Good for nursery or above changing table |
| 90–120 cm (35–47 in) | Medium collection, kids’ bedroom | Most common size for home use |
| 150–180 cm (59–71 in) | Large collection, playroom or store display | Needs stronger fabric and mounting hardware |
| Long rectangle (e.g., 120×40 cm) | Along a wall above a bed or sofa | Good for narrow rooms or above headboard |
| Double-layer design | Heavy plush storage in playrooms | Requires more sewing and stronger supports |
Once you decide on size, draw your triangle (or rectangle) directly on the fabric with chalk or a fabric pen, add seam allowance on all sides, then cut carefully with fabric scissors.
What sewing methods ensure strong seams that can hold multiple plush toys?
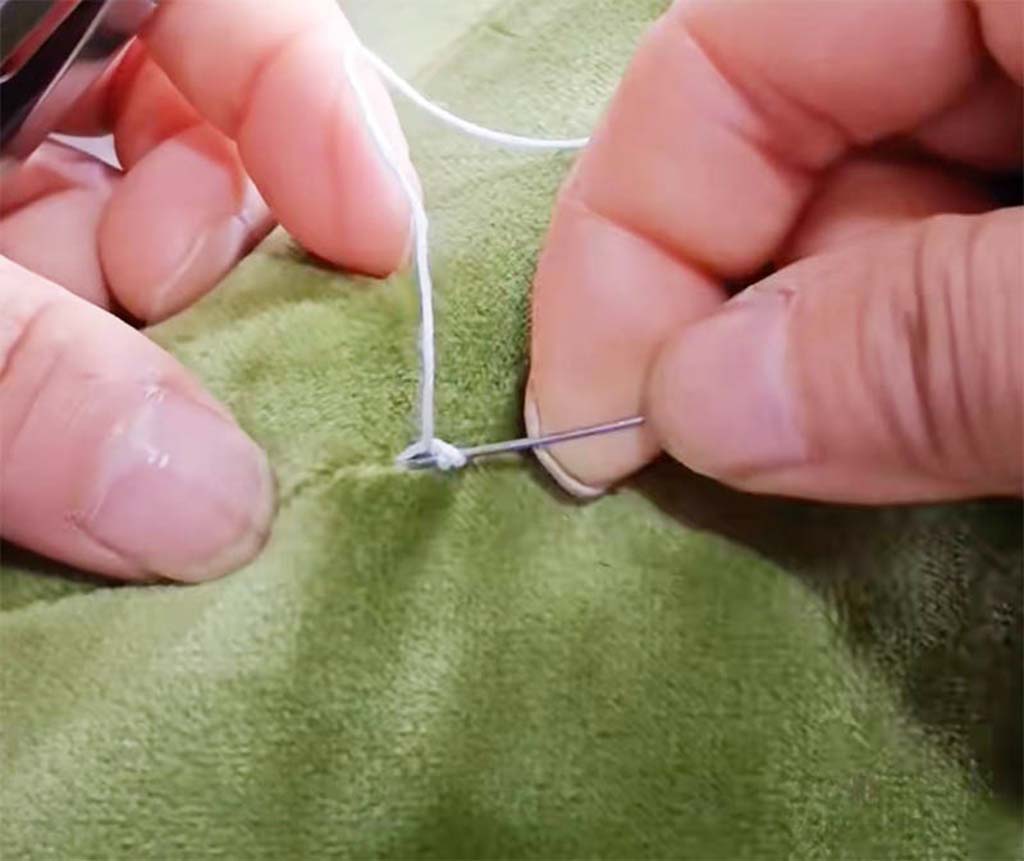
Because the hammock must hold multiple stuffed animals, your seams and corners must be strong. Weak stitching can tear under load and could cause toys to fall.
You can keep the sewing simple but strong by focusing on three areas:
- Edge finishing – so the fabric does not fray.
- Reinforced corners – where the cords or hooks will pull.
- Even seam allowance – for a clean, professional finish.
Step-by-step sewing approach
- Hem the edges:
- Fold the raw edges twice (about 1 cm + 1 cm) and sew, or
- Cover edges with bias tape or a strip of webbing and stitch in place.
- Reinforce corners:
- Fold a small triangular patch of fabric or webbing over each corner.
- Sew in a square or “X” pattern to secure it.
- Add loops or channels for hanging:
- Sew small loops of webbing or cord into each corner, or
- Add metal grommets (eyelets) through reinforced corner patches.
Table 3 – Sewing methods for a durable plush hammock
| Sewing Area | Recommended Method | Benefit for Strength and Appearance |
|---|---|---|
| Edge finish | Double-fold hem or bias tape | Prevents fraying and stretching |
| Corner reinforcement | Fabric patch, webbing, or extra layers | Spreads load and reduces stress on fabric |
| Stitch type | Straight stitch with medium-short length | Creates strong, clean seams |
| Stitching pattern | Extra box or “X” stitching in corners | Secures loops or grommets under heavy load |
| Hanging points | Sewn-in loops, grommets, or D-rings | Provides safe, consistent attachment points |
| Thread quality | Polyester thread, not weak cotton | Better strength and less breakage over time |
If you don’t have a sewing machine, you can still make a hammock by hand, but you should use strong, small stitches and double-thread your needle for extra strength.
How do you install wall mounts or ceiling hooks safely and securely?
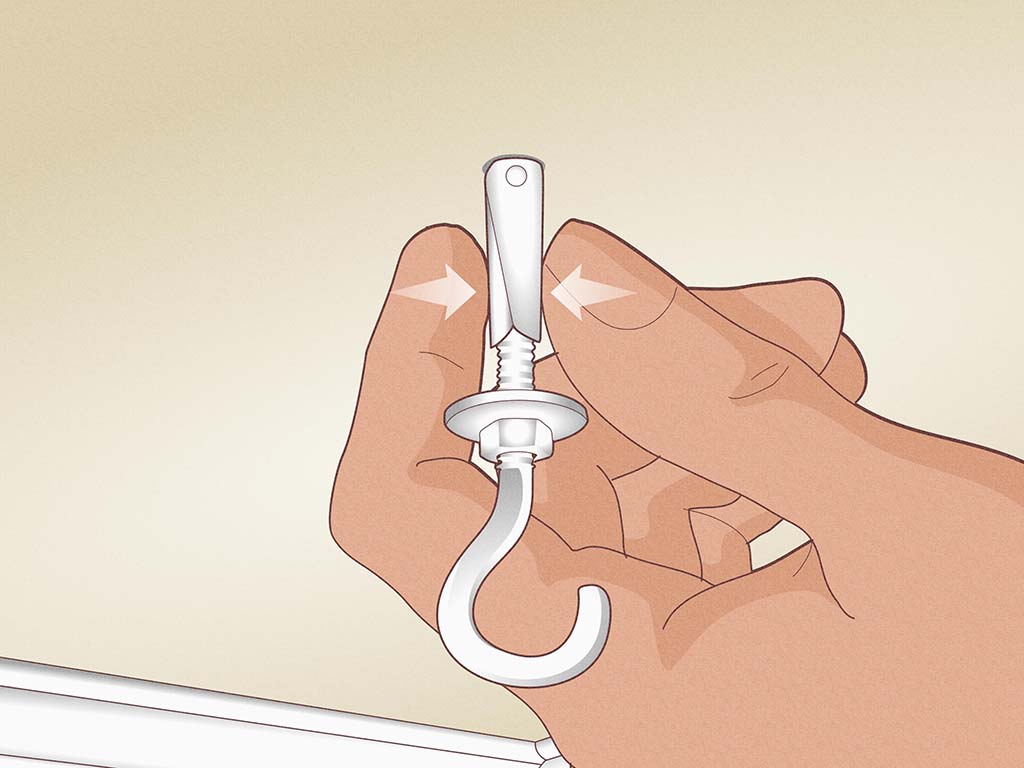
The hammock is only as safe as the hooks and anchors that hold it. Installation depends on your wall type: drywall, concrete, brick, or wood. If you are not sure about your wall material or are uncomfortable using tools, it’s best to ask a professional or someone experienced for help.
General safety reminders
- Do not hang the hammock above a baby’s crib or where a child sleeps.
- Keep any cords and loops out of reach of small children.
- Make sure the hooks and anchors are rated for more weight than you think you need.
Basic installation steps
- Mark the points where each corner will attach.
- Use a level or visual alignment to keep the hammock even.
- For drywall:
- Use wall anchors suitable for the weight.
- Pre-drill a small hole, insert the anchor, then screw in the hook.
- For concrete or brick:
- Use masonry anchors and a suitable drill bit.
- For wood (studs):
- Drill a small pilot hole and screw hooks directly into the wood.
Table 4 – Hook and mounting choices for stuffed animal hammocks
| Wall Type | Recommended Hardware | Notes for Safe Installation |
|---|---|---|
| Drywall | Plastic or metal wall anchors + screw-in hooks | Do not rely on screws alone without anchors |
| Concrete/brick | Masonry anchors + heavy-duty hooks | Use correct drill bits and follow instructions |
| Wood studs | Wood screws or screw-in hooks | Best to hit studs for stronger support |
| Ceiling mount | Ceiling hooks with suitable anchors | Only for small, light hammocks; check structure |
| Temporary/removable | Strong adhesive hooks (for very light loads only) | Only for a few small plush toys, not heavy collections |
After installation, test the hammock gently with a few toys first. Check for any movement or cracking sounds. If anything seems unstable, remove weight and adjust hardware before full use.
What design variations suit different room layouts and toy collections?
One nice thing about stuffed animal hammocks is their flexibility in design. You can design them for different rooms, collections, and interior styles. As a manufacturer, I often see how small changes in structure and fabric can give a very different impression.
Here are some popular design variations:
- Corner hammock (triangular)
- Fits into room corners.
- Good for kids’ bedrooms and nurseries.
- Wall-to-wall hammock (long rectangle)
- Hangs along a wall above a bed or sofa.
- Suitable for narrow rooms or above furniture.
- Tiered hammocks
- Two or three smaller hammocks at different heights.
- Good for large plush collections or playrooms.
- Decor-style hammocks
- Use themed fabrics (stars, animals, minimal neutrals).
- Add tassels, pom-poms, or decorative edges for older children or teens (ensure they are firmly attached).
- Store or showroom displays
- Larger hammocks with stronger hardware.
- May use branded colors or printed fabrics.
Table 5 – Hammock design variations by use and layout
| Design Type | Best Location | Ideal For |
|---|---|---|
| Corner triangle | Bedroom corner, playroom corner | Medium collections, kids’ rooms |
| Long rectangle | Above bed, sofa, or along hallway walls | Narrow rooms, decorative wall storage |
| Tiered sets | Open wall in playroom or store | Large plush collections |
| Themed decorative | Feature wall in bedroom or living room | Style-conscious teens and adults |
| Store display | Retail shops, pop-up booths, trade shows | Visual merchandising, brand promotion |
When you design the hammock, think about how it will look when full of toys. Choose fabrics and shapes that support your room style rather than fighting it.
How do you maintain and clean a stuffed animal hammock for long-term use?
To keep your hammock fresh and safe, you should maintain and clean it regularly. Stuffed animals collect dust over time, and so do the fabrics that hold them.
Simple maintenance habits
- Dusting:
- Gently shake the hammock and toys now and then.
- Use a handheld vacuum with a soft brush attachment on a low setting.
- Washing:
- If your hammock is washable, remove all toys first.
- Machine wash on a gentle cycle (if allowed by fabric type) or hand wash.
- Hang to air dry completely before loading toys again.
- Inspection:
- Check seams, loops, and hooks every few weeks.
- Look for fraying, loose stitching, or weak anchors.
If the hammock is used in a child’s room, it is especially important to keep it free from dust and mold, and to check that no cords or loops are within easy reach of small children.
Table 6 – Cleaning and maintenance checklist for stuffed animal hammocks
| Task Type | Recommended Frequency | What to Look For / Do |
|---|---|---|
| Light dusting | Weekly or bi-weekly | Shake or vacuum surface and plush toys |
| Deep cleaning | Every 1–3 months (depends on environment) | Wash hammock fabric if washable, air dry fully |
| Visual safety check | Monthly | Check hooks, wall anchors, seams, and loops |
| Load check | When you add many new toys | Make sure hammock is not overloaded or too saggy |
| Fabric condition | Every few months | Look for tears, fading, or stretched corners |
| Toy rotation | As needed | Swap toys in and out to reduce dust accumulation |
Good maintenance helps your hammock stay attractive and safe for years, and it also keeps your plush collection cleaner and more pleasant to handle.
Conclusion
A stuffed animal hammock is a simple DIY or small-production project that can transform messy piles of plush toys into a clean, charming display. With the right fabric, strong seams, safe wall mounts, and thoughtful design, you get storage that is both practical and visually appealing. When you maintain it properly, it will support your plush collection for a long time, whether it is in a family bedroom, a playroom, or a retail store.
At Kinwin, my team and I focus on the plush toys themselves, but we also care about how they are displayed and stored in real homes and shops. If you are developing plush-related products, storage ideas, or lifestyle content for your brand and want a manufacturing partner who understands the full plush ecosystem—from toy to display—you are welcome to contact me at [email protected] or visit kinwintoys.com to explore how our factory can support your next project.